background image

12

ACCESSORIES

For accessories in the U.S.A., you can visit our website at 

www.whirlpool.com

 or call us at 

1-800-253-1301

.

In Canada, visit our website at 

www.whirlpool.ca

 or call us at 

1-800-807-6777

.

Affresh

®

 Stainless Steel Cleaning Wipes

(stainless steel models) 

Order Part Number W10355049

Affresh

®

 Stainless Steel Cleaner

(stainless steel models)  

Order Part Number W10355016

Affresh

®

 Kitchen and Appliance Cleaner

Order Part Number W10355010

Granite Cleaner and Polish

Order Part Number W10275756

Porcelain Broiler Pan and Grid

Order Part Number 4396923

Premium Broiler Pan and Roasting Rack

Order Part Number W10123240

Содержание WOS31ES7JS

Страница 1: ...____________________________________ Serial Number____________________________________________ Table of Contents W11177276B BUILT IN ELECTRIC OVEN USER INSTRUCTIONS OVEN SAFETY 2 FEATURE GUIDE 3 OVEN USE 5 Electronic Oven Controls 5 Sabbath Mode 6 Aluminum Foil 6 Positioning Racks and Bakeware 6 Oven Vent 7 Baking and Roasting 7 Broiling 7 Keep Warm 8 Favorite 8 Cook Hold 8 Cook Time 9 OVEN CARE 9...

Страница 2: ... Not Heat Unopened Food Containers Build up of pressure may cause container to burst and result in injury Keep Oven Vent Ducts Unobstructed Placement of Oven Racks Always place oven racks in desired location while oven is cool If rack must be moved while oven is hot do not let potholder contact hot heating element in oven DO NOT TOUCH HEATING ELEMENTS OR INTERIOR SURFACES OF OVEN Heating elements ...

Страница 3: ...ER ON OFF to begin the countdown If enabled timer tone s will sound at the end of countdown 4 Press TIMER ON OFF to cancel the Timer and return to the time of day Do not press OFF CANCEL because the oven will turn off START Cooking start The Start keypad begins any oven function If Start is not pressed within 2 minutes after pressing a keypad the function is canceled and the time of day is display...

Страница 4: ...e repeat steps 2 and 3 5 Press OFF CANCEL when finished DELAY START Delayed start The Delay Start keypad is used to enter the starting time for an oven function with a delayed start Delay Start should not be used for foods such as breads and cakes because they may not bake properly To set a Timed Cook or a Delayed Timed Cook see the Cook Time section COOK TIME Timed cooking Cook Time allows the ov...

Страница 5: ...ad to adjust the setting 4 Press OFF CANCEL to exit and display the time of day Sound Volume Sets the pitch of the tone to either high or low 1 Press SETTINGS until SOUND VOLUME is displayed 2 The current setting will be displayed 3 Press the 1 keypad to adjust the setting 4 Press OFF CANCEL to exit and display the time of day End of Cycle Tone Activates or turns off the tones that sound at the en...

Страница 6: ... oven door is opened during this time the oven light will not turn on To Enable Sabbath Mode Capability One Time Only 1 Press SETTINGS until SABBATH is displayed 2 Press the 1 keypad Sabbath Mode can be activated for baking 3 Press OFF CANCEL to save the setting and exit to display the time of day NOTE To disable the Sabbath Mode repeat steps 1 through 3 to change the status from SABBATH ON to SAB...

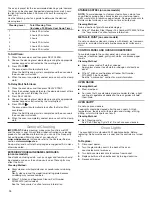
Страница 7: ...s ensures that when you place your food in the oven the oven will begin at the proper temperature Insert your food when the preheat tone sounds Do not open the door during preheat before the tone sounds Rapid Preheat Rapid Preheat can be used to shorten the preheating time Only one standard flat oven rack should be in the oven during Rapid Preheat Extra racks should be removed prior to starting Ra...

Страница 8: ... hour Keep Warm cycle Delay start should not be used for food such as breads and cakes because they may not bake properly Do not use delayed baking if oven is already hot NOTE During the Cook Hold function the Delay Start and Cook Time are applied to the baking itself and not for the Holding Warm phase 1 Press BAKE 2 Use the number keypads to enter the desired temperature NOTE The temperature may ...

Страница 9: ...he Self Cleaning cycle to help get rid of heat odors and smoke Do not block the oven vent s during the Self Cleaning cycle Air must be able to move freely Depending on your model see Oven Vent or Oven Vents section Do not clean rub damage or move the oven door gasket Prepare Oven Remove the broiler pan grid cookware and bakeware all cooking utensils oven racks aluminum foil and on some models the ...

Страница 10: ...l These spills may affect the finish Cleaning Method Glass cleaner mild liquid cleaner or nonabrasive scrubbing pad Gently clean around the model serial rating plate because scrubbing may remove numbers Affresh Kitchen and Appliance Cleaner Part Number W10355010 not included See the Accessories section for more information STAINLESS STEEL on some models NOTE To avoid damage to stainless steel surf...

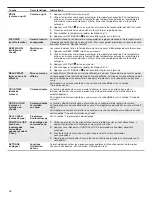
Страница 11: ...ee the Clock keypad feature in the Feature Guide section Error code display shows letter followed by number Press OFF CANCEL to clear the display See Control Display in the Electronic Oven Controls section If it reappears call for service See the Warranty for contact information Cleaning cycle did not work on all spills Several cooking cycles between cleaning cycles or spills on oven walls and doo...

Страница 12: ...tainless Steel Cleaning Wipes stainless steel models Order Part Number W10355049 Affresh Stainless Steel Cleaner stainless steel models Order Part Number W10355016 Affresh Kitchen and Appliance Cleaner Order Part Number W10355010 Granite Cleaner and Polish Order Part Number W10275756 Porcelain Broiler Pan and Grid Order Part Number 4396923 Premium Broiler Pan and Roasting Rack Order Part Number W1...

Страница 13: ... de série__________________________________________ Table des matières INSTRUCTIONS D UTILISATION DU FOUR ÉLECTRIQUE ENCASTRÉ SÉCURITÉ DU FOUR 14 GUIDE DES CARACTÉRISTIQUES 15 UTILISATION DU FOUR 17 Commandes électroniques du four 17 Mode Sabbat 18 Papier d aluminium 19 Positionnement des grilles et des ustensiles de cuisson au four 19 Évent du four 19 Cuisson au four et rôtissage 20 Cuisson au gr...

Страница 14: ...itaines de four mouillées ou humides sur des surfaces chaudes peuvent provoquer des brûlures provenant de la vapeur Ne pas laisser les mitaines de four toucher les éléments chauffants Ne pas utiliser une serviette ou un tissu épais Exercer une grande prudence lors de l ouverture de la porte Laisser l air chaud ou la vapeur s échapper avant d enlever ou de remplacer un plat Ne pas faire chauffer de...

Страница 15: ...du compte à rebours 4 Appuyer sur TIMER ON OFF marche arrêt de la minuterie pour annuler la minuterie et revenir à l heure du jour Ne pas appuyer sur OFF CANCEL arrêt annulation sinon le four s éteindra START mise en marche Démarrage de la cuisson La touche Start mise en marche met en marche n importe quelle fonction du four Si après avoir appuyé sur une touche on n appuie pas sur Start mise en ma...

Страница 16: ...à entrer l heure de mise en marche pour un four équipé d une fonction de mise en marche différée Le mise en marche différée ne doit pas être utilisée pour les aliments tels que pains et gâteaux car ils risquent de ne pas bien cuire Pour régler une cuisson minutée ou une cuisson minutée différée voir la section Durée de cuisson COOK TIME durée de cuisson Cuisson minutée La fonction de durée de cuis...

Страница 17: ...icher l heure Désactivation des signaux sonores Désactive la majorité des signaux sonores y compris le signal sonore de fin de programme et les signaux sonores d appui sur une touche Les signaux sonores de rappel restent actifs lorsque les sons sont désactivés 1 Appuyer sur SETTINGS réglages jusqu à ce que SOUND signaux sonores s affiche 2 Le réglage utilisé à ce moment là s affiche 3 Appuyer sur ...

Страница 18: ... le four ne fonctionnera pas 1 Appuyer sur SETTINGS réglages jusqu à ce que DEMO MODE mode de démonstration s affiche 2 Le réglage utilisé à ce moment là s affiche 3 Appuyer sur la touche 1 pour modifier le réglage 4 Appuyer sur OFF CANCEL arrêt annulation pour quitter ce mode et afficher l heure Mode Sabbat Le mode Sabbat maintient le réglage de cuisson au four tant que le four n est pas éteint L...

Страница 19: ... de grille 2 et 5 pour la cuisson ordinaire Cuisson au four des gâteaux à étages sur 2 grilles Pour des résultats optimaux lors de la cuisson au four de gâteaux sur 2 grilles utiliser les positions de grille 2 et 5 avec la fonction Bake cuisson au four Placer les gâteaux sur les grilles tel qu indiqué Cuisson au four de biscuits sur 2 grilles Pour des résultats optimaux lors de la cuisson au four ...

Страница 20: ...celle ci au centre de la grille du four Fermer la porte pour une température de cuisson au gril adéquate REMARQUE Des odeurs et de la fumée sont normales lorsque le four est utilisé les premières fois ou lorsqu il est très sale Le changement de température lors de la cuisson au gril permet un contrôle plus précis de la cuisson Plus le réglage du gril est bas plus la cuisson est lente Les morceaux ...

Страница 21: ...température dans la fourchette autorisée REMARQUE La température peut être modifiée à tout moment en appuyant sur le clavier numérique pour entrer la température souhaitée puis en appuyant sur START mise en marche Si l on modifie la température une fois que les aliments sont placés dans le four la performance du four pourrait être affectée 3 Appuyer sur COOK HOLD cuisson et maintien au chaud 4 Uti...

Страница 22: ...ur choisir le degré de nettoyage ou entrer le nombre d heures et ou de minutes dont on souhaite différer l heure de mise en marche 3 Appuyer sur le bouton pour obtenir n importe quelle fonction de cuisson à l exception de Broil cuisson au gril ou Keep Warm maintien au chaud 4 Utiliser les touches numériques pour régler la température souhaitée Si la température entrée ne se trouve pas dans la four...

Страница 23: ...rer la cendre avec un chiffon humide Pour éviter de briser le verre ne pas appliquer de chiffon humide froid sur le verre intérieur de la porte avant que le four n ait complètement refroidi L éclairage du four ne fonctionne pas durant le programme d autonettoyage Pour arrêter le programme d autonettoyage à tout moment appuyer sur OFF CANCEL arrêt annulation Si la température est trop élevée la por...

Страница 24: ...ient subir des dommages même pour une seule utilisation ou en cas d utilisation limitée Méthode de nettoyage Frotter dans la direction du grain pour éviter les dommages Nettoyant pour acier inoxydable affresh pièce n W10355016 Voir la section Accessoires pour plus de renseignements PEINTURE MÉTALLIQUE sur certains modèles Ne pas utiliser de nettoyants abrasifs de nettoyants avec agent de blanchime...

Страница 25: ...u four S il réapparaît appeler le service de dépannage Voir la Garantie pour des renseignements de contact Le programme de nettoyage n a pas éliminé toutes les salissures Plusieurs programmes de cuisson entre les programmes de nettoyage ou éclaboussures sur les parois et la porte du four Lancer des programmes de nettoyage supplémentaires Pour les salissures tenaces utiliser le nettoyant pour cuisi...

Страница 26: ...ettoyant pour acier inoxydable affresh modèles en acier inoxydable Commander la pièce numéro W10355016 Nettoyant pour cuisine et appareils ménagers affresh Commander la pièce numéro W10355010 Nettoyant et poli pour granite Commander la pièce numéro W10275756 Lèchefrite et grille en porcelaine Commander la pièce numéro 4396923 Lèchefrite et grille de rôtissage de qualité supérieure Commander la piè...

Страница 27: ...27 Remarques ...

Страница 28: ...W11177276B 04 19 2019 Whirlpool All rights reserved Used under license in Canada Tous droits réservés Utilisé sous licence au Canada ...

Отзывы: