background image

24

RANGE CARE

Self-Cleaning Cycle

(on some models)

IMPORTANT: 

The health of some birds is extremely sensitive to 

the fumes given off during the Self-Cleaning cycle. Exposure to 
the fumes may result in death to certain birds. Always move birds 
to another closed and well-ventilated room.

Self-clean the oven before it becomes heavily soiled. Heavy soil 
results in longer cleaning and more smoke.

Keep the kitchen well-ventilated during the Self-Cleaning cycle to 
help get rid of heat, odors, and smoke.

Do not block the oven vent(s) during the Self-Cleaning cycle. Air 
must be able to move freely. Depending on your model, see 
“Oven Vent” or “Oven Vents” section.

Do not clean, rub, damage or move the oven door gasket. The 
door gasket is essential for a good seal.

Prepare Oven:

Remove the broiler pan, grid, cookware and bakeware and, 
on some models, the temperature probe from the oven.

Remove any foil from the oven because it may burn or melt, 
damaging the oven.

Remove oven racks to keep them shiny and easy to slide. 
See “General Cleaning” section for more information.

Hand clean inside door edge and the 1½" (3.8 cm) area 
around the inside oven cavity frame, being certain not to 
move or bend the gasket. This area does not get hot enough 
during self-cleaning to remove soil. Do not let water, cleaner, 
etc. enter slots on door frame. Use a damp cloth to clean this 
area.

Wipe out any loose soil to reduce smoke and avoid damage. 
At high temperatures, foods react with porcelain. Staining, 
etching, pitting or faint white spots can result. This will not 
affect cooking performance.

Prepare Cooktop and Storage Drawer:

Remove plastic items from the cooktop because they may 
melt.

Remove all items from the storage drawer.

How the Cycle Works

IMPORTANT:

 The heating and cooling of porcelain on steel in the 

oven may result in discoloring, loss of gloss, hairline cracks and 
popping sounds.

Style 1 - Electronic Oven Control

The Precise Clean Self-Cleaning cycle is a “one touch” step that 
uses very high temperatures, dissolving soil to a powdery ash. 

The Precise Clean setting will automatically determine the length 
of cleaning time needed based on the number of times the oven 
has been used since the last self-clean cycle. Maximum clean 
time is 4 hours 30 minutes; minimum clean time is 2 hours 
30 minutes.

The oven will automatically shut off once it is clean. The door will 
not unlock until the oven cools. 

Once the oven has completely cooled, remove ash with a damp 
cloth. Do not wipe down any of the inside surfaces until the oven 
has completely cooled down. Applying a cool, damp cloth to the 
inner door glass before it has cooled completely could result in 
the glass breaking.

The oven light will not work during the Self-Cleaning cycle.

Surface elements will not function during the Self-Cleaning cycle.

Styles 2 & 3 - Electronic Oven Control 

The oven is preset for a 3 hour 30 minute clean cycle, but the 
time can be changed. Suggested clean times are 2 hours 
30 minutes for light soil and between 3 hours 30 minutes and 
4 hours 30 minutes for average to heavy soil.

Once the oven has completely cooled, remove ash with a damp 
cloth. Do not wipe down any of the inside surfaces until the oven 
has completely cooled down. Applying a cool, damp cloth to the 
inner door glass before it has cooled completely could result in 
the glass breaking.

The oven light will not work during the Self-Cleaning cycle.

Style 4 - Electronic Oven Control

The clean cycle can be set at one of 2 levels, Maxi Clean (4 hours 
30 minutes) or Quick Clean (2 hours 30 minutes).

Suggested clean times are 2 hours 30 minutes for light soil and 
between 3 hours 30 minutes and 4 hours 30 minutes for average 
to heavy soil. 

Once the oven has completely cooled, remove ash with a damp 
cloth. Do not wipe down any of the inside surfaces until the oven 
has completely cooled down. Applying a cool damp cloth to the 
inner door glass before it has cooled completely could result in 
the glass breaking.

The oven light will not work during the Self-Cleaning cycle.

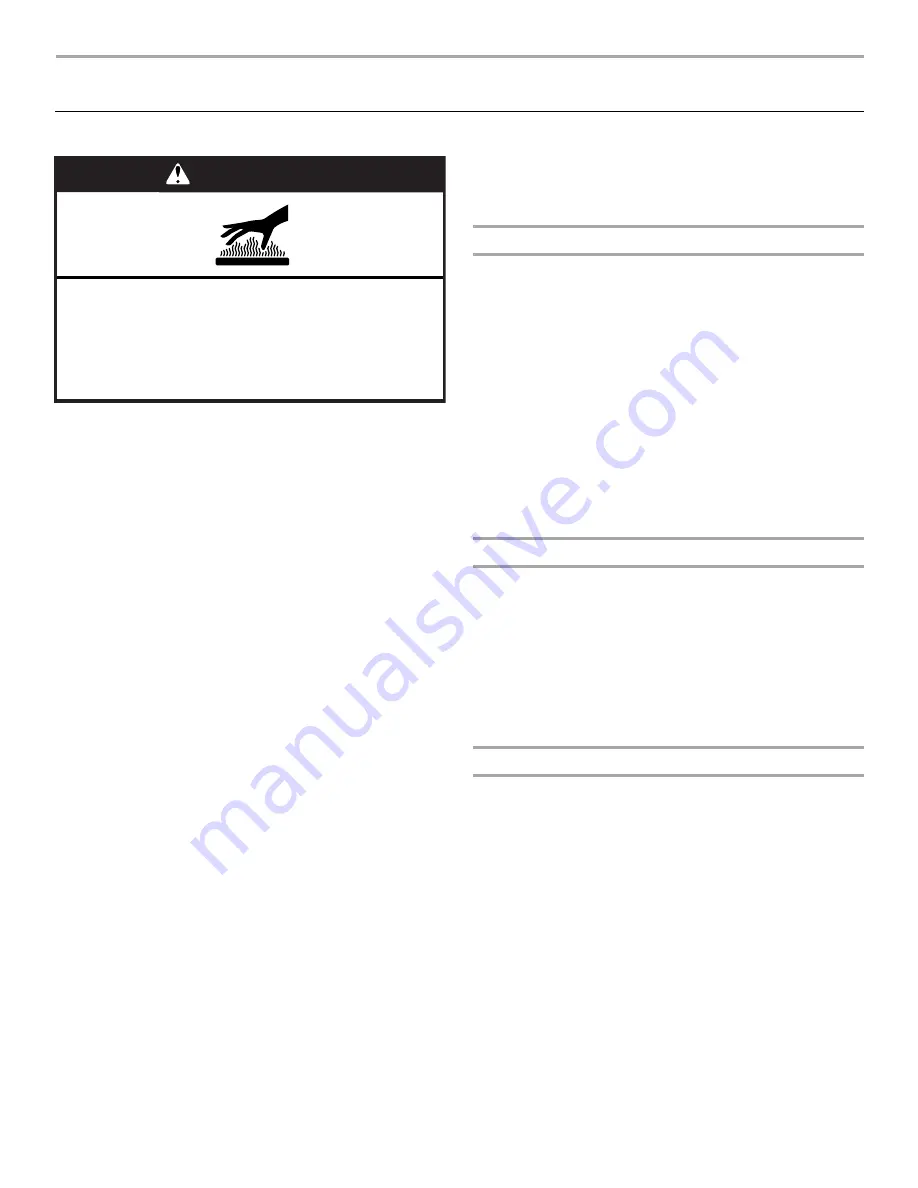
WARNING

Burn Hazard

Do not touch the oven during the Self-Cleaning cycle.

Keep children away from oven during 
Self-Cleaning cycle.

Failure to follow these instructions can result in burns.

Содержание WERP3101SB

Страница 1: ...stallation ou service composez le 1 800 807 6777 ou visitez notre site web à www whirlpool ca Table of Contents Table des matières 2 9763040 To the installer Please leave this instruction book with the unit To the consumer Please read and keep this book for future reference Pour l installateur laisser ce manuel d instructions avec l appareil Pour le consommateur lire ce manuel et le conserver pour...

Страница 2: ... 36 UTILISATION DE LA TABLE DE CUISSON 39 Commandes de la table de cuisson 39 Zone de cuisson à double fonction 39 Élément zone de réchauffage 40 Vitrocéramique 40 Éléments en spirale et cuvettes de brûleur 41 Table de cuisson relevable 41 Préparation de conserves à la maison 41 Ustensiles de cuisson 42 COMMANDES ÉLECTRONIQUES DU FOUR 43 Affichage 45 Mise en marche 45 Arrêt annulation 45 Horloge 4...

Страница 3: ...nce Always read and obey all safety messages This is the safety alert symbol This symbol alerts you to potential hazards that can kill or hurt you and others All safety messages will follow the safety alert symbol and either the word DANGER or WARNING These words mean follow instructions instructions DANGER WARNING Tip Over Hazard A child or adult can tip the range and be killed Connect anti tip b...

Страница 4: ...ese pans or bowls during cooking may subject wiring or components underneath to damage Protective Liners Do not use aluminum foil to line surface unit drip bowls or oven bottoms except as suggested in the manual Improper installation of these liners may result in a risk of electric shock or fire Glazed Cooking Utensils Only certain types of glass glass ceramic ceramic earthenware or other glazed u...

Страница 5: ...light E Right rear control knob F Surface cooking area locator G Right front control knob H Warm zone button A Left front control knob B Left rear control knob C Electronic oven control D Hot surface indicator light E Right rear control knob F Surface cooking area locator G Right front control knob H Warm zone button A Left front control knob B Left rear control knob C Electronic oven control D Ho...

Страница 6: ...b A Left front control knob B Left rear control knob C Electronic oven control D Hot surface indicator light E Right rear control knob F Surface cooking area locator G Right front control knob A Left front control knob B Left rear control knob C Electronic oven control D Surface cooking area locator E Right rear control knob F Right front control knob A B C D E F G A B C D E F G A B C D E F ...

Страница 7: ... Console night light on some models H Oven light switch on some models I Console panel J Warm zone element on some models K Automatic oven light switch L Broil element not shown M Gasket N Bake element hidden on some models O Self clean latch Parts and Features not shown Coil elements on some models Oven door window Oven light Broiler pan and grid on some models Roasting rack on some models Storag...

Страница 8: ...ment onsomemodels Use the Warm Zone element to keep cooked foods warm One hour is the recommended maximum time to maintain food quality Do not use it to heat cold foods The Warm Zone element can be used alone or when any of the other surface cooking areas are being used SETTING RECOMMENDED USE HI Start food cooking Bring liquid to a boil Medium High Between MEDIUM and HI Hold a rapid boil Quickly ...

Страница 9: ...d leave scratches or marks on the cooktop Do not cook popcorn in prepackaged aluminum containers on the cooktop They could leave aluminum marks that cannot be removed completely Do not allow objects that could melt such as plastic or aluminum foil to touch any part of the entire cooktop Do not use the cooktop as a cutting board Use cookware about the same size as the surface cooking area Cookware ...

Страница 10: ...ned See Assistance or Service for ordering instructions For more information contact your local agricultural department Companies that manufacture home canning products can also offer assistance Cookware IMPORTANT Do not leave empty cookware on a hot surface cooking area element or surface burner Ideal cookware should have a flat bottom straight sides and a well fitting lid and the material should...

Страница 11: ... A Auto clean B Control lock C Oven display D Clock E Timer set off F Start G Off cancel H Hour minute I Temperature J Oven settings K Stop time L Cook time M Oven light N Night light A B C D E G H I J F K L M N O P SET TIMER BROIL CHOICE WARM DRAWER START TIME STOP TIME COOK TIME DELAY MIN HR SEC MIN AM PM ON FC DOOR LOCKED CONVECT BAKE WARM REVIEW PROGRAM STEP 1 2 3 4 SET TIMER BROIL CHOICE WARM...

Страница 12: ...odels J Timer A Convect B Clock C Oven display D Start E Cancel off F Temperature time G Oven settings H Control lock I Auto clean on some models J Timer A Oven light B Start time C Oven display D Clock E Timer set off F Off cancel G Start H Temperature time I Oven settings J Control lockout K Auto clean L Cook time A B C D E F G H I J A B C D E F G H I J A B C D E G H I J F K L ...

Страница 13: ...ven and Timer are off 1 Press CLOCK 2 Depending on your model press the HOUR or MIN TEMP TIME or TEMP HOUR up or down arrow pads to set the time of day including a m or p m 3 Press CLOCK Tones Tones are audible signals indicating the following Basic Functions One tone Valid pad press Oven is preheating long tone Function has been entered Reminder on some models repeating each minute after the end ...

Страница 14: ...he set time ends end of cycle tones will sound then if enabled reminder tones will sound every minute on some models 4 Press TIMER SET OFF or TIMER anytime to cancel the Timer and reminder tones NOTE Do not press the OFF CANCEL pad because the oven will turn off On some models to display the time of day for 5 seconds when the timer is counting down press CLOCK ControlLock onsomemodels The Control ...

Страница 15: ...ottom finish Do not cover entire rack with foil because air must be able to move freely for best cooking results To catch spills place foil on rack below dish Make sure foil is at least 1 3 cm larger than the dish and that it is turned up at the edges PositioningRacksandBakeware IMPORTANT To avoid permanent damage to the porcelain finish do not place food or bakeware directly on the oven door or b...

Страница 16: ...nce should be used to determine doneness A meat thermometer is not supplied with this appliance Insert the thermometer into the center of the thickest portion of the meat or inner thigh or breast of poultry The tip of the thermometer should not touch fat bone or gristle After reading the thermometer once push it into the meat 1 3 cm more and read again If the temperature drops cook the meat or pou...

Страница 17: ...erature of the oven increases PREHEATING will appear in the display in the lower text line When the preheat conditioning temperature is reached a tone will sound and the selected temperature will appear on the display Styles 2 3 4 Electronic Oven Controls After START is pressed the oven will enter a timed preheat conditioning PrE and the time countdown will appear on the display on some models Whe...

Страница 18: ...mperature To Broil 1 Open door to broil stop position 2 Press BROIL 3 Press START 4 Press OFF CANCEL when finished BROILING CHART For best results place food 3 7 cm or more from the broil element Times are guidelines only and may need to be adjusted for individual tastes Recommended rack positions are numbered from the bottom 1 to the top 5 For diagram see the Positioning Racks and Bakeware sectio...

Страница 19: ...settings This helps you to match the convection oven settings with package instructions or your favorite recipes Convection Settings NOTE Each temperature in this table is 25 F 10 to 15 C lower than for a non convection oven At the end of each set time the oven will turn off 1 Press CONVECT keypad The first setting in the display will show convection at 325 F 165 C and scrolling text at the bottom...

Страница 20: ...t boneless rare medium well done Rump Sirloin Tip Roast rare medium well done Meat Loaf 20 25 25 30 30 35 22 25 27 30 32 35 20 25 25 30 30 35 20 25 300 F 150 C 300 F 150 C 300 F 150 C 325 F 160 C 140 F 60 C 160 F 71 C 170 F 77 C 140 F 149 C 160 F 149 C 170 F 149 C 140 F 60 C 160 F 71 C 170 F 77 C 165 F 74 C Veal Rack Position 2 Loin Rib Rump Roast medium well done 25 35 30 40 325 F 160 C 160 F 71 ...

Страница 21: ... Cooking allows the oven to be set to turn on at a certain time of day cook for a set length of time and or shut off automatically Delay start should not be used for food such as breads and cakes because they may not bake properly Style 1 Electronic Oven Control To Set a Timed Cook 1 Press the desired cook function The indicator text will light up 2 Set the temperature optional 3 Press the TEMP up...

Страница 22: ...f automatically and End will appear on the display 7 Press OFF CANCEL or open the oven door to clear the display To Set a Delayed Timed Cook Before setting make sure the clock is set to the correct time of day See Clock section 1 Press BAKE 2 Set the temperature optional 3 Press the TEMP TIME or TEMP HOUR up or down arrow pad to enter a temperature other than the one displayed 4 Press COOK TIME Th...

Страница 23: ...rogrammed press REVIEW STEP if it is desired to program an additional step 3 After Review Modification of the programmed sequence is complete press START to begin sequence To Modify Sequence Programming 1 Press DELETE STEP The last step of the sequence will be canceled then STEP 1 will show on the display for either review or modification If the programmed sequence has not been started see To Prog...

Страница 24: ...lving soil to a powdery ash The Precise Clean setting will automatically determine the length of cleaning time needed based on the number of times the oven has been used since the last self clean cycle Maximum clean time is 4 hours 30 minutes minimum clean time is 2 hours 30 minutes The oven will automatically shut off once it is clean The door will not unlock until the oven cools Once the oven ha...

Страница 25: ...e 1 Electronic Oven Control 1 Press PRECISE CLEAN 2 Press DELAY 3 Press HOUR and MIN up and down arrow pads to enter the time of day to stop 4 Press START The start time is automatically calculated and displayed The door will automatically lock at the set start time and DOOR LOCKED and DELAY and the stop time will also appear on the display The door will not unlock until the oven cools When the st...

Страница 26: ...ing Method Do not use abrasive cleaners cleaners with bleach rust removers ammonia or sodium hydroxide lye because paint surface may stain CERAMIC GLASS on some models Cleaning Method Always wipe with a clean wet cloth or sponge and dry thoroughly to avoid streaking and staining Cooktop Cleaner Part Number 31464B is recommended regularly to help avoid scratches pitting and abrasions and to conditi...

Страница 27: ...eaner and a soft cloth or sponge Apply glass cleaner to soft cloth or sponge not directly on panel All Purpose Appliance Cleaner Part Number 31662B not included See Assistance or Service section to order OVEN CAVITY Food spills should be cleaned when oven cools At high temperatures foods react with porcelain and staining etching pitting or faint white spots can result Cleaning Method Self Cleaning...

Страница 28: ...t Circuit Breakers The circuit breakers for the appliance outlets on your range are located under the cover on top of the control console They are rated for 12 amps Lift the cover by lifting the front edge at both ends On models equipped with a fluorescent cooktop light remove the fluorescent tube to gain access to the circuit breakers OvenDoor For normal range use it is not suggested to remove th...

Страница 29: ...n you are removing and replacing the storage drawer a slight push may be needed to move the drawer stop notch past the drawer glides WarmingDrawer onsomemodels Remove all items from inside the warming drawer and allow the unit to cool completely before attempting to remove the drawer To Remove 1 Open drawer to its fully open position 2 Locate the black triangle shaped tabs on both sides of the dra...

Страница 30: ...sh Do the oven indicator lights flash See the Display and or the Oven Indicator Lights section If the indicator light s keeps flashing call for service See Assistance or Service section Display shows messages Is the display showing PF or a flashing time There has been a power failure Clear the display See Display s section On some models reset the clock if needed See Clock section Is the display s...

Страница 31: ...parts distributors and service companies Whirlpool Canada LP designated service technicians are trained to fulfill the product warranty and provide after warranty service anywhere in Canada For further assistance If you need further assistance you can write to Whirlpool Canada LP with any questions or concerns at Customer Interaction Centre Whirlpool Canada LP 1901 Minnesota Court Mississauga Onta...

Страница 32: ... appliance is used in a country other than the country in which it was purchased DISCLAIMER OF IMPLIED WARRANTIES LIMITATION OF REMEDIES CUSTOMER S SOLE AND EXCLUSIVE REMEDY UNDER THIS LIMITED WARRANTY SHALL BE PRODUCT REPAIR AS PROVIDED HEREIN IMPLIED WARRANTIES INCLUDING WARRANTIES OF MERCHANTABILITY OR FITNESS FOR A PARTICULAR PURPOSE ARE LIMITED TO ONE YEAR OR THE SHORTEST PERIOD ALLOWED BY LA...

Страница 33: ...curité et de vous y conformer AVERTISSEMENT DANGER Voici le symbole d alerte de sécurité Ce symbole d alerte de sécurité vous signale les dangers potentiels de décès et de blessures graves à vous et à d autres Tous les messages de sécurité suivront le symbole d alerte de sécurité et le mot DANGER ou AVERTISSEMENT Ces mots signifient Risque de basculement Un enfant ou une personne adulte peut faire...

Страница 34: ...cée Les endroits près des éléments de surface peuvent devenir assez chauds pour causer des brûlures Pendant et après l utilisation ne pas toucher les éléments chauffants et ne pas laisser les vêtements ou autres matériaux inflammables entrer en contact avec ces éléments de surface ou les endroits près des éléments avant qu ils soient suffisamment refroidis Ces endroits comprennent la table de cuis...

Страница 35: ... pour causer des brûlures Pendant et après l utilisation ne pas toucher ou laisser des vêtements ou autres matériaux inflammables venir en contact avec les éléments chauds ou les surfaces intérieures chaudes du four avant qu ils aient eu assez de temps pour refroidir D autres surfaces de l appareil peuvent devenir assez chaudes pour causer des brûlures Ces surfaces comprennent les ouvertures de l ...

Страница 36: ...mande arrière droit F Repère de zone de cuisson à la surface G Bouton de commande avant droit H Bouton de la zone de réchauffage A Bouton de commande avant gauche B Bouton de commande arrière gauche C Commande électronique du four D Témoin lumineux de surface chaude E Bouton de commande arrière droit F Repère de zone de cuisson à la surface G Bouton de commande avant droit H Bouton de la zone de r...

Страница 37: ...ant gauche B Bouton de commande arrière gauche C Commande électronique du four D Témoin lumineux de surface chaude E Bouton de commande arrière droit F Repère de zone de cuisson à la surface G Bouton de commande avant droit A Bouton de commande avant gauche B Bouton de commande arrière gauche C Commande électronique du four D Repère de zone de cuisson à la surface E Bouton de commande arrière droi...

Страница 38: ...rrupteur de lampe du four sur certains modèles I Panneau de la console J Élément de zone de réchauffage sur certains modèles K Interrupteur automatique de la lampe du four L Élément de cuisson au gril non illustré M Joint d étanchéité N Élément de cuisson non visible sur certains modèles O Loquet d autonettoyage Pièces et caractéristiques non illustrées Éléments à spirale sur certains modèles Hubl...

Страница 39: ...sur le bouton avant gauche et le tourner dans le sens horaire à la zone SINGLE simple n importe où entre HI et LO 2 Pousser et tourner le bouton à la verticale off après avoir terminé RÉGLAGE UTILISATION RECOMMANDÉE HI élevé Pour commencer la cuisson des aliments Pour porter un liquide à ébullition Medium High moyen élevé Entre MEDIUM et HI Pour maintenir une ébullition rapide Pour brunir ou saisi...

Страница 40: ...vercle est retiré Nettoyer tous les renversements et toutes les saletés des aliments contenant du sucre sous n importe quelle forme dès que possible Laisser la table de cuisson refroidir légèrement puis en portant des mitaines de four essuyer les renversements tandis que la surface est encore tiède Si on laisse le sucre refroidir sur la table de cuisson il se peut que celui ci adhère à la surface ...

Страница 41: ...r sur le rebord de l élément en spirale à l opposé de la prise Tabledecuissonrelevable surcertainsmodèles La table de cuisson relevable permet d accéder facilement en dessous pour le nettoyage Ne pas l échapper ce qui risque d endommager le fini et le châssis de la table de cuisson Pour plus de renseignements voir la section Nettoyage général Pour soulever Soulever la table de cuisson par les deux...

Страница 42: ...aura les propriétés de l aluminium Les ustensiles de cuisson avec surface antiadhésive ne doivent pas être utilisés sous le gril Utiliser le tableau suivant comme guide pour les caractéristiques du matériau de l ustensile de cuisson USTENSILE CARACTÉRISTIQUES Aluminium Chauffe rapidement et uniformément Convient à tous les genres de cuisson L épaisseur moyenne ou forte convient le mieux pour la pl...

Страница 43: ...mpe du four P Veilleuse A Autonettoyage B Verrouillage des commandes C Afficheur du four D Horloge E Réglage arrêt de la minuterie F Mise en marche G Arrêt annulation H Heure minute I Température J Réglages du four K Heure d arrêt L Durée de cuisson M Lampe du four N Veilleuse A B C D E G H I J F K L M N O P SET TIMER BROIL CHOICE WARM DRAWER START TIME STOP TIME COOK TIME DELAY MIN HR SEC MIN AM ...

Страница 44: ...ion B Horloge C Afficheur du four D Mise en marche E Annulation arrêt F Température durée G Réglages du four H Verrouillage des commandes I Autonettoyage sur certains modèles J Minuterie A Lampe du four B Heure de mise en marche C Afficheur du four D Horloge E Réglage arrêt de la minuterie F Arrêt annulation G Mise en marche H Température durée I Réglages du four J Verrouillage des commandes K Aut...

Страница 45: ...2 heures qui indique a m et p m Réglage Avant de procéder au réglage s assurer que le four et la minuterie sont désactivés 1 Appuyer sur CLOCK horloge 2 Selon votre modèle appuyer sur les touches à flèche HOUR ou MIN TEMP TIME ou TEMP HOUR vers le haut ou vers le bas pour régler l heure en indiquant a m ou p m 3 Appuyer sur CLOCK Signauxsonores Les signaux sonores indiquent ce qui suit Fonctions b...

Страница 46: ... 12 heures et 59 minutes et procède à un compte à rebours de la durée réglée La minuterie ne met pas en marche le four et ne l éteint pas Réglage 1 Appuyer sur TIMER SET OFF réglage arrêt de la minuterie ou sur TIMER minuterie Le témoin lumineux de la minuterie s allumera sur certains modèles Si aucune fonction n est entrée après 5 minutes l afficheur retourne au mode d affichage de l heure 2 Selo...

Страница 47: ... une autre pièce fermée et bien aérée Papierd aluminium IMPORTANT Ne pas garnir le fond du four avec n importe quel type de papier d aluminium garnitures ou ustensiles de cuisson car le fini du fond du four subira des dommages permanents Ne pas recouvrir totalement la grille avec une feuille d aluminium l air doit pouvoir circuler librement pour obtenir les meilleurs résultats de cuisson Pour récu...

Страница 48: ...les recommandé dans la recette Se servir du tableau suivant comme guide FONCTION DU FOUR NOMBRE DE GRILLES UTILISÉES POSITION S DE LA GRILLE Cuisson au four ou rôtissage par convection 1 1 2 ou 3 Cuisson au four par convection 2 2 et 4 Cuisson au four par convection 3 1 3 et 5 NOMBRE D USTENSILES POSITION SUR LA GRILLE 1 Centre de la grille 2 Côte à côte ou légèrement décalés 3 ou 4 Dans les coins...

Страница 49: ...les 2 et 3 il n est pas nécessaire d appuyer de nouveau sur START 3 Appuyer sur OFF CANCEL arrêt annulation après avoir terminé Préchauffage Style 1 Commande électronique du four Après que l on a appuyé sur START le four commence un préchauffage de conditionnement minuté Lo apparaît sur l afficheur jusqu à ce que la température soit supérieure à 170 F 75 C Une fois que la température de 170ºF 75ºC...

Страница 50: ...mmande Placer l aliment sur la grille de la lèchefrite puis placer celle ci au centre de la grille du four Fermer la porte à la position de cuisson au gril pour assurer une température de cuisson adéquate Cuisson au gril 1 Ouvrir la porte à la position de cuisson au gril 2 Appuyer sur BROIL cuisson au gril 3 Appuyer sur START mise en marche 4 Appuyer sur OFF CANCEL arrêt annulation après avoir ter...

Страница 51: ...our des résultats de cuisson optimaux ne pas recouvrir les aliments de papier d aluminium Pour sélectionner les réglages de convection Il y a 5 préréglages de convection pour la durée et la température Chacun d entre eux peut être activé en appuyant séquentiellement sur la touche CONVECT Les températures et les durées peuvent être modifiées pour chacun des réglages suivants Ceci vous aide à faire ...

Страница 52: ...a fonction Warm Hold La caractéristique Warm Hold permet de garder les aliments cuits chauds à la température de service Elle peut aussi être utilisée à la fin d une cuisson minutée ALIMENTS POSITION DE LA GRILLE DURÉE DE CUISSON min par lb 454 g TEMP DU FOUR TEMP INTERNE DES ALIMENTS Bœuf position de grille 2 Rôti de côte saignant à point bien cuit Rôti de côte désossé saignant à point bien cuit ...

Страница 53: ... de rappel de 1 seconde à intervalles de 1 minute 8 Appuyer sur OFF CANCEL arrêt annulation ou ouvrir la porte du four pour arrêter les signaux sonores de rappel et effacer End de l afficheur L affichage de l heure est rétabli Style 3 Commande électronique du four Utilisation 1 Appuyer sur WARM 2 La température est réglée à 170 75 C pendant 60 minutes 3 Appuyer sur START mise en marche 4 Appuyer s...

Страница 54: ... bas pour entrer une température autre que celle qui est affichée 4 Appuyer sur COOK TIME durée de cuisson Le témoin lumineux de la durée de cuisson du four s allume 5 Appuyer sur la touche à flèche TEMP TIME ou TEMP HOUR vers le haut ou vers le bas pour entrer la durée de cuisson 6 Appuyer sur START mise en marche L afficheur présente le compte à rebours de la durée Lorsque la durée est terminée ...

Страница 55: ...étape affichée s illumine Une étape de rappel reste allumée sur l afficheur pendant 10 secondes si rien d autre n est fait 2 Si moins de 4 étapes ont été programmées appuyer sur REVIEW STEP pour programmer une étape supplémentaire 3 Une fois que la révision modification de la séquence programmée est terminée appuyer sur START mise en marche pour commencer la séquence Modification de la programmati...

Страница 56: ...la porcelaine sur l acier dans le four peuvent causer une décoloration une perte de fini luisant des fissures minuscules et des craquements Style 1 Commande électronique du four Le programme d autonettoyage Precise Clean nettoyage précis effectue un nettoyage par étape unique qui utilise des températures très élevées brûlant les saletés pour les réduire en cendre Le réglage Precise Clean nettoyage...

Страница 57: ...e est terminé et que le four a refroidi le témoin lumineux du four DOOR LOCKED s éteint 3 Appuyer sur n importe quelle touche ou ouvrir la porte du four pour effacer l afficheur du four Pour différer l autonettoyage Avant de différer la mise en marche de l autonettoyage s assurer que l horloge est réglée à l heure exacte Voir la section Horloge S assurer également que la porte est complètement fer...

Страница 58: ...inaigre et tomates doivent être nettoyés dès que l appareil est froid Ces renversements peuvent affecter le fini Méthode de nettoyage Nettoyant à vitre nettoyant doux liquide ou tampon à récurer non abrasif Nettoyer doucement autour de la plaque signalétique des numéros de modèle et de série car le frottement pourrait en effacer les chiffres Nettoyant tout usage pour appareil ménager Pièce n 31662...

Страница 59: ...rasifs ou de nettoyant pour four Ne pas immerger les boutons TABLEAU DE COMMANDE Méthode de nettoyage Nettoyant à vitre et chiffon doux ou éponge Appliquer le nettoyant à vitre sur un chiffon doux ou une éponge et non pas directement sur le tableau Nettoyant tout usage pour appareil ménager Pièce n 31662B non inclus Voir la section Assistance ou service pour placer une commande Ne pas utiliser des...

Страница 60: ...à l ouverture de la porte Lorsque la porte du four est fermée appuyer sur LIGHT lumière pour allumer ou éteindre la lampe La lampe ne fonctionne pas durant le programme d autonettoyage Remplacement 1 Débrancher la cuisinière ou couper le courant 2 Tourner dans le sens inverse des aiguilles d une montre le couvercle en verre de l ampoule à l arrière du four et l enlever 3 Tourner l ampoule dans le ...

Страница 61: ...ir lentement dans la cuisinière jusqu à ce que les rails latéraux du tiroir s engagent dans les ouvertures des glissières du tiroir 4 Une fois complètement engagé des deux côtés glisser le tiroir en position fermée REMARQUE Lors de la dépose et de la réinstallation du tiroir de remisage il peut s avérer nécessaire d exercer une légère pression pour déplacer l encoche de la butée de tiroir au delà ...

Страница 62: ...ains modèles le ventilateur de refroidissement fonctionne t il durant BAKE cuisson au four BROIL cuisson au gril ou CLEAN nettoyage Il est normal que le ventilateur fonctionne automatiquement durant l utilisation du four Ceci aide à refroidir les commandes électroniques Les témoins lumineux du four clignotent Les témoins lumineux du four clignotent ils Voir la section Affichage et ou Témoin lumine...

Страница 63: ...consultants vous renseigneront sur les sujets suivants Caractéristiques et spécifications sur toute notre gamme d appareils électroménagers Consignes d utilisation et d entretien Ventes d accessoires et pièces de rechange Références aux marchands locaux aux distributeurs de pièces de rechange et aux compagnies de service Les techniciens de service désignés par Whirlpool Canada LP sont formés pour ...

Страница 64: ...T EXCLUSIF RECOURS DU CLIENT DANS LE CADRE DE LA PRÉSENTE GARANTIE LIMITÉE CONSISTE EN LA RÉPARATION PRÉVUE CI DESSUS LES GARANTIES IMPLICITES Y COMPRIS LES GARANTIES APPLICABLES DE QUALITÉ MARCHANDE ET D APTITUDE À UN USAGE PARTICULIER SONT LIMITÉES À UN AN OU À LA PLUS COURTE PÉRIODE AUTORISÉE PAR LA LOI WHIRLPOOL N ASSUME AUCUNE RESPONSABILITÉ POUR LES DOMMAGES FORTUITS OU INDIRECTS CERTAINES J...

Отзывы: