background image

12

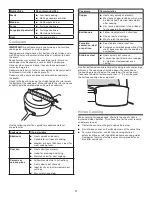
Odors and smoke are normal when the oven is used the first 
few times or when it is heavily soiled.

IMPORTANT: 

The health of some birds is extremely sensitive 

to the fumes given off by the oven. Exposure to the fumes may 
result in death to certain birds. Always move birds to another 
closed and well-ventilated room.

Aluminum Foil

IMPORTANT:

 To avoid permanent damage to the oven bottom 

finish, do not line the oven bottom with any type of foil or liner.
For best cooking results, do not cover entire oven rack with foil 
because air must be able to move freely.

Positioning Racks and Bakeware

IMPORTANT: 

To avoid permanent damage to the porcelain 

finish, do not place food or bakeware directly on the oven door 
or bottom.

Bakeware

To cook food evenly, hot air must be able to circulate. Allow 2" 
(5 cm) of space around bakeware and oven walls. Make sure 
that no bakeware piece is directly over another.

Racks


Position racks before turning on the oven.


Do not position racks with bakeware on them.


Make sure racks are level.

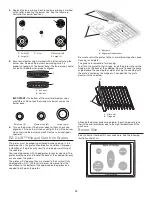
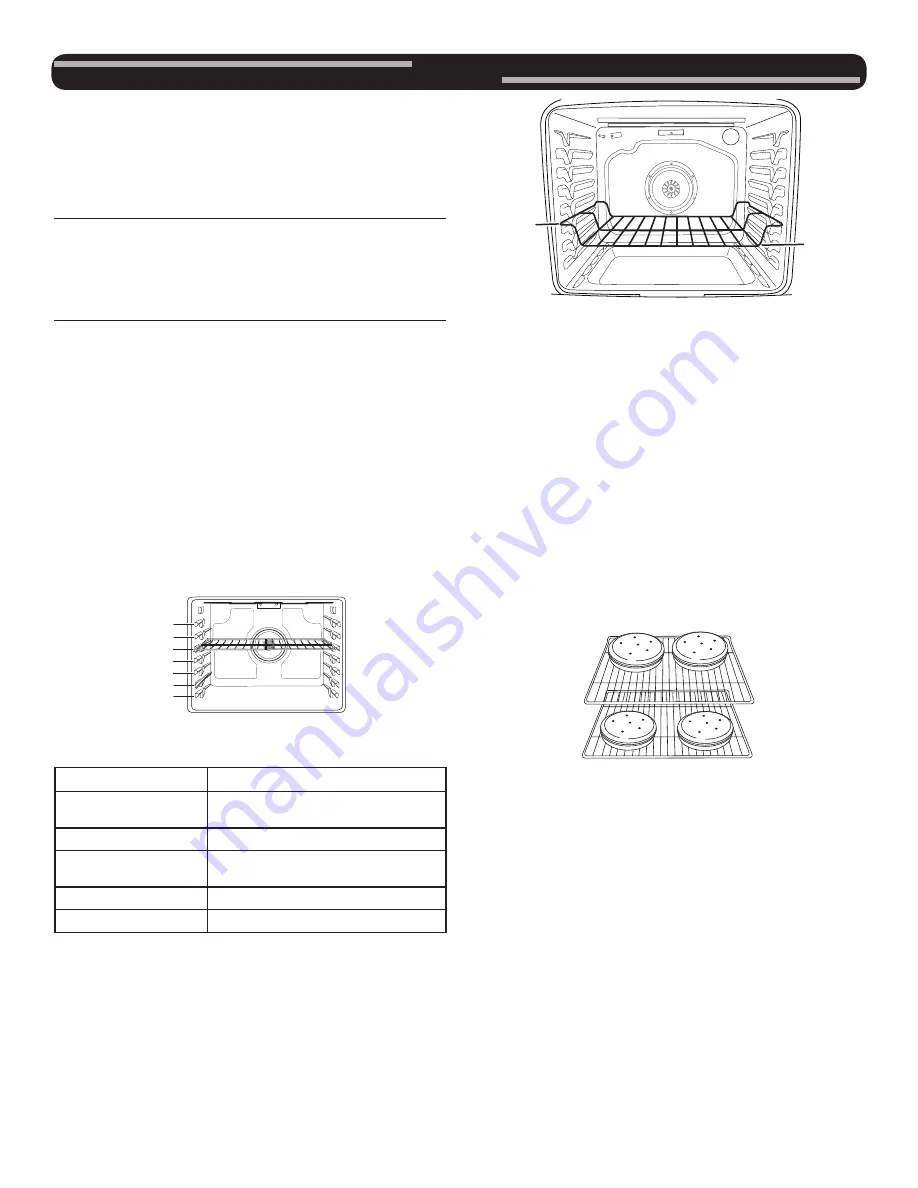
To position a rack, pull it out to the stop position, raise the front 
edge, and then lift out. Use the following illustration and chart 
as a guide.

The oven has 7 positions for a flat rack, as shown in the previous 
illustration and the following table.

Flat Rack Position*

Type of Food

7

Broiling/searing meats, 
hamburgers, steaks

6

Broiled meats, poultry, fish

3 or 4

Most baked goods, casseroles, 
frozen foods

2

Roasted meats

1

Large roasts or poultry

For hamburger patties to have a well-seared exterior and a rare 
interior, use a flat rack in rack position 7. Side 1 should cook 
for approximately 2

1

/

2

 to 3

1

/

2

 minutes. Side 2 should cook for 

approximately 4 to 5 minutes. Expect a moderate degree of 
smoke when broiling.
* If your model has a Max Capacity Oven Rack, the recessed ends 

must be placed in the rack position above the desired position 
of the food. See the following illustration.

IMPORTANT:

 These rack positions are for flat racks. If a Max 

Capacity Oven Rack is used, the rack position must be adjusted 
as shown in the previous figure.

Multiple Rack Cooking

2-rack (non-convection): Use rack positions 2 and 5 or 3 and 6.
2-rack (convection): Use rack positions 2 and 5 or 3 and 6.
3-rack (convection): Use rack positions 2 and 7 and a Max 
Capacity Oven Rack in rack position 5.

Baking Cookies and Layer Cakes on 2 Racks

Baking Layer Cakes

For best results when baking cakes on 2 racks, use the 
Convection Bake function, a flat rack in rack position 2, and a 
Max Capacity Oven rack in rack position 6. Place the cakes on 
the racks as shown. Keep at least 3" (7.6 cm) of space between 
the front of the racks and the front cakes.

Baking Cookies

For best results when baking cookies on 2 racks, use the 
Convection Bake function, a flat rack in rack position 2, 
and a Max Capacity Oven rack in rack position 6.

7

6

5
4

3

2
1

A

B

A.  Ends of rack in position 3
B.  Food in position 2

OVEN

Содержание W10841340B

Страница 1: ...úmero de modelo y de serie que están ubicados en el marco del horno detrás del lado derecho superior de la puerta del horno Table of Contents User Guide Gas Range W10841340B RANGE SAFETY 2 The Anti Tip Bracket 3 KEY USAGE TIPS 4 AquaLift Self Cleaning Technology 4 Surface Temperatures 4 Preheating 4 Surface Burners 4 FEATURE GUIDE 5 Electronic Oven Controls 7 COOKTOP 9 Surface Burners 9 EZ 2 Lift ...

Страница 2: ...y damage personal injury or death Do not store or use gasoline or other flammable vapors and liquids in the vicinity of this or any other appliance WHAT TO DO IF YOU SMELL GAS Do not try to light any appliance Do not touch any electrical switch Do not use any phone in your building Immediately call your gas supplier from a neighbor s phone Follow the gas supplier s instructions If you cannot reach...

Страница 3: ...erheating of the oven WARNING NEVER cover any slots holes or passages in the oven bottom or cover an entire rack with materials such as aluminum foil Doing so blocks air flow through the oven and may cause carbon monoxide poisoning Aluminum foil linings may also trap heat causing a fire hazard CAUTION Do not store items of interest to children in cabinets above a range or on the backguard of a ran...

Страница 4: ...ter START is pressed The oven will take approximately 12 to 15 minutes to reach 350 F 177 C with all of the oven racks provided with your oven inside the oven cavity Higher temperatures will take longer to preheat The preheat cycle rapidly increases the oven temperature The actual oven temperature will go above your set temperature to offset the heat lost when your oven door is opened to insert fo...

Страница 5: ...e the oven door is closed press the Oven Light keypad to turn the light on and off When the oven door is opened the oven light will automatically come on TIMER SET OFF Oven timer The Timer can be set in hours or minutes up to 9 hours and 59 minutes 1 Press TIMER SET OFF 2 Press the number keypads to set the length of time in hr min min Leading zeros do not have to be entered For example for 2 minu...

Страница 6: ...ntil the desired convection mode appears in the display 2 Press START 3 Press the number keypads to set the desired temperature 4 Press START 5 To change the temperature repeat steps 3 and 4 6 Press CANCEL when finished KEEP WARM Hold warm Food must be at serving temperature before placing it in the warmed oven 1 Press KEEP WARM 2 Set the desired temperature between 145 F and 190 F 63 C and 88 C u...

Страница 7: ...ure is preset to Fahrenheit but can be changed to Celsius 1 Press SETTINGS CLOCK until TEMP UNIT is displayed 2 The current setting will be displayed 3 Press the 1 keypad to adjust the setting 4 Press START or CANCEL to exit and display the time of day Audible Tones Disable Turns off all tones including the end of cycle tone and keypress tones Reminder tones are still active when all tones are dis...

Страница 8: ... set to automatically shut off the oven 12 hours after the oven initiates a cook or clean function This will not interfere with any timed or delay cook functions 1 Press SETTINGS CLOCK until 12Hr AUTO_OFF is displayed 2 The current setting will be displayed 3 Press the 1 keypad to adjust the setting 4 Press START or CANCEL to exit and display the time of day Languages Scrolling Display Text Langua...

Страница 9: ...er size NOTE The oval burner base is permanently attached to the burner cap Gas Tube Opening Gas must flow freely throughout the gas tube opening for the burner to light properly Keep this area free of soil and do not allow spills food cleaning agents or any other material to enter the gas tube opening Keep spillovers out of the gas tube opening by always using a burner cap Burner Ports Check burn...

Страница 10: ...comes with hinged grates for easier cleaning The grates pivot upward and toward the back of the cooktop for easy access under the grates The grates will stop once they are moved to their vertical fully open position A 20 50 8 cm minimum clearance from the countertop to the bottom of the upper cabinets appliances is needed to fully open the grates Be sure to return the grates to their normal down p...

Страница 11: ...g area or element Home Canning When canning for long periods alternate the use of surface burners between batches This allows time for the most recently used areas to cool Center the canner on the grate above the burner Do not place canner on 2 surface burners at the same time For more information contact your local agricultural extension office or refer to published home canning guides Companies ...

Страница 12: ... 6 Broiled meats poultry fish 3 or 4 Most baked goods casseroles frozen foods 2 Roasted meats 1 Large roasts or poultry For hamburger patties to have a well seared exterior and a rare interior use a flat rack in rack position 7 Side 1 should cook for approximately 21 2 to 31 2 minutes Side 2 should cook for approximately 4 to 5 minutes Expect a moderate degree of smoke when broiling If your model ...

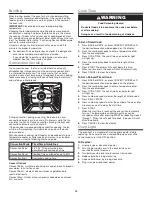
Страница 13: ... insert food This ensures that when you place your food in the oven the oven will begin at the proper temperature Insert your food when the preheat tone sounds Do not open the door during preheat before the tone sounds Rapid Preheat Rapid Preheat can be used to shorten the preheating time Only one standard flat oven rack should be in the oven during Rapid Preheat Extra racks should be removed prio...

Страница 14: ...up to 30 Convection Broil Shortened cooking time Convect Options Convect Bake multiple rack baking or cookies biscuits breads casseroles tarts tortes cakes Convect Roast whole chicken or turkey vegetables pork roasts beef roasts Convect Broil thicker cuts or unevenly shaped pieces of meat fish or poultry Cook Time To Set a Timed Cook 1 Press BAKE or BROIL or press CONVECT MODES until the desired c...

Страница 15: ...lean cycles may be run to help remove the stubborn soils IMPORTANT Do not use oven cleaners The use of chemicals including commercial oven cleaners or metal scouring pads may cause permanent damage to the porcelain surface of the oven interior NOTES The range should be level to ensure that the entire surface of the bottom of the oven cavity is covered by water at the beginning of the Clean cycle F...

Страница 16: ...e cycle Cooked on soils should be soaked or scrubbed before going into a dishwasher Although the burner grates are durable they may lose their shine and or discolor when washed in a dishwasher Gas Grate and Drip Pan Cleaner Part Number 31617 not included See the Accessories section for more information SURFACE BURNERS Food spills containing acids such as vinegar and tomato should be cleaned as soo...

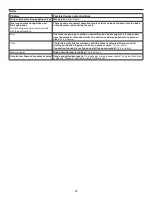
Страница 17: ...t a trained repair specialist or see Installation Instructions Surface burners will not operate The control knob is not set correctly Push in knob before turning to a setting Air in the gas lines If this is the first time the surface burners have been used turn on any one of the surface burner knobs to release air from the gas lines Clogged burner ports See Sealed Surface Burners section Surface b...

Страница 18: ...n Mineral deposits are left on the oven bottom after the Clean cycle Tap water was used in the clean cycle Use distilled or filtered water in the clean cycle To remove deposits use a cloth soaked with vinegar Then use a cloth dampened with water to thoroughly remove any vinegar residue Range is not level Mineral deposits will collect on dry areas of the oven bottom during the clean cycle Level the...

Страница 19: ...ngle pop when it snaps open from the solenoid It sounds similar to a suction cup being pulled off of a piece of glass This is normal Click The igniters will click several times until the flame is detected These are short clicking sounds like tapping a nail onto a piece of glass This is normal Convection fan relay is cycling on and off on some models This is normal Woosh or poof Bake or broil burne...

Страница 20: ...mber WA906B Granite Cleaner and Polish Order Part Number W10275756 Gas Grate and Drip Pan Cleaner Order Part Number 31617A Canning Unit Kit coil models Order Part Number 242905 Gourmet Griddle Order Part Number W10432539 Split Oven Rack Order Part Number 4396927 Max Capacity Oven Rack Order Part Number W10289145 Porcelain Broiler Pan and Grid Order Part Number 4396923 Premium Broiler Pan and Roast...

Страница 21: ...utions etc 5 Defects or damage caused by the use of non genuine Whirlpool parts or accessories 6 Conversion of products from natural gas or L P gas 7 Damage from accident misuse abuse fire floods acts of God or use with products not approved by Whirlpool 8 Repairs to parts or systems to correct product damage or defects caused by unauthorized service alteration or modification of the appliance 9 C...

Отзывы: