background image

Содержание RF4700XB

Страница 1: ...ns 3 Parts and Features 6 Using Your Range 7 Using the Self Cleaning Cycle 22 Your Range 25 or Service 33 Warranty 36 1 800 253 I 301 Call us with questions or comments SELF CLEANING ELECTRIC RANGE PART NO 318058300 9504 Rev A 4372290 Rev A MODEL RF4700XB ...

Страница 2: ...rief explanation of the use of the warning symbol I This symbol will help alert you to such dangers as fire electrical shock burns and personal injury I Our Consumer Assistance Center number 1 800 253 l 301 is toll free 24 hours a day If you ever have a question concerning your appliance s operation or if you need service first see If You Need Assistance or Service on page 33 If you need further h...

Страница 3: ...othing or other properly installed anti tip brack flammable materials contact ets To check if the brackets are surface units areas near units installed properly see The heating elements or interior anti tip brackets on page 21 surfaces of oven until they have CAUTION Do not store things had sufficient time to cool Other children might want above the surfaces of the range such as the range Children...

Страница 4: ...te when using glass or plastic utensils Do not store flammable materials on or near the range The fumes could create an explosion and or fire hazard a lTu n pan handles Award but not When using the cooktop over other surface units This will help reduce the chance of burns l Make sure the reflector bowls are igniting of flammable materials in place during cooking Cooking and spills due to bumping o...

Страница 5: ...e instructed to do so in this Use and Care Guide Do not soak removable heating elements in water The element will be damaged and shock or fire could result Care and cleaning Do not clean door heat seals Small amounts of formaldehyde They are essential for a good seal and carbon monoxide are given Care should be taken not to rub off in the Self Cleaning cycle damage or move the seals Clean from fib...

Страница 6: ... oven auto matic light switch Broil element Self cleaning oven Bake element Control panel Left Right Right oven oven oven tempera tempera manual ture Right Right ture Left rear rear front light MEALTIMERTM Control control Right oven control control control clock minute switch knob knob selector knob knob knob timer I I I I Left oven Right oven Cleaning Left I I Surface Surface tempera tempera indi...

Страница 7: ...st cooking results possible you must operate your range properly This section gives you important information for efficient and safe use of your range Using the surface units Push in control knobs before turning them to a setting You can set them any where between HI and OFF Push in and turn Surface unit markers The solid dot in the Surface Unit Marker shows which surface unit is turned on by that...

Страница 8: ...ented bottoms or very small expansion channels This cookware is specially designed to provide the good contact needed for best cooking results Also woks canners and teakettles with flat bottoms suitable for use on your cooktop are now available in most stores that sell housewares l The pan should have straight sides and a tight fitting lid l Choose medium to heavy gauge thick ness pans that are fa...

Страница 9: ...r long periods of time can shorten the life of regular surface units and cause damage to the cooktop If you plan to use the cooktop for canning we recommend the installation of a Canning Kit Order the kit Part No 242905 from your Whirlpool dealer or authorized Whirlpool service company Positioning racks and pans For baking roasting with one rack place the rack so the top of the food will be center...

Страница 10: ... the oven rack Three or four pans Place in opposite corners on each oven rack Stagger pans so no pan is directly over another Using aluminum foil for baking Use aluminum foil to catch spillovers from pies or casseroles l Place the foil on the oven rack below the rack with the food Turn up foil edges and make sure foil is about 1 inch 3 cm larger all around than the dish holding the food l Do not c...

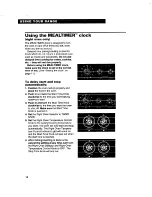
Страница 11: ...start or stop the oven It works like a kitchen timer Set it in minutes up to an hour You will hear a buzzer when the set time is up NOTE Do not push in the knob when setting the Minute Timer or when stopping the buzzer Pushing in and turning the Minute Timer Knob changes the clock setting 1 Without pushing it in turn the Minute Timer Knob counterclockwise until the timer hand passes the setting yo...

Страница 12: ... The Right Oven Temperature Control Indicator Light will come on The oven is preheated when the Right Oven Temperature Control Indicator Light first goes off NOTE Do not preheat oven when roasting or cooking items such as casseroles 4 Put food in the oven During baking roasting the elements will turn on and off to maintain the temperature setting The Right Oven Temperature Control Indica tor Light...

Страница 13: ...itioning racks and pans on page 9 2 Set the Left Oven Temperature Control Knob to the baking roasting temperature you want The Left Oven Temperature Control Indicator Light will come on The oven is preheated when the Left Oven Temperature Control Indicator Light first goes off NOTE Do not preheat oven when roast ing or cooking items such as casseroles 3 Put food in the oven During baking roasting ...

Страница 14: ...aight off and flip it over 2 Loosen the locking screws inside the control knob Note the position of the notches on the knob in relation to the skirt pointer 3 To lower the temperature hold knob skirt firmly and rotate the knob and notches in the direction of the LO arrow at the top of the skirt Each notch equals about 10 F 5 C 4 To raise the temperature hold knob skirt firmly and rotate the knob a...

Страница 15: ...Control Knob to OFF The Right Oven Temperature Control Indica tor Light will go off Custom broil l If food is cooking too fast turn the Right Oven Temperature Control Knob counterclockwise until the Right Oven Temperature Control Indicator Light goes off l If you want the food to broil slower from the start set the Right Oven Temperature Control Knob between 170 F and 325 F 77 C and 163 C These te...

Страница 16: ...ature Control Knob to OFF The Left Oven Temperature Control Indicator Light will go off Broiling tips l Use the broiler pan and grid for broiling They are designed to drain excess liquid and grease away from the cooking surface to help prevent spatter smoke or fire l After broiling remove the broiler pan from the oven when you remove the food Drippings will bake on the pan if you leave it in the h...

Страница 17: ...l Preheat pans only when recommended and for the shortest time possible l Start food on higher heat settings then set surface unit control on low or off to finish cooking Use retained heat for cooking when possible l Use the more efficient surface units instead of the oven when possible l Turn on the surface unit only after placing filled pan on the unit l Oven peeking may cause heat loss longer c...

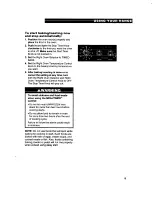
Страница 18: ...e the food in the oven 2 Push in and turn the Start Time Knob clockwise to the time you want baking roasting to start 3 Push in and turn the Stop Time Knob clockwise to the time you want the oven to shut off Make sure the Start Time Knob is pushed in 4 Set the Right Oven Selector to TIMED BAKE 5 Set the Right Oven Temperature Control Knob to the baking roasting temperature you want The oven will n...

Страница 19: ... turn both the Right Oven Selector and Right Oven Temperature Control Knob to OFF The Stop Time Knob will pop out To avoid sickness and food waste when using the MEALTIMER control l Do not let most UNFROZEN food stand for more than two hours before cooking starts l Do not allow food to remain in oven for more than two hours after the end of cooking cycle Failure to follow the above could result in...

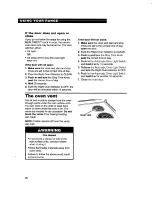
Страница 20: ... Turn the Right Oven Selector to CLEAN Push in and turn the Stop Time Knob past the correct time of day Push in the Automatic Oven Light Switch and hold it in for 10 seconds Release the Automatic Oven Light Switch and turn the Right Oven Selector to OFF Push in the Automatic Oven Light Switch and hold it in for another 10 seconds Close the oven door The oven vent Hot air and moisture escape from t...

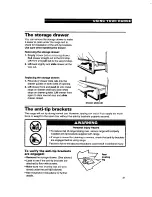
Страница 21: ... second stop and slide drawer closed Drawer slide iall The anti tip brackets The range will not tip during normal use However tipping can occur if you apply too much force or weight to the open door without the anti tip brackets properly secured Personal Injury Hazard To reduce risk of range tipping over secure range with properly installed anti tip brackets supplied with range l If range is moved...

Страница 22: ...heat breaks up the soil or grease and burns it away You can adjust the cycle time to the amount of soil in your oven You can set the cycle time anywhere between 2 and 4 hours See Setting the controls on page 23 The graph at the right is representative of a normal 3 hour Self Cleaning cycle Note that the heating stops when the 3 hour setting is up but it takes longer for the oven to cool enough to ...

Страница 23: ...chen well ventilated by opening a window or by turning on a vent hood or other kitchen vent during the cycle Burn Hazard l Do not touch the oven during the Self Cleaning cycle l Do not use commercial oven cleaners in your oven Failure to follow the above could result in burns or hazardous fumes NOTES l Do not force the locking mechanism You could bend or break it The locking mecha nism is designed...

Страница 24: ... If needed touch up spots with a soapy steel wool pad To stop the Self Cleaning cycle at any time 1 Push in and turn the Stop Time Knob clockwise until it points to the correct time of day 2 Turn the Right Oven Selector and Right Oven Temperature Control Knob to OFF Special tips l Keep the kitchen well ventilated during the l If the Self Cleaning cycle does not get Self Cleaning cycle to help get ...

Страница 25: ...to keep it looking and operating like new Electrical Shock Hazard Make sure all controls are OFF and the range is cool before cleaning Failure to do so could result in electrical shock or burns Surface units and reflector bowls Removing 1 Make sure all surface units are off and cool before removing surface units reflector bowls and trim rings 2 Lift the edge of the unit opposite the receptacle jus...

Страница 26: ...ossible with the terminal just started into the receptacle Push the surface unit terminal into the receptacle NOTE Reflector bowls reflect heat back to the utensils on the surface units They also help catch spills When they are kept clean they reflect heat better and look new longer If a trim ring gets discolored some of your utensils may not be flat enough or some may be too large for the surface...

Страница 27: ...safely supports the cooktop Failure to do so could result in personal injury from the cooktop accidentally falling NOTE Do not drop the cooktop Damage could result to the porcelain and the cooktop frame 3 Wipe with warm soapy water Use a soapy steel wool pad on heavily soiled areas 4 To lower the cooktop lift cooktop while lowering the support rod back to its resting position Lower the cooktop int...

Страница 28: ...s then pull the bottom of the door up and toward you to disconnect the hinges 4 Keep pulling the bottom of the door toward you while moving the top of the door toward the range to completely disconnect the hinges To replace the door 1 Grasp the door by the sides Set hinges into the hinge slots 2 Keep pushing the bottom of the door away from you While pushing move the top of the door away from the ...

Страница 29: ... than control soapy water thoroughly panel l Use nonabrasive plastic scrubbing pad on heavily soiled areas l Do not use abrasive or harsh cleans ers They may damage the finish NOTE Do not allow foods containing acids such as vinegar tomato or lemon juice to remain on surface Acids may remove the glossy finish Also wipe up milk or egg spills when cooktop is cool Surface units No cleaning required l...

Страница 30: ...Leave in oven during Self Cleaning cycle cycle NOTE Racks will permanently discolor and become harder to slide if left in oven during Self Cleaning cycle Apply a small amount of vegetable oil to the side rungs to aid sliding Paper towel and spray l Make sure oven is cool glass cleaner l Follow directions provided with the OR cleaner Warm soapy water l Wash wipe with clean water and dry and a nonab...

Страница 31: ...ccur l Do not allow a film from the cleaner to build up on the tempera ture sensing bulb it could cause the oven to heat improperly NOTE One sensing bulb is located in the upper left corner of the large oven and the other sensing bulb is located in the upper right corner of the small oven Carefully wipe the sensing bulb clean after each oven cleaning being careful not to move the bulb A change in ...

Страница 32: ...is made of glass be careful not to drop it Failure to follow the above could result in electrical shock burns or injury from broken glass To replace the oven light 1 Unplug appliance or disconnect at the main power supply 2 Remove the glass bulb cover in the back of the oven by pushing the wire holder to the side and pulling out the cover 3 Remove the light bulb from its socket Replace the bulb wi...

Страница 33: ...use or reset circuit a circuit breaker has tripped breaker You have not turned the Oven Turn the Oven Selector to the desired Selector to BAKE or BROIL setting You have set a delayed start Wait for the start time to be reached or time cancel and reset the control You have not turned the Oven Turn the Oven Temperature Control Temperature Control Knob to Knob to a temperature setting a temperature s...

Страница 34: ... Level range See Installation Instruc results are tions not what you expected The oven temperature seems Adjust the oven temperature control too low or too high See Adjusting the oven temperature control on page 14 You have not preheated the Preheat oven if called for in recipe oven as the recipe calls for The recipe you are using may Alter recipe as needed need to be altered to improve the taste ...

Страница 35: ...you need FSP replacement parts FSP is a registered trademark of Whirlpool Corporation for quality parts Look for this symbol of quality whenever you need a replacement part for your Whirlpool appli ance FSP replacement parts will fit right and work right because they are made to the same exacting specifications used to build every new Whirlpool appliance To locate FSP replacement parts in your are...

Страница 36: ... modifications made to the appliance 3l95 WHIRLPOOL CORPORATION SHALL NOT BE LIABLE FOR INCIDENTAL OR CONSE QUENTIAL DAMAGES Some states do not allow the exclusion or limitation of incidental or consequential damages so this exclusion or limitation may not apply to you This warranty gives you specific legal rights and you may also have other rights which vary from state to state Outside the United...

Отзывы: