background image

7

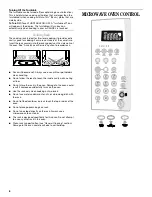
Display

When power is first supplied to the microwave oven, a “:” will 
blink on the display. Touch CANCEL to stop the blinking. If the “:” 
blinks on the display at any other time, a power failure has 
occurred. Touch CANCEL and reset the clock if needed.

If “RETRY” blinks on the display for 1 second, an invalid value 
has been entered. Retry your entry.

When the microwave oven is in use, the display shows cooking 
power, quantities, weights and/or prompts. When the microwave 
oven is not in use, the display shows the time of day or Timer 
countdown.

Number Codes

The microwave oven is preset with shortcut number codes. A 
number code includes one or more of the following: cooking 
power, cook time and food quantity or weight. See the charts in 
the “Cooking” and/or “Reheating” sections for additional 
information.

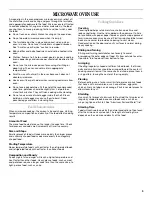
Start/Add 30 Seconds

The START control shares function with the Add 30 Seconds 
feature. The START pad will start any function. If not touched 
within 5 seconds after touching a pad, “START?” will appear on 
the display as a reminder. If not touched within 5 minutes after 
touching a pad, the display will return to the time of day mode 
and the programmed function will be canceled.

If cooking is interrupted, touching the START will resume the 
preset cycle.

The ADD 30 SEC. control starts the oven at 100% power for 
30 seconds, and adds 30 seconds of cook time with each 
additional touch of the control. Once cooking begins, cook power 
or cook time may be changed manually by touching the 
appropriate display area and entering the new setting.

Easy Minute Feature

The numerical pads 1-5 share function with the Easy Minute 
controls. When one of these controls is touched (while no 
function is operating), the oven will begin cooking at high power 
for 1-5 minutes, depending on which pad is touched. After 
cooking begins, the Easy Minute controls return to their normal 
numerical pad function.

Cancel

The CANCEL pad stops most functions except for the Timer, 
Child Lock and Demo Mode.

The microwave oven will also turn off when the door is opened. 
Close the door and touch START control to resume the cycle. A 
sensor cooking cycle may not be resumed if interrupted by 
opening the door.

Clock

This is a 12-hour clock and does not show a.m. or p.m.

To Set:

The microwave oven and timer must be off.

1. Touch CLOCK.

2. Touch the number pads to set the time of day.

3. Touch CLOCK or START.

To Remove:

1. Touch CLOCK.

2. Touch 0.

3. Touch CLOCK.

The time will disappear, and “:” will appear on the display.

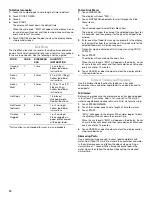
Tones

Tones are audible signals, indicating the following:

One tone

Valid entry (short tone)

End of Timer countdown (long tone)

Two tones

Reminder, repeat each minute after the end-of-cycle tones

End of stage in multistage cooking

Hidden feature has been entered or exited

Three tones

Invalid entry

Four tones

End of cycle

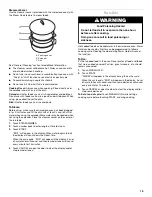
To Turn Off/On Valid Entry Tones: Touch and hold the number 
pad “1” for 5 seconds until 2 tones sound. Repeat to turn tones 
back on.

To Turn Off/On All Tones: Touch and hold the number pad “2” 
for 5 seconds until 2 tones sound. Repeat to turn tones back on.

Содержание MH3185XP

Страница 1: ...INATION Use CareGuide For questions about features operation performance parts accessories or service call 1 800 253 1301 or visit our website at www whirlpool com Table of Contents 2 8204921 4619 652 64161 Model MH3185XP ...

Страница 2: ...ICROWAVE OVEN USE 9 Food Characteristics 9 Cooking Guidelines 9 Cookware and Dinnerware 10 Aluminum Foil and Metal 10 Cooking Power 10 Cooking 11 6th SENSE System Cooking 11 Preset Cooking 12 Beverage 12 Cooking in Stages 12 Reheating 13 Defrosting 13 Kids Menu 14 Simmer Cooking and Steaming 14 Warm Hold 15 MICROWAVE OVEN CARE 16 General Cleaning 16 Replacing Filters 17 Replacing Cooktop Light 17 ...

Страница 3: ...Some products such as whole eggs in the shell and sealed containers for example closed glass jars are able to explode and should not be heated in the microwave oven Use the microwave oven only for its intended use as described in this manual Do not use corrosive chemicals or vapors in the microwave oven This type of oven is specifically designed to heat cook or dry food It is not designed for indu...

Страница 4: ...e overheating of the oven Do not store anything directly on top of the microwave oven when the microwave oven is in operation To reduce the risk of injury to persons Liquids such as water coffee or tea are able to be overheated beyond the boiling point without appearing to be boiling Visible bubbling or boiling when the container is removed from the microwave oven is not always present THIS COULD ...

Страница 5: ...f an electrical short circuit grounding reduces the risk of electric shock by providing an escape wire for the electric current The microwave oven is equipped with a cord having a grounding wire with a grounding plug The plug must be plugged into an outlet that is properly installed and grounded WARNING Improper use of the grounding plug can result in a risk of electric shock Consult a qualified e...

Страница 6: ...ack Rack will become hot Always use oven mitts or pot holders when handling Do not allow the rack to touch the inside cavity walls ceiling or floor Do not store the rack in the oven Damage to the oven could result if someone accidentally turns on the oven Use the rack only when cooking on two levels Do not use metal cookware utensils or a browning dish with the rack Do not let food container on ra...

Страница 7: ...ower or cook time may be changed manually by touching the appropriate display area and entering the new setting EasyMinuteFeature The numerical pads 1 5 share function with the Easy Minute controls When one of these controls is touched while no function is operating the oven will begin cooking at high power for 1 5 minutes depending on which pad is touched After cooking begins the Easy Minute cont...

Страница 8: ...n and Light pads will function To Lock Unlock Control The microwave oven and Timer must be off Touch and hold CANCEL for 5 seconds until 2 tones sound and a lock icon appears on the display Repeat to unlock and remove the lock icon from display VentFan The vent fan has 4 speeds ranging from 4 fastest to 1 slowest Zero 0 is off To protect the microwave oven if the temperature from the range or cook...

Страница 9: ...n larger pieces and uniformly shaped foods cook more evenly than irregularly shaped food Starting Temperature Room temperature foods will heat faster than refrigerated foods and refrigerated foods will heat faster than frozen foods Composition and Density Foods high in fat and sugar will reach a higher temperature and heat faster than other foods Heavy dense foods such as meat and potatoes require...

Страница 10: ... as sandwich wrappers staples and objects with gold or silver trim or a metallic glaze should not be used in the oven CookingPower Many recipes for microwave cooking specify which cooking power to use by percent name or number For example 70 7 Medium High Use the following chart as a general guide for the suggested cooking power of specific foods MATERIAL RECOMMENDATIONS Aluminum Foil Metal See Al...

Страница 11: ...F 35 C and the outside of the container and microwave oven cavity are dry 1 Touch one of the SENSOR pads The microwave oven will automatically turn on when POPCORN BAKED POTATO or DINNER PLATE is touched If more or less time is required for BAKED POTATO and DINNER PLATE only touch COOK POWER after the microwave oven starts to cook When the cycle ends END will appear in the display 4 end of cycle t...

Страница 12: ...ll sound every minute for 15 minutes 3 Touch CANCEL or open the door to clear the display and or stop reminder tones CookinginStages The oven can be set to cook at different cooking powers for various lengths of time up to 3 stages Sensor cooking cannot be done in stages To Cook in Stages 1 Touch COOK TIME 2 Touch number pads to enter length of time to cook during the 1st stage 3 Touch COOK POWER ...

Страница 13: ...ield parts of food such as chicken wings leg tips and fish tails See Aluminum Foil and Metal first The automatic Defrost control has 3 categories Meat Poultry and Fish It should not be used for food left outside the freezer more than 20 minutes and frozen ready made food Use the following chart as a guide To use the Defrost control 1 Touch DEFROST 2 Touch 1 for Meat 2 for Poultry or 3 for Fish or ...

Страница 14: ...e display and or stop reminder tones SimmerCookingandSteaming Use the Simmer Cook function for foods such as soups casseroles stews and other liquid food It can also be used to cook pasta To Simmer Before using make sure the microwave oven has been plugged in for at least 2 minutes Add to cup 60 to 125 mL of water to vegetables and cover dish with its lid not plastic wrap 1 Touch STEAM SIMMER 2 To...

Страница 15: ...Touch START BOIL will appear in the display When water begins to boil the display will count down the steam time When the cycle ends END will appear in the display 4 end of cycle tones will sound and then reminder tones will sound every minute for 15 minutes 4 Touch CANCEL or open the door to clear the display and or stop reminder tones WarmHold Hot cooked food can be kept warm in the microwave ov...

Страница 16: ...ld nonabrasive soaps and detergents Rinse with clean water and dry with soft lint free cloth Glass cleaner and paper towels or nonabrasive plastic scrubbing pad Apply glass cleaner to towel not directly to surface Stainless Steel on some models Do not use soap filled scouring pads abrasive cleaners steel wool pads gritty washcloths or some paper towels Damage may occur Rub in direction of grain to...

Страница 17: ...k and into place so that it rests at an inclined angle about 45 5 Align the bottom of the vent grille into position then push the top back until it snaps into place ReplacingCooktopLight The cooktop light is a candelabra base bulb See Assistance or Service section to reorder To Replace 1 Unplug microwave oven or disconnect power 2 Remove the bulb cover mounting screw A Mounting screw 3 Replace lig...

Страница 18: ...tor rotation at the beginning of the cycle Display shows messages Is the display showing There has been a power failure or the clock time has been turned off See Display section to clear display See Clock section to reset the clock or to turn it on Is the display showing a letter followed by a number See Display section to clear If it reappears call for service See Assistance or Service section Di...

Страница 19: ...ion information Use and maintenance procedures Accessory and repair parts sales Specialized customer assistance Spanish speaking hearing impaired limited vision etc Referrals to local dealers repair parts distributors and service companies Whirlpool designated service technicians are trained to fulfill the product warranty and provide after warranty service anywhere in the United States To locate ...

Страница 20: ...T BE LIABLE FOR INCIDENTAL OR CONSEQUENTIAL DAMAGES Some states do not allow the exclusion or limitation of incidental or consequential damages so this exclusion or limitation may not apply to you This warranty gives you specific legal rights and you may also have other rights which may vary from state to state Outside the 50 United States this warranty does not apply Contact your authorized Whirl...

Отзывы: