background image

8

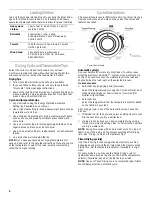
Loading Clothes

Load clothes loosely into the dryer. Do not pack the dryer. Allow 
space for clothes to tumble freely. The following chart shows 
examples of balanced loads that would allow for proper tumbling. 

Drying, Cycle, and Temperature Tips

Select the correct cycle and temperature for your load.

Cool Down tumbles the load without heat during the last few 
minutes of all cycles to make the load easier to handle.

Drying tips

Follow care label directions when they are available.

If you use fabric softener sheets, use only those labeled 
“dryer safe.” Follow package instructions.

Remove the load from the dryer as soon as tumbling stops, to 
reduce wrinkling. This is especially important for permanent 
press, knits, and synthetic fabrics.

Cycle and temperature tips 

Dry most loads using the Energy Preferred Automatic 
Setting (

*

), if available on your dryer.

Use a High Heat setting for drying heavyweight items such as 
towels and work clothes.

Use a Medium Heat setting for drying medium weight items, 
such as sheets, underwear, permanent press fabrics, and 
some knits.

Use a Low Heat setting for drying lightweight items such as 
lingerie, blouses, dresses, and some knits.

Use a no-heat (air) setting for rubber, plastic, or heat-sensitive 
fabrics.

Line dry bonded or laminated fabrics.

NOTE:

 If you have questions about drying temperatures for 

various loads, refer to the care label directions. If you are unsure 
of the temperature to select for a load, select a lower setting 
rather than a higher setting.

Cycle Descriptions

This manual covers several different models. Your dryer may vary 
from the model shown and may not have all of the cycles and 
features described.

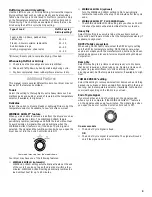
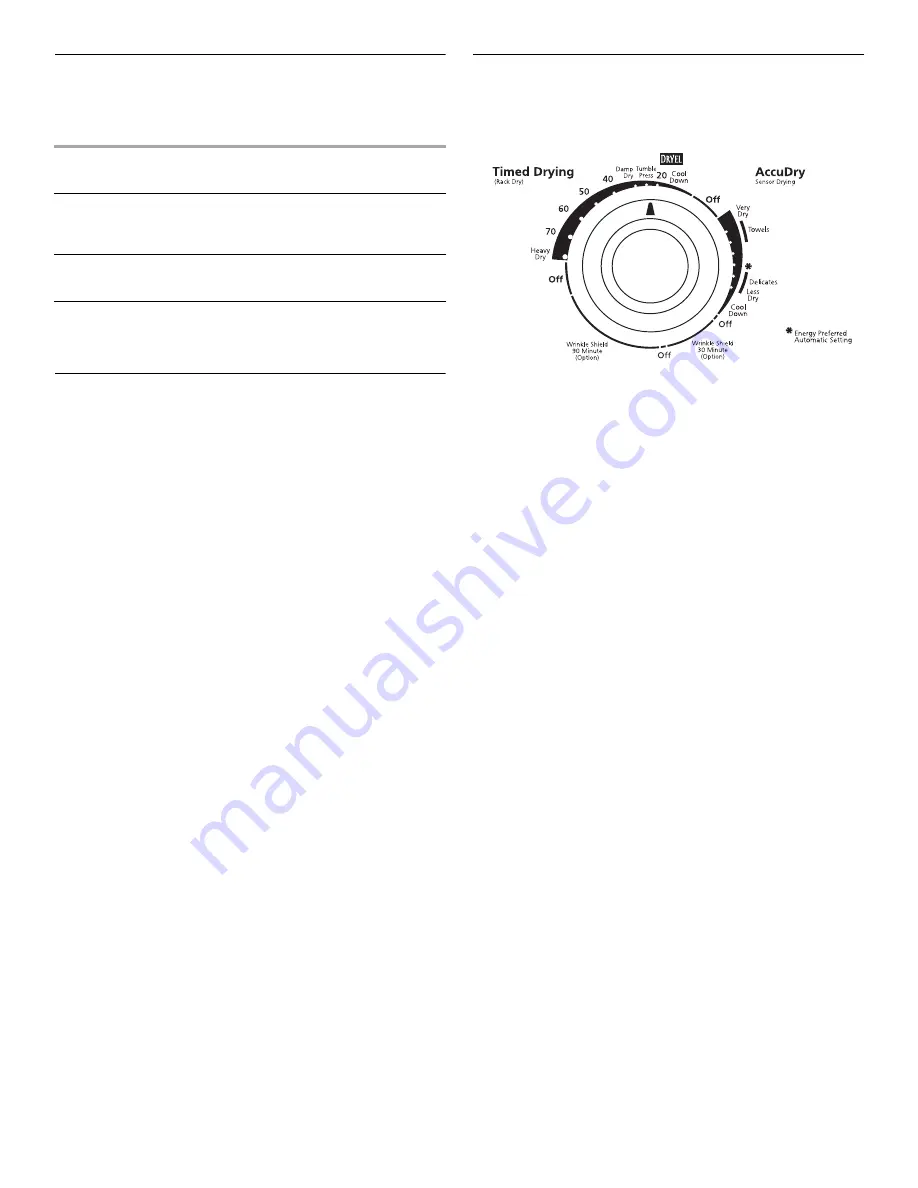
Cycle Control knob

Automatic cycle(s)

Use your Automatic cycle to dry most loads. Your dryer uses 
either the electronic ACCUDRY™ system or the Automatic Dry 
control. The control senses the moisture level in the load and 
shuts off when the load reaches the selected dryness.

On some models

Automatic Dry (High Heat) and (Low Heat)

Select the temperature by moving the Cycle Control knob to 
(High Heat) for bigger or heavier loads or (Low Heat) for 
smaller or lighter loads.  

Automatic Dry

Select the temperature from the temperature selector based 
on the fabrics in your load.

After drying a load in any of the Automatic cycles, check the 
dryness.

If the load is drier than you like, select a setting closer to Less 
Dry the next time you dry a similar load.

If a load is not as dry as you like, complete drying using a 
Timed cycle. Select a setting closer to Very Dry the next time 
you dry a similar load.

NOTE:

 Drying time varies with an Automatic cycle. The type of 

fabric, size of the load, and the dryness selected affect drying 
time. See “Drying, Cycle and Temperature Tips.”

Timed Drying cycle(s)

Use Timed Drying for heavyweight and bulky items, such as 
bedspreads and work clothes or large loads that require a long 
drying time. Set the temperature selector, if available, to High 
Heat. 

On some models, you may use the Timed Drying cycle for 
lightweight items such as lingerie or knits. Set the temperature 
selector, if available, based on the fabrics in your load.

NOTE:

 Use your Timed Drying cycle to complete drying if items 

are still damp after the Automatic cycle.

Heavy work 
clothes


3 pair of pants, 4 pair of jeans, 2 pair of
overalls, 3 shirts   

Delicates

3 camisoles, 1 robe, 4 slips,
6 undergarments, 2 sets of sleepwear, 
1 child’s outfit

Towels

10 bath towels, 10 hand towels, 14 wash 
cloths, 1 bath mat

Mixed Load

3 double sheets, 4 pillowcases, 
8 T-shirts, 6 pair of shorts, 2 blouses,
8 handkerchiefs

Содержание LEQ9557KQ0

Страница 1: ...ECTRICAND GAS DRYERS Use CareGuide For questions about features operation performance parts accessories or service call 1 800 253 1301 or visit our website at www whirlpool com Table of Contents 2 8527926 ...

Страница 2: ...ng Clothes 8 Drying Cycle and Temperature Tips 8 Cycle Descriptions 8 Additional Features 9 Drying Rack optional purchase 10 CARING FOR YOUR DRYER 10 Cleaning the Lint Screen 10 Cleaning the Dryer Interior 11 Removing Accumulated Lint from Inside the Dryer Cabinet 11 Changing the Drum Light 11 TROUBLESHOOTING 12 ASSISTANCE OR SERVICE 13 WARRANTY 16 ...

Страница 3: ...All safety messages will follow the safety alert symbol and either the word DANGER or WARNING These words mean WARNING For your safety the information in this manual must be followed to minimize the risk of fire or explosion or to prevent property damage personal injury or death Do not store or use gasoline or other flammable vapors and liquids in the vicinity of this or any other appliance WHAT T...

Страница 4: ...e the door to the drying compart ment Do not reach into the dryer if the drum is moving Do not repair or replace any part of the dryer or attempt any servicing unless specifically recom mended in this Use and Care Guide or in published user repair instructions that you understand and have the skills to carry out Do not use fabric softeners or products to eliminate static unless recommended by the ...

Страница 5: ...nt screen 5 Exhaust grill 6 Wide opening door Additional features your dryer may have End of Cycle Signal selector WRINKLE SHIELD PLUS selector ACCUDRY electronic sensor Automatic Dry sensor Drum light Optional purchase Drying rack Large side swing door Super wide swing door 2 3 4 5 6 1 ...

Страница 6: ...ng times 3 The exhaust vent can be routed up down left right or straight out the back of the dryer Space requirements are listed in your Installation Instructions 4 Use the straightest path possible when routing the exhaust vent Use the fewest number of elbows and turns Allow room when using elbows or making turns Bend vent gradually to avoid kinking 5 Use duct tape to seal all joints Do not use s...

Страница 7: ...d of Cycle Signal can be adjusted Turn the selector to the desired volume OR The End of Cycle Signal is part of the START button Turn the START button to ON or OFF 5 Select the desired option See Additional Features 6 Push the START button StoppingandRestarting You can stop your dryer any time during a cycle To stop your dryer Open the dryer door or turn the Cycle Control knob to OFF NOTE The Cycl...

Страница 8: ...knob Automatic cycle s Use your Automatic cycle to dry most loads Your dryer uses either the electronic ACCUDRY system or the Automatic Dry control The control senses the moisture level in the load and shuts off when the load reaches the selected dryness On some models Automatic Dry High Heat and Low Heat Select the temperature by moving the Cycle Control knob to High Heat for bigger or heavier lo...

Страница 9: ...WRINKLE SHIELD setting periodically tumbles the load without heat for up to 45 minutes WRINKLE SHIELD optional Turn the WRINKLE SHIELD setting to On to periodically tumble the load without heat up to 45 minutes after the cycle ends WRINKLE SHIELD PLUS 30 90 Minute The WRINKLE SHIELD PLUS setting lets you choose 30 or 90 minutes of periodic unheated tumble after the cycle ends Heavy Dry Select this...

Страница 10: ... wash screen to remove lint Wet lint is hard to remove 2 Push the lint screen firmly back into place IMPORTANT Do not run the dryer with the lint screen loose damaged blocked or missing Doing so can cause overheating and damage to both the dryer and fabrics Some towels made of synthetic fibers and natural fibers polyester and cotton blends may shed more lint than other towels causing your dryer s ...

Страница 11: ... and will not stain future loads of clothes Dry unstable dye items inside out to prevent dye transfer RemovingAccumulatedLintfromInsidethe DryerCabinet Lint should be removed every two years or more often depending on dryer usage Cleaning should be done by a qualified person ChangingtheDrumLight To change drum light 1 Unplug dryer or disconnect power 2 Open the dryer door Locate the light bulb cov...

Страница 12: ...ar fuse used Use a time delay fuse Is the dryer door firmly closed Was the START button firmly pressed Is a cycle selected Unusual sounds Has the dryer had a period of non use If the dryer hasn t been used for a while there may be a thumping sound during the first few minutes of operation Is it a gas dryer The gas valve clicking is a normal operating sound Lint on load Is the lint screen clogged C...

Страница 13: ... recommend that you only use FSP factory specified parts These parts will fit right and work right because they are made with the same precision used to build every new WHIRLPOOL appliance To locate FSP replacement parts in your area call our Customer Interaction Center or your nearest designated service center For assistance and service Call the Whirlpool Customer Interaction Center toll free 1 8...

Страница 14: ... not allow the exclusion or limitation of incidental or consequential damages so this exclusion or limitation may not apply to you This warranty gives you specific legal rights and you may also have other rights which vary from state to state Outside the 50 United States this warranty does not apply Contact your authorized Whirlpool dealer to determine if another warranty applies If you need servi...

Отзывы: