background image

11

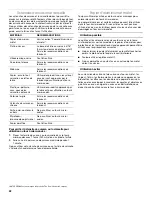
MICROWAVE OVEN CARE

General Cleaning

IMPORTANT: Before cleaning, make sure all controls are off and the microwave oven is cool. Always follow label instructions on 
cleaning products.

Soap, water and a soft cloth or sponge are suggested unless otherwise noted.

GREASE FILTERS

Do not use ammonia or corrosive cleaning agents such as lye-
based oven cleaners.

Hot water and mild detergent:

Soak filters, then scrub and swish to remove embedded dirt 
and grease. Rinse well and shake to dry.

Dishwasher:

Wash separately, not with dirty dishes, because food can be 
trapped in the filters.

NOTE: Some discoloration of the filters may occur after 
cleaning them in the dishwasher. This is normal, and will not 
affect the performance of the grease filters.

MICROWAVE OVEN CAVITY

To avoid damage to the microwave oven cavity, do not use soap-
filled scouring pads, abrasive cleaners, steel-wool pads, gritty 
washcloths or some recycled paper towels.

To avoid damage to stainless steel models, rub in direction of 
grain.

The area where the microwave oven door and frame touch when 
closed should be kept clean.

Average soil

Mild, nonabrasive soaps and detergents:

Rinse with clean water and dry with soft, lint-free cloth.

Heavy soil

Mild, nonabrasive soaps and detergents:

Heat 1 cup (250 mL) of water for 2 to 5 minutes in microwave 
oven. Steam will soften soil. Rinse with clean water and dry 
with soft, lint-free cloth.

Odors

Lemon juice or vinegar:

Heat 1 cup (250 mL) of water with 1 tbs (15 mL) of either 
lemon juice or vinegar for 2 to 5 minutes in microwave oven.

Microwave Inlet Cover

To avoid arcing and microwave oven damage, the microwave 
inlet cover (see “Parts and Features”) should be kept clean.

Wipe with wet cloth.

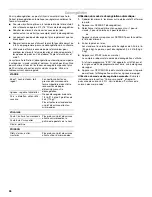
MICROWAVE OVEN DOOR AND EXTERIOR

The area where the microwave oven door and frame touch when 
closed should be kept clean.

Mild, nonabrasive soaps and detergents:

Rinse with clean water and dry with soft, lint-free cloth.

Glass cleaner and paper towels or nonabrasive plastic 
scrubbing pad:

Apply glass cleaner to towel, not directly to surface.

Stainless Steel (on some models)

To avoid damage to microwave oven door and exterior, do not 
use soap-filled scouring pads, abrasive cleaners, steel-wool 
pads, gritty washcloths or some paper towels. Rub in direction of 
grain.

Stainless Steel Cleaner & Polish (not included):

See “Assistance or Service” section to order.

Liquid detergent or all-purpose cleaner:

Rinse with clean water and dry with soft, lint-free cloth.

Vinegar for hard water spots

CONTROL PANEL

Sponge or soft cloth and water:

Dampen sponge with water and wipe panel. Dry with soft 
cloth.

Do not use chemical or abrasive cleansers.

TURNTABLE

Replace turntable immediately after cleaning. Do not operate the 
microwave oven without the turntable in place.

Mild cleanser and scouring pad

Dishwasher

Содержание IMH16XS

Страница 1: ...n performance parts accessories or service call 1 800 253 1301 In Canada for assistance installation or service call 1 800 807 6777 ENSEMBLE FOUR À MICRO ONDES HOTTE Guided utilisationetd entretien Au Canada pour assistance installation ou service composez le 1 800 807 6777 Table of Contents Table des matières 2 ...

Страница 2: ...ES HOTTE 16 Spécifications électriques 18 PIÈCES ET CARACTÉRISTIQUES 18 Plateau rotatif 18 TABLEAU DE COMMANDE DU FOUR À MICRO ONDES 19 Affichage 19 Start mise en marche 19 Off Cancel arrêt annulation 19 Add 1 Minute ajouter 1 minute 19 Horloge 20 Signaux sonores 20 Control Lock verrouillage des commandes 20 Ventilateur d évacuation 20 Lampe de la table de cuisson 20 UTILISATION DU FOUR À MICRO ON...

Страница 3: ... or dry food It is not designed for industrial or laboratory use As with any appliance close supervision is necessary when used by children Do not operate the microwave oven if it has a damaged cord or plug if it is not working properly or if it has been damaged or dropped The microwave oven should be serviced only by qualified service personnel Call an authorized service company for examination r...

Страница 4: ...ENERGY a Do not attempt to operate this oven with the door open since open door operation can result in harmful exposure to microwave energy It is important not to defeat or tamper with the safety interlocks b Do not place any object between the oven front face and the door or allow soil or cleaner residue to accumulate on sealing surfaces c Do not operate the oven if it is damaged It is particula...

Страница 5: ...op the blinking If the blinks in the display at any other time a power failure has occurred Touch OFF CANCEL and reset the clock if needed If an invalid value has been entered the invalid entry tones will sound and the input prompt will reappear in the display Retry your entry When the microwave oven is in use the display shows cooking power quantities weights and or prompts When the microwave ove...

Страница 6: ...nes Three tones Invalid entry Four tones End of cycle To Turn Off On Valid Entry Tones With the microwave oven in standby mode touch and hold the number pad 1 for 3 seconds until 2 tones sound Touch and hold number pad 1 to turn tones back on To Turn Off All Tones except hidden feature tones With the microwave oven in standby mode touch and hold the number pad 2 for 3 seconds until 2 tones sound T...

Страница 7: ...an larger pieces and uniformly shaped foods cook more evenly than irregularly shaped food Starting Temperature Room temperature foods will heat faster than refrigerated foods and refrigerated foods will heat faster than frozen foods Composition and Density Foods high in fat and sugar will reach a higher temperature and will heat faster than other foods Heavy dense foods such as meat and potatoes r...

Страница 8: ...e the following chart as a general guide for the suggested cooking power of specific foods MATERIAL RECOMMENDATIONS Aluminum Foil Metal See Aluminum Foil and Metal section Browning Dish Bottom must be at least 3 16 5 mm above the turntable Follow manufacturer s recommendations Ceramic Glass Glass Acceptable for use China Earthenware Follow manufacturer s recommendations Melamine Follow manufacture...

Страница 9: ... power levels Touch START Popcorn Popping time has been preset based on commercially packaged microwave popcorn The preset programs are for bag sizes 3 5 oz 99 g 3 0 oz 85 g and 1 75 oz 50 g For bag sizes not listed in this section follow directions on the package NOTE The Popcorn times are programmed to run 15 seconds longer than the actual pop time During this 15 second period the magnetron is o...

Страница 10: ...Touch DEFROST 3 Select food by entering 1 for Meat 2 for Poultry or 3 for Fish or Touch DEFROST repeatedly to scroll through food selections 4 Enter the weight in pounds Meats and Poultry can be set from 0 2 to 6 6 lb 90 g to 3 kg Fish can be set from 0 2 to 4 4 lb 90 g to 2 kg 5 Touch START The display will count down the defrost time When the cycle ends END will appear in the display and the end...

Страница 11: ...s in microwave oven Steam will soften soil Rinse with clean water and dry with soft lint free cloth Odors Lemon juice or vinegar Heat 1 cup 250 mL of water with 1 tbs 15 mL of either lemon juice or vinegar for 2 to 5 minutes in microwave oven Microwave Inlet Cover To avoid arcing and microwave oven damage the microwave inlet cover see Parts and Features should be kept clean Wipe with wet cloth MIC...

Страница 12: ... charcoal filter 5 Replace vent grille and mounting screws ReplacingCooktopLight The cooktop light is a candelabra base bulb See Assistance or Service section to reorder To Replace 1 Unplug microwave oven or disconnect power 2 Remove the bulb cover mounting screw A Mounting screw 3 Replace light Close bulb cover Replace mounting screw 4 Plug in microwave oven or reconnect power ReplacingMicrowaveO...

Страница 13: ...rntable Place 1 cup 250 mL of water on the turntable then restart microwave oven If it still is not working call for service See Assistance or Service section Do not operate the microwave oven without turntable and turntable support working properly Turntable alternates rotation directions This is normal and depends on motor rotation at the beginning of the cycle Display shows messages Is the disp...

Страница 14: ...paired limited vision etc Referrals to local dealers repair parts distributors and service companies Whirlpool designated service technicians are trained to fulfill the product warranty and provide after warranty service anywhere in the United States To locate the Whirlpool designated service company in your area you can also look in your telephone directory Yellow Pages For further assistance If ...

Страница 15: ... appliance is used in a country other than the country in which it was purchased DISCLAIMER OF IMPLIED WARRANTIES LIMITATION OF REMEDIES CUSTOMER S SOLE AND EXCLUSIVE REMEDY UNDER THIS LIMITED WARRANTY SHALL BE PRODUCT REPAIR AS PROVIDED HEREIN IMPLIED WARRANTIES INCLUDING WARRANTIES OF MERCHANTABILITY OR FITNESS FOR A PARTICULAR PURPOSE ARE LIMITED TO ONE YEAR OR THE SHORTEST PERIOD ALLOWED BY LA...

Страница 16: ... coquille et les récipients fermés par exemple les bocaux en verre fermés peuvent exploser et on ne doit pas les faire chauffer dans le four à micro ondes Utiliser le four à micro ondes uniquement pour les applications auxquelles il est destiné telles qu elles sont décrites dans ce manuel Ne pas utiliser de vapeurs ou de produits chimiques corrosifs dans le four à micro ondes Ce type de four est s...

Страница 17: ...Lorsque vous flambez des aliments sous la hotte mettre le ventilateur en marche Nettoyer avec soin le filtre du ventilateur de la hotte Des agents de nettoyage corrosifs tels que les produits de nettoyage de four à base de soude peuvent endommager le filtre Ne pas couvrir ni obstruer toute ouverture sur le four à micro ondes Ne pas remiser ce four à micro ondes à l extérieur Ne pas utiliser le fou...

Страница 18: ...trique INSTRUCTIONS DE LIAISON À LA TERRE CONSERVEZ CES INSTRUCTIONS Pour tout appareil ménager connecté par un cordon de courant électrique Il faut que le four à micro ondes soit relié à la terre En cas de court circuit électrique la liaison à la terre réduit le risque de choc électrique car le courant électrique dispose d un itinéraire direct d acheminement à la terre Le four à micro ondes est d...

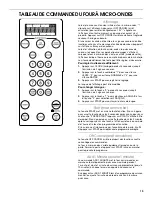
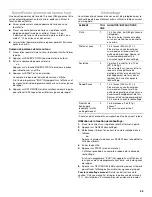
Страница 19: ...r la langue 1 Appuyer sur la touche 0 pendant 3 secondes jusqu à l émission de 2 signaux sonores 2 Appuyer sur la touche 1 pour sélectionner ANGLAIS et sur la touche 2 pour sélectionner FRANÇAIS 3 Appuyer sur START pour confirmer le choix de langue Start miseenmarche La touche START met en marche toute fonction Si on n appuie pas sur cette touche dans les 5 secondes après avoir appuyé sur une touc...

Страница 20: ...onnent Si on appuie sur n importe quelle autre touche LOCKED verrouillé s affiche et les signaux sonores d entrée invalide sont émis Pour verrouiller déverrouiller les commandes Le four à micro ondes doit être en mode de veille Appuyer sur OFF CANCEL arrêt annulation pendant 3 secondes jusqu à l émission de 2 signaux sonores et l affichage d un cadenas Répéter pour déverrouiller et effacer le cade...

Страница 21: ...uiront plus vite que les gros morceaux et les aliments uniformes cuiront plus également que les aliments de forme irrégulière Température de début Les aliments à température ambiante chaufferont plus vite que les aliments réfrigérés et les aliments réfrigérés chaufferont plus vite que les aliments congelés Composition et densité Les aliments à haute teneur en gras et en sucre atteindront une tempé...

Страница 22: ...ntes Ne pas laisser le papier d aluminium ou le métal toucher les parois le plafond ou le fond de la cavité intérieure Toujours utiliser le plateau rotatif Ne pas permettre un contact avec un autre objet en métal durant la cuisson Utilisation à éviter Les ustensiles de cuisson et de cuisson au four en métal l or l argent l étain les thermomètres à viande non approuvés les brochettes les attaches l...

Страница 23: ... Appuyer sur COOK TIME durée de cuisson Le compte à rebours fera une pause pendant quelques secondes Entrer la nouvelle durée de cuisson et appuyer sur START mise en marche ou attendre quelques secondes que le compte à rebours reprenne Modification de la puissance de cuisson Appuyer à plusieurs reprises sur COOK POWER puissance de cuisson pour faire défiler les niveaux de puissance de cuisson Appu...

Страница 24: ... ondes Les programmes préréglés conviennent aux sachets de 3 5 oz 99 g 3 oz 85 g et 1 75 oz 50 g Pour des sacs dont les dimensions ne figurent pas dans cette section suivre les indications de l emballage REMARQUE Les durées de cuisson du maïs à éclater sont programmées pour cuire 15 secondes de plus que la durée nécessaire à l éclatement Au cours de cette période de 15 secondes le magnétron est ét...

Страница 25: ...sur REHEAT réchauffage 3 Sélectionner l aliment en entrant le numéro indiqué dans le tableau ou Appuyer à plusieurs reprises sur REHEAT pour faire défiler la liste des aliments 4 Entrer la quantité 5 Appuyer sur START mise en marche L afficheur procède à un compte à rebours de la durée de réchauffage À la fin du programme END fin apparaît sur l afficheur et les signaux de fin de programme sont émi...

Страница 26: ...viande 2 pour la volaille ou 3 pour le poisson ou Appuyer à plusieurs reprises sur DEFROST pour faire défiler la liste des aliments 4 Entrer le poids en livres Les viandes et la volaille peuvent être réglées de 0 2 à 6 6 lb 90 g à 3 kg Le poisson peut être réglé de 0 2 à 4 4 lb 90 g à 2 kg 5 Appuyer sur START mise en marche Le compte à rebours de la durée de décongélation s affiche À la fin du pro...

Страница 27: ...er à l eau propre et sécher avec un linge doux sans charpie Odeurs Jus de citron ou vinaigre Faire chauffer une tasse 250 mL d eau avec 1 c à soupe 15 mL de jus de citron ou de vinaigre pendant 2 à 5 minutes dans le four à micro ondes Couvercle orifice d introduction des micro ondes Pour éviter la formation d arcs et les dommages causés au four à micro ondes le couvercle orifice d introduction des...

Страница 28: ...re vers l arrière soulever l extrémité avant et tirer le filtre 4 Installer un nouveau filtre à charbon 5 Réinstaller la grille d évent et les vis de montage Remplacementdelalampe de la table de cuisson La lampe de la table de cuisson est une ampoule à culot candélabre Voir la section Assistance ou service pour une nouvelle commande Remplacement 1 Débrancher le four à micro ondes ou déconnecter la...

Страница 29: ...produit lorsque l alimentation électrique allume et éteint le magnétron par intermittence La porte du four à micro ondes semble gondolée Ceci est normal et n affecte pas la performance Le plateau rotatif ne fonctionne pas Le ruban adhésif a t il été retiré du plateau rotatif Voir la section Plateau rotatif Le plateau rotatif est il bien en place S assurer que le plateau rotatif est à l endroit et ...

Страница 30: ...te de service Si vous avez encore besoin d aide suivre les instructions ci dessous Lors d un appel veuillez connaître la date d achat le numéro de modèle et le numéro de série au complet de l appareil Ces renseignements nous aideront à mieux répondre à votre demande Si vous avez besoin de pièces de rechange Si vous avez besoin de commander des pièces de rechange nous vous recommandons d employer u...

Страница 31: ...é dans un pays autre que le pays où il a été acheté CLAUSE D EXONÉRATION DE RESPONSABILITÉ AU TITRE DES GARANTIES IMPLICITES LIMITATION DES RECOURS LE SEUL ET EXCLUSIF RECOURS DU CLIENT DANS LE CADRE DE LA PRÉSENTE GARANTIE LIMITÉE CONSISTE EN LA RÉPARATION PRÉVUE CI DESSUS LES GARANTIES IMPLICITES Y COMPRIS LES GARANTIES APPLICABLES DE QUALITÉ MARCHANDE ET D APTITUDE À UN USAGE PARTICULIER SONT L...

Страница 32: ...pool Corporation All rights reserved Tous droits réservés IKEA is a registered trademark of Inter Ikea Systems B V IKEA est une marque déposée de Inter Ikea Systems B V 4619 652 68892 7 06 Printed in China Imprimé en Chine ...

Отзывы: