4-14
REMOVING THE ELECTRONIC CONTROL BOARD
AND THE TOUCH CONTROL ASSEMBLY
Electrical Shock Hazard
Disconnect power before servicing.
Replace all parts and panels before
operating.
Failure to do so can result in death or
electrical shock.
WARNING
1. Unplug microwave oven or disconnect
power.
2. Remove the microwave oven from its
mounting location (see page 2-4 for the
procedure and do procedure in reverse).
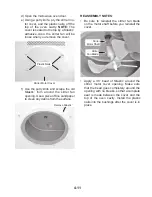
3. Remove front air vent by pulling forward
at top of air vent and remove the air vent
from the oven.
4. Remove the top screw from the control
panel. Open the oven door, lift the panel,
unhook the side latching tabs from the
slots, and tilt the panel forward.
5. Disconnect the 3-wire humidity sen-
sor cable (red, white and black) from
humidity sensor connector P1.
Humidity Sensor
Connector P1
P2
Relay
BN
RD
P4
P3
Green Ground
Wire Screw
6. Lift the control panel and unhook the bot-
tom bracket from the slot in the chassis.
Rotate the panel so you can access the
electronic control board wiring.
7. Disconnect wire connectors P2 through
P4 from the electronic control board.
8. Disconnect the red and brown wires from
terminals of relay 4903.
9. Remove the green ground wire screw and
remove the control panel.
Front Air Vent
Control Panel Screw
Содержание GH4184XSB
Страница 51: ...4 28 NOTES ...
Страница 68: ...7 5 NOTES ...
Страница 69: ...7 6 NOTES ...
Страница 71: ......


