14
LIGHT button
14
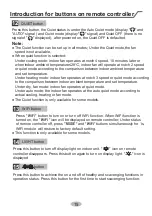
Press this button to turn off display light on indoor unit. " " icon on remote
controller disappears. Press this button again to turn on display light. " " icon is
displayed.
Introduction for buttons on remote controller
15
Press this button to achieve the on and off of healthy and scavenging functions in
operation status. Press this button for the first time to start scavenging function;
button
WiFi button
13
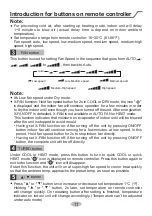
QUIET button
12
Press this button, the Quiet status is under the Auto Quiet mode (display " " and
"AUTO" signal ) and Quiet mode (display " " singal) and Quiet OFF (there is no
signal of " " displayed), after powered on, the Quiet OFF is defaulted.
Note:
● The Quiet function can be set up in all modes; Under the Quiet mode,the fan
speed is not available.
● When quiet function is selected:
● The Quiet function is only available for some models.
Under cooling mode: indoor fan operates at notch 4 speed. 10 minutes later or
when indoor ambient temperature≤28
Ƈ
, indoor fan will operate at notch 2 speed
or quiet mode according to the comparison between indoor ambinet temperature
and set temperature.
Under heating mode: indoor fan operates at notch 3 speed or quiet mode according
to the comparison between indoor ambient temperature and set temperature.
actual cooling, heating or fan mode.
Under dry, fan mode: indoor fan operates at quiet mode.
Under auto mode: the indoor fan operates at the auto quiet mode according to
● This function is only available for some models.
Press "
WiFi
" button to turn on or turn off WiFi function. When WiFi function is
turned on, the "
WiFi
" icon will be displayed on remote controller; Under status
of remote controller off, press "MODE" and "
WiFi
" buttons simultaneously for 1s,
WiFi module will restore to factory default setting.
1
Function introduction for combination buttons
Energy-saving function
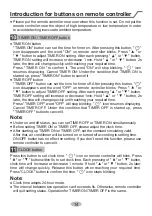
Under cooling mode, press "TEMP" and "CLOCK" buttons simultaneously to
start up or turn off energy-saving function. When energy-saving function is started
up, "SE" will be shown on remote controller, and air conditioner will adjust the set
temperature automatically according to ex-factory setting to reach to the best
energy-saving effect. Press "TEMP" and "CLOCK" buttons simultaneously again to
exit energy-saving function.
Note:
Ɣ8QGHUHQHUJ\VDYLQJIXQFWLRQIDQVSHHGLVGHIDXOWHGDWDXWRVSHHGDQGLWFDQ¶W
be adjusted.
16
TEMP button
By pressing this button, you can see indoor set temperature, indoor ambient temp-
erature or outdoor ambient temperature on indoor unit¶s display. The setting on
remote controlleris selected circularly as below:
no display
Ɣ:KHQVHOHFWLQJRUQRGLVSOD\ZLWKUHPRWHFRQWUROOHr, temperature indicator
on indoor unit displays set temperature.
Ɣ:KHQVHOHFWLQJZLWKUHPRWHFRQWUROOHr, temperature indicator on indoor unit
displays indoor ambient temperature.
Ɣ:KHQVHOHFWLQJZLWKUHPRWHFRQWUROOHr, temperature indicator on indoor unit
displays outdoor ambient temperature.
Note:
ƔOutdoor temperature display is not available for some models. At that time, indoor
unit receives " " signal, while it displays indoor set temperature.
Ɣ,W¶s defaulted to display set temperature when turning on the unit.There is no
display in the remote controller.
Ɣ2QO\IRUWKHPRGHOVZKRVHLQGRRUXQLWKDVGXDOGLVSODy.
Ɣ:KHQVHOHFWLQJGLVSOD\LQJRILQGRRURUoutdoor ambient temperature, indoor
temperature indicator displays corresponding temperature and automatically turn
WRGLVSOD\VHWWHPSHUDWXUHDIWHUWKUHHRU¿YHVHFRQGV
LCD displays " ". Press the button for the second time to start healthy and
scavenging functions simultaneously; LCD displays " " and " " . Press this
button for the third time to quit healthy and scavenging functions simultaneously.
Press the button for the fourth time to start healthy function; LCD display " " .
Press this button again to repeat the operation above.
ƔThis function is applicable to partial of models.
16
controller is selected circularly as below:
Содержание ASH09000R
Страница 13: ...Introduction for buttons on remote controller 10 Note ...
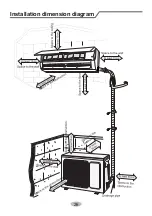
Страница 29: ...26 Installation dimension diagram ...
Страница 82: ...室內機的安裝 79 持 ...
Страница 86: ...室內機的安裝 83 ...


