


page 3 – 3
EDGE Network / Jan 2016
E D G E G U I
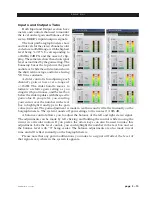
Both of the System Info and Devices Panes are relocatable within the GUI window
by clicking on the Pane’s button and dragging the Pane to the new location. You can even
drag one or both of these Panes outside of the GUI window, a handy feature if you have
two monitors. To bring a Pane back into the GUI, double‑click its title bar.
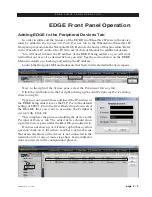
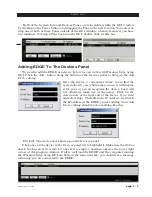
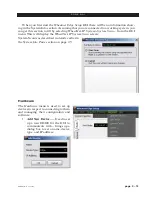
Adding EDGE To The Devices Panel
We need to add the EDGE as a device before we can work with Wheatnet Edge Setup
GUI. Click the Add... button along the bottom of the Devices panel to bring up the Add
Device dialog:
Give the device a convenient Name: (note that the
system doesn’t care what name you use; it will display
it for you so you can recognize the device, but it will
not otherwise make use of the name). Click on the
down arrow at the right end of the Device Type:
field
and select Edge
. Then fill in the
IP Address:
field with
the IP address of the EDGE you are adding. Your Add
Device dialog should look something like this:
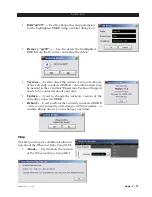
Click Ok. The device now shows up on the Devices panel.
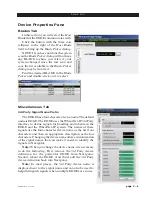
Click once on the device in the Devices panel list to highlight it. Make sure the Online
check box has an X in it (click it once if it is empty), and then observe the lower right
corner of the program window. If all is well and the EDGE and the computer running
the Wheatnet Edge Setup GUI are both on the same network, you should see a message
indicating you are connected to the EDGE.