


11
Assembly Instructions
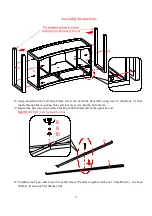
21.
Now, go back and tighten all cam locks and screws, make sure that all the parts are tight and there are
no gaps between the parts, this will help keep the unit square.
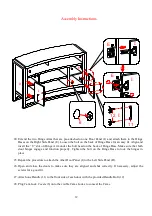
22.
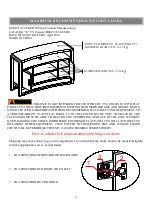
Ask for assistance to stand the unit upright. Unfold the Back Panel (M) and position it to the back edges
of the assembled unit. Make sure that the overlaps on the panels are even all the way
around.
Secure the
Back Panel (M) in place using the 15 mm
Screws (5).
Note: We recommend attaching back panel with the screws at the corners first.
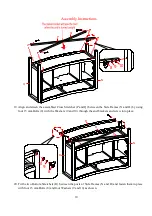
23.
Insert four Shelf Pins (13) into the desired holes in the sides of each compartment. Make sure you place
the four Shelf Pins in the same level so the shelf is not tilted. Tilt and rest the Shelves (J, K and L) onto
the Shelf Pins (13).
D
E
F
G
K
J
L
13
A
E
B
C
D
M
M
5