12
Operation
Inserting/Replacing the Batteries
(not included)
1. Open the battery compartment (4) located at the rear side of the
lamp.
2. Insert 3 fresh batteries of the type LR06 (AA) into the battery
compartment. Pay attention to the proper polarity of the batteries.
The polarity is printed at the battery compartment.
3. Close the battery compartment with the cover.
Replace the batteries when the light of the LEDs gets weaker.
Wall Mounting
Attach the included mounting bracket at the desired location on
the wall with adhesive tapes or hook and loop tape and attach the
lamp to the mounting bracket. You can also use screws or nails
which lock into the mounting holes at the back of the lamp. The
lamp can be installed horizontally, vertically or overhead at the
ceiling.
Put the lamp on the mounting bracket and push it to the left until
it audibly snaps into place.
You can remove the lamp quickly and easily at any time from the
mounting bracket in case you want to exchange the batteries.
Operation
1. Tilt the two LED arrays to the desired angle.
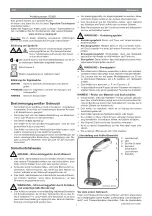
2. Set the switch (1) to the position “ON” to turn on the light.
3. Set the switch (1) to “AUTO”. In Darkness the lamp will light up
each time the brightness and motion sensor (2) detects motion
within its field of view. The light will turn off after 30 seconds.
Содержание 84 54 33
Страница 4: ...4 bersicht Overview 3 2 3 4 1...
Страница 18: ...18 Notizen Notes...


