background image


18 

Using

Maintenance and Cleaning the Pump 

For optimum performance of the pump and depending on the water contamina-
tion, you have to wash the pump occasionally with warm water. 
1.  Disconnect the pump from the solar module. 
2.  Open the filter cover (13) by levering it from the pump. Use a screwdriver or 

similar and carefully open the cover. Please do not use force while disassem-
bling or assembling the pump. The parts are very fragile and can break easily. 

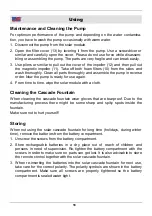
3.  Use pliers or similar to pull out the cover of the impeller (12) and then pull out 

the magnetic impeller (11). Take off both foam filters (10) from the sides and 
wash thoroughly. Clean all parts thoroughly and assemble the pump in reverse 
order. Now the pump is ready for use again. 

4.  From time to time, wipe the solar module with a cloth. 

Cleaning the Cascade Fountain 

When cleaning the cascade fountain wear gloves that are tearproof. Due to the 
manufacturing process there might be some sharp and spiky spots inside the 
fountain.  
Make sure not to hurt yourself! 

Storing 

When not using the solar cascade fountain for long time (holidays, during winter 
time), remove the batteries from the battery compartment. 
1.  Unscrew the screws from the battery compartment. 
2. Store rechargeable batteries in a dry place out of reach of children and 

persons in need of supervision. Re-tighten the battery compartment with the 
screws in order to make sure no parts can get lost. It is also advisable to store 
the remote control together with the solar cascade fountain. 

3.  When re-inserting the batteries into the solar cascade fountain for next use, 

take care for the correct polarity. The polarity symbols are shown in the battery 
compartment. Make sure all screws are properly tightened so the battery 
compartment is sealed water tight. 

Содержание 820692

Страница 1: ...Instruction Manual Solar Kaskadenbrunnen STYLE mit Fernbedienung LEDs Artikel Nr 82 06 92 Solar Cascade Fountain STYLE with Remote Control LEDs Article No 82 06 92 Bedienungsanleitung...

Страница 2: ...II bersicht Overview 9 5 4 1 8 7 6 10 12 13 14 11 10 3 2 15...

Страница 3: ...6 Stromkabel f r Pumpe Power Cord for Pump 7 Wasserschlauch Water Hose 8 Akkufach Rechargeable Battery Compartment 9 Fernbedienung Remote Control 10 Schaumstofffilter Foam Filter 11 Laufrad Impeller...

Страница 4: ...Page 18 Replacing the Batteries of the Remote Control page 19 Technical Data Page 20 Sicherheitshinweise Seite 1 Vor der ersten Benutzung Seite 9 Lieferumgang Seite 9 Funktionsweise Seite 9 Aufbau Sei...

Страница 5: ...erfl che des Solarmoduls mit Vorsicht Punktf rmige Belastungen oder Kratzer k nnen die Solarzellen zerst ren Sch tzen Sie den Solarbrunnen vor Frost In kalten Wintermonaten muss der Artikel entleert a...

Страница 6: ...uch aus dem Ger t z B berwinterung Bei Besch digungen an der Pumpe oder am Solarmodul darf das Ger t nicht weiter benutzt werden und muss von einer Fachkraft repariert werden Zerlegen Sie das Ger t ni...

Страница 7: ...odule with care Punctual loads or scratches will damage the solar module Protect the solar cascade fountain from frost Empty the fountain during winter time and store it in a dry and frost free place...

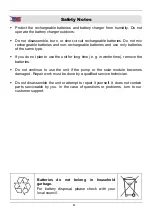
Страница 8: ...you do not plan to use the unit for long time e g in winter time remove the batteries Do not continue to use the unit if the pump or the solar module becomes damaged Repair work must be done by a qual...

Страница 9: ...avec soin Les charges ponctuelles et les rayures peuvent d truire les cellules Prot ger la fontaine solaire contre le gel tre drain s au cours des mois froids de l hiver le produit doit tre dans un en...

Страница 10: ...h rique par exemple en hiver En cas de dommages sur le module de la pompe ou l nergie solaire l appareil ne peut pas tre utilis et doit tre r par par un professionnel Ne d montez l appareil et n essay...

Страница 11: ...la superficie del modulo solare con cura Carichi puntuali e graffi pu distruggere le cellule Proteggere la fontana solare dal gelo Essere tenuti svuotato durante i mesi invernali il prodotto di un lu...

Страница 12: ...non in uso dal dispositivo ad esempio d inverno In caso di danni al modulo pompa o solare il dispositivo non pu essere utilizzata e deve essere riparato da un professionista Non smontare mai il banco...

Страница 13: ...kus aufgeladen Wenn Sie die Fernbedienung bet tigen beginnt die eingebaute Wasserpumpe zu arbeiten und mithilfe der verschiedenen Wassersprinkler k nnen Sie das Wasserspiel nach Wunsch ver ndern Dabei...

Страница 14: ...n stoppt der Betrieb automatisch Bei Bedarf k nnen Sie den Solar Kaskadenbrunnen vorzeitig ausschalten indem Sie erneut die Taste A dr cken 9 Beim Dr cken der Taste B auf der Fernbedienung k nnen Sie...

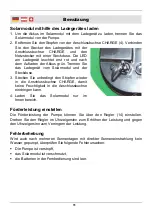
Страница 15: ...Steckdose 3 Stecken Sie unbedingt den Stopfen wieder in die Anschlussbuchse CHARGE damit keine Feuchtigkeit in die Anschlussbuchse eindringen kann 4 Laden Sie das Solarmodul nur im Innenbereich F rde...

Страница 16: ...as Solarmodul mit einem Tuch abwischen Reinigung des Kaskadenbrunnens Beim Reinigen des Artikels tragen Sie unbedingt rei feste Handschuhe da sich aufgrund der Verarbeitung teilweise scharfe und spitz...

Страница 17: ...fnen Sie das Geh use 2 Tauschen Sie die leeren Batterien durch neue Batterien des gleichen Typs und Abmessung Typ Knopfzellen LR 936 bzw AG9 aus Tipp Stecken Sie die neuen Knopfzellen nach M glichkeit...

Страница 18: ...rockenlauf Nein Fernbedienung Stromversorgung 3x LR 936 AG9 Frequenz 433 80 MHz Solar Modul Art der Zelle Monokristallin Silicon Laden 6 3 V 0 4 A Pumpe 6 V 1 W Batterien 4x 1 2 V HR 6 1200 mAh Ni Mh...

Страница 19: ...sunlight is shining directly on the solar module Thus the rechargeable batteries can be charged When pressing the remote control the water pump starts operating The different included water sprinkler...

Страница 20: ...op automatically If desired stop the solar cascade fountain by pressing the button A again 9 When pressing the button B on the remote control you can adjust the intensity of the water jets Each time y...

Страница 21: ...tery charger from the solar module and the wall socket 3 It is very important to re insert the plug into the charging socket CHARGE in order to make sure no moisture can enter the socket 4 Always char...

Страница 22: ...loth Cleaning the Cascade Fountain When cleaning the cascade fountain wear gloves that are tearproof Due to the manufacturing process there might be some sharp and spiky spots inside the fountain Make...

Страница 23: ...y open the housing 2 Replace the spent batteries with new ones of the same type and dimensions Type Button Cells LR 936 resp AG9 Hint If possible place the new button cells in the transparent tube The...

Страница 24: ...P68 Dry Run No Remote Control Power Supply 3x LR 936 AG9 Frequency 433 8 MHz Solar Module Type of Cell Monocrystalline Silicon Charge 6 3 V 0 4 A Pump 6 V 1 W Batteries 4x 1 2 V HR 6 1200 mAh Ni Mh LE...

Страница 25: ...rungen festgelegt sind Hagen den 3 April 2012 Thomas Klingbeil Qualit tsbeauftragter We the Westfalia Werkzeugcompany Werkzeugstra e 1 D 58093 Hagen declare by our own responsibility that the product...

Страница 26: ...h Internet www westfalia net Kundenbetreuung Customer Services Werter Kunde bitte helfen Sie mit Abfall zu vermeiden Sollten Sie sich einmal von diesem Artikel trennen wollen so bedenken Sie bitte das...

Отзывы: