CALIBRATION
Upon powering the unit up, and all has
gone well, you should be able to apply
a gate to each of the 6 inputs and get a
sound on the corresponding output, as
well as a blink of the corresponding
LED. Their is only 1 calibration item for
this board:
VCA CVR Trim
1) Plug the MIX audio out to a means
of listening over speakers.
2) Make sure none of the 6 gate inputs
are connected.
3) Turn the MIX knob to the center and
the ACCENT knob to full clockwise.
4) Connect a gate to the ACCENT input
and trigger this gate over and over
while you listen to the output from
step (1). Turn the trim pot TP201 (the
only trump pot!) until you minimize
any thump sound from the accent
bleeding through. You may have to
turn your speakers up a bit to notice
it.
Calibration is now complete!
At this point, the build is basically
finished. If you haven’t already, make
sure all the screws are tight and install
the front panel with all the pot nut/
washers and jack nut/washers. Install
the knobs as shown in the finished
picture on the next page.
Have fun with your new module and
thank you!!
The following pages are for reference
and include photos of the finished unit
and PCBs, as well as the electrical
schematics for diagnosis/
troubleshooting.
© 2020 Weston Precision Audio
11
Содержание AD110
Страница 12: ...REF Finished Unit 2020 Weston Precision Audio 12...
Страница 13: ...REF PCB Pics Finished 2020 Weston Precision Audio 13...
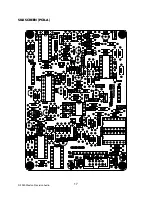
Страница 17: ...SILKSCREEN PCB A 2020 Weston Precision Audio 17...
Страница 18: ...SILKSCREEN PCB B 2020 Weston Precision Audio 18...
Страница 19: ...SILKSCREEN PCB C 2020 Weston Precision Audio 19...


