background image


U

SING 

Y

OUR 

E

LECTRIC 

C

AN 

O

PENER


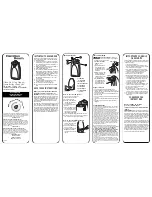
To open cans: 
1.  Place can opener on a dry, level surface. 
2.  Plug cord into electrical outlet. 
3.  Raise piercing lever. 
4.  Place rim of can firmly under can guide pin and against the geared wheel. 
5.  Press piercing lever all the way down. 
6.  The motor will begin turning the can and cutting the lid. It is not necessary to 

hold the piercing lever down or to hold the can during the cutting action. Large 

cans may need to be guided while being opened. 

7.  The motor will automatically stop when the can is open. 
8.  Remove the can from the opener. Check the contents of the can to make sure 

no pieces of label or metal shavings may have fallen in. Carefully remove lid 

from magnetic lid holder. 


To sharpen knives: 
1.  Place cutting edge of knife in the knife slot located on the back of the 

can opener. 

2.  Draw the knife blade through the slot several times. Always direct blade away 

from yourself and others. 

3.  Clean knife after sharpening. 

NOTE: Serrated blades should never be inserted into this appliance. 

To open bottles: 
1.  Hold top of can opener to stabilize the unit. Open bottles slowly to avoid spilling 

contents. 

Cord 

Storage 

Knife 

Sharpener 

Piercing Lever/ 

Cutting Attachment 

Magnetic Lid 

Holder 

Bottle Opener

Содержание Electric Can Opener

Страница 1: ...NER Instruction Manual Register this and other Focus Electrics products through our website www registerfocus com Safety Precautions 2 Using Your Electric Can Opener 3 Cleaning Your Electric Can Opene...

Страница 2: ...attempt to repair this appliance yourself A short power supply cord is provided to reduce risks resulting from becoming entangled in or tripping over a longer cord Longer extension cords are available...

Страница 3: ...n the can is open 8 Remove the can from the opener Check the contents of the can to make sure no pieces of label or metal shavings may have fallen in Carefully remove lid from magnetic lid holder To s...

Страница 4: ...the can opener in water 5 To re assemble hold the lever at an angle and slide the cutting head attachment shaft into the hole in the can opener body lower lever HELPFUL HINTS If there is a bump dent o...

Страница 5: ...the original purchase date will be required for all warranty claims hand written receipts are not accepted You may also be required to return the appliance for inspection and evaluation Return shippi...

Страница 6: ...ez ce produit et d autres produits Focus Electrics sur notre site Internet www registerfocus com Pr cautions de S curit Importantes 2 Utilisation de Votre Ouvre Bo te lectrique 3 Nettoyage de Votre Ou...

Страница 7: ...ner un incendie une lectrocution ou une blessure N utilisez pas cet appareil en ext rieur Ne laissez pas le cordon pendre depuis l extr mit de la table ou du plan de travail ou entrer en contact avec...

Страница 8: ...s pression de type a rosol N ouvrez pas de bo tes m talliques contenant des liquides inflammables comme des fluides pour briquets Pour une utilisation domestique uniquement CONSERVEZ CES INSTRUCTIONS...

Страница 9: ...z le cordon de la prise secteur 2 Pour retirer l accessoire de d coupe soulevez le levier de percement et tirez le doucement vers vous 3 Lavez l accessoire de d coupe l eau chaude savonneuse rincez et...

Страница 10: ...n justificatif prouvant la date d achat d origine sera exig pour toutes les demandes de prise en charge dans le cadre de la garantie les factures manuscrites ne sont pas accept es Focus Electrics n es...

Страница 11: ...iones Registre este y otros productos Focus Electrics LLC a trav s de nuestro sitio web www registerfocus com Precauciones Importantes 2 C mo Utilizar su Abrelatas El ctrico 3 Limpieza de su Abrelatas...

Страница 12: ...ue sobre o cerca de un calentador el ctrico o de gas ni dentro de un horno caliente Para desconectar desenchufe del tomacorriente No utilice el artefacto electrodom stico para usos distintos del indic...

Страница 13: ...a firmemente debajo del perno gu a y contra la rueda engranada 5 Presione la palanca de perforaci n completamente hacia abajo 6 El motor comenzar a girar la lata y a cortar la tapa No es necesario man...

Страница 14: ...uelo y s quelo a fondo o el accesorio de corte puede colocarse en la cesta superior del lavavajillas 4 Limpie el cuerpo del abrelatas y la zona detr s del accesorio de corte con un pa o h medo Nunca s...

Страница 15: ...ico a la service focuselectrics com Los gastos de devoluci n no son reembolsables Para todas las reclamaciones de garant a se requerir un recibo que demuestra la fecha de compra original los recibos e...

Страница 16: ...NOTES NOTAS...

Отзывы: