


OPERATION
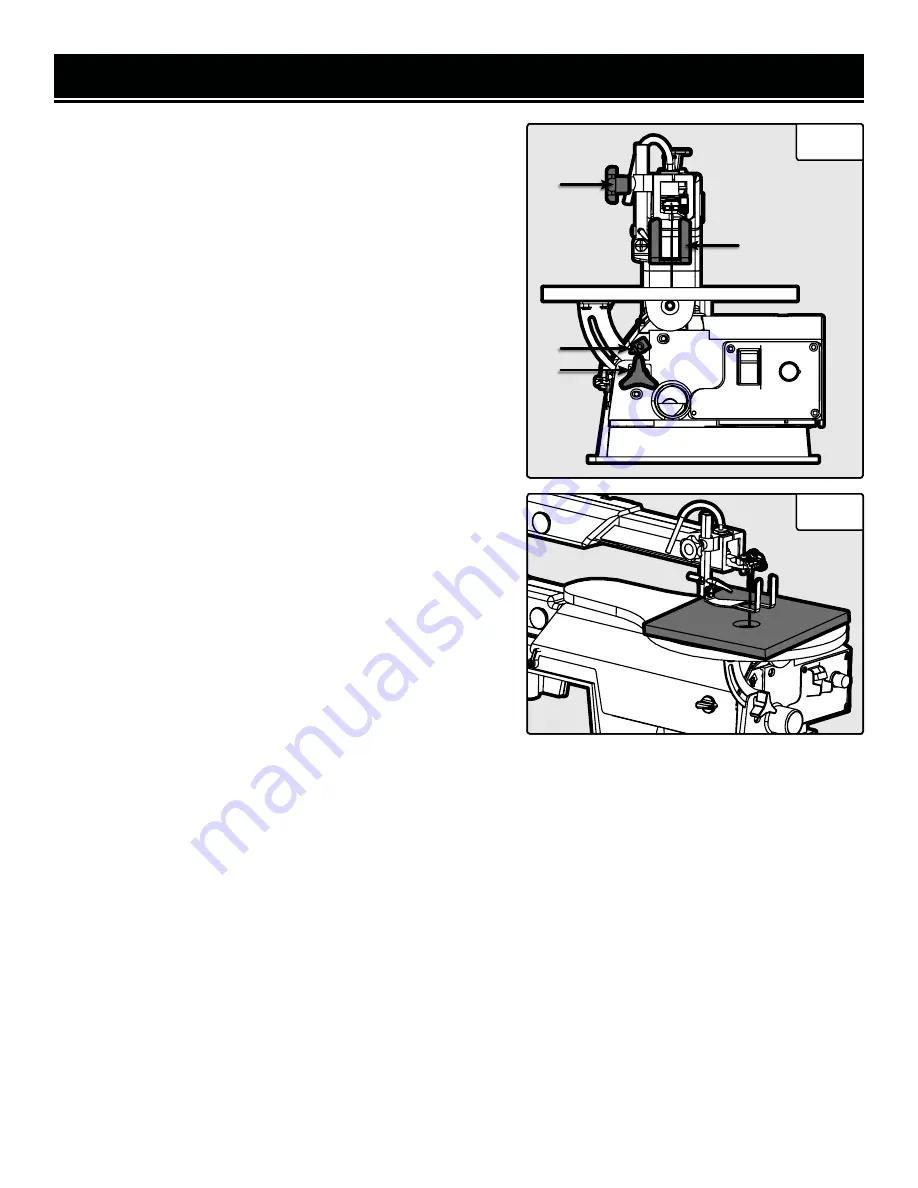
ANGLE CUTTING (BEVELING)
1. Layout or secure design to workpiece.
2. Move the blade guard foot (Fig. 16 - 1) to the highest posi-
tion by loosening the height adjustment knob (Fig. 16 - 2) and
retighten.
3. Tilt the table to the desired angle by loosening the table bevel
lock knob (Fig. 16 - 3). Move the table to the proper angle using
the degree scale and the pointer (Fig. 16 - 4).
4. Tighten the table bevel lock knob (Fig. 16 - 3).
5. Loosen the blade guard screw (Fig. 16 - 2), and tilt the blade
guard (Fig. 16 - 1) to the same angle as the table. Retighten the
blade guard screw.
6. Position the workpiece on the right side of the blade. Lower
the blade guard foot against the surface by loosening the height
adjustment knob. Retighten.
7. Follow steps 5 to 7 under Freehand cutting.
INTERIOR CUTTING & FRETWORK (FIG. 17)
1. Lay out the design on the workpiece. Drill a 1/4" pilot hole in
the workpiece.
2. Remove the blade. See “Blade removal and installation” on
p. 13.
NOTE:
If you are not changing blades, only remove the blade
from the upper blade holder. Leave it installed in the lower blade
holder. If you are changing blades, install the new blade in the
lower blade holder. Do not secure it in the upper blade holder
yet.
3. Place the workpiece on the saw table, threading the blade
through the hole in the workpiece. Secure the blade in the upper
blade holder, as directed in “Blade Removal and Installation” on
p. 13.
4. Follow steps 3-7 under “Freehand cutting” on p. 15.
5. When finished making the interior scroll cuts, simply turn the
scroll saw OFF. Unplug the saw and relieve blade tension before
removing the blade from the upper blade holder. Remove the
workpiece from the table.
Fig. 16
2
Fig. 17
1
4
3
16
Содержание 3922
Страница 24: ...THANKS FOR REMEMBERING V 2019 11 12 ...