background image


FR


FR


FR


ES


PT


NL


SV


DK


FI


GR


TR


CZ


PL


HU


SK


SL


EE


LV


LT


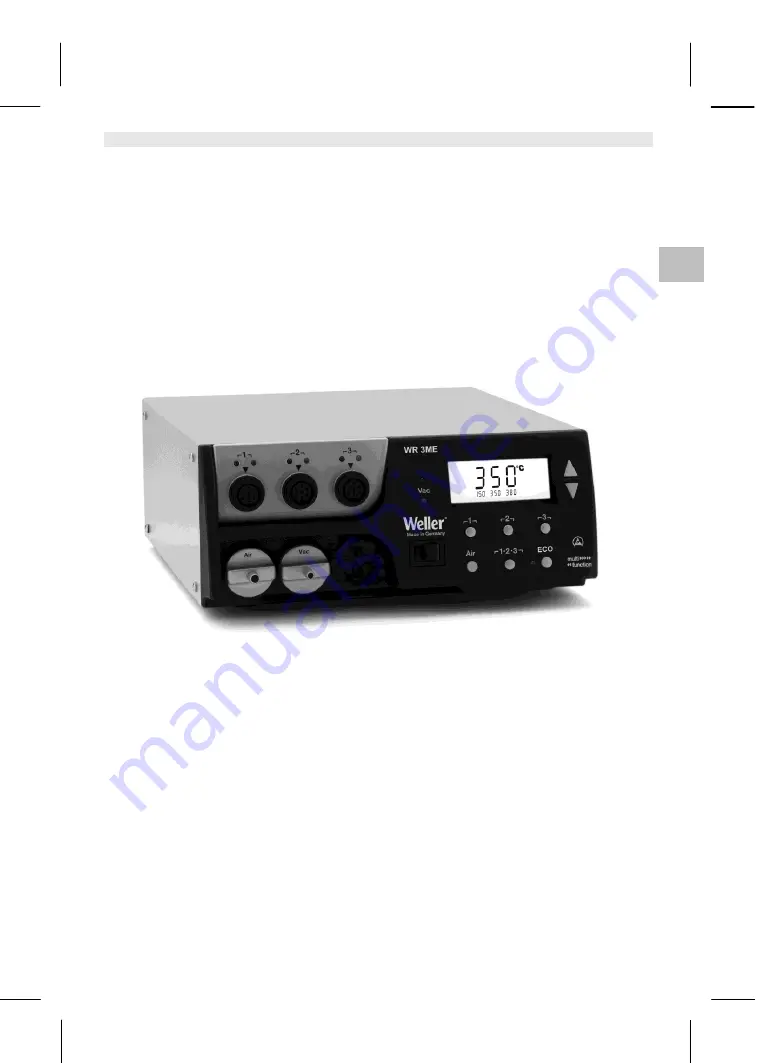
WR 3ME 
 

Notice d'utilisation 

GB


Содержание WR 3ME

Страница 1: ...WR 3ME Operating Instructions Istruzioni per l so Manual de uso...

Страница 2: ...EN FR IT ES PT NL SV DK FI GR TR CZ PL HU SK SL EE LV LT WR 3ME Operating Instructions EN...

Страница 3: ...hannel selection 11 Hot air setting button Air 12 Mains power switch 13 Connection vacuum Vac 14 Connection hot air Air 15 Connector sockets soldering tool channel 1 2 3 16 Temperature display 17 Temp...

Страница 4: ...of the device These instructions contain important information which will help you to start up operate and service the WR 3ME repair station safely and correctly as well as to eliminate simple faults...

Страница 5: ...ied use Always use the repair station WR 3ME exclusively for the purpose specified in the Operating Instructions namely soldering under the conditions specified here Intended use of the WR 3ME repair...

Страница 6: ...range from 50 C to 550 C 150 F 999 F depending on which tool is connected Setpoint and actual values are displayed in digital form Three temperature buttons are used to select fixed temperatures direc...

Страница 7: ...n the tool WP 65 100 C 450 F 212 F 850 F WP 80 WP 120 50 C 450 C 150 F 850 F WSP 150 50 C 550 C 150 F 950 F WP 200 50 C 550 C 150 F 950 F WMRT WMRP 100 C 450 C 200 F 850 F DSX 80 DXV 80 50 C 450 C 150...

Страница 8: ...ring bit is actuated and cause injuries Never connect the vacuum hose to the Air nipple 1 Carefully unpack the device 2 Connect the soldering tools as follows Connect the hot air pencil HAP with air h...

Страница 9: ...in smaller script the permanently programmed temperatures Or Tap on the 1 2 3 button until the desired channel is displayed The current tool temperature then appears in the display The status with th...

Страница 10: ...hannel separately by selecting three preset temperature values fixed temperatures Factory settings 1 150 C 300 F 2 350 C 662 F 3 380 C 716 F 1 Select a channel 3 fixed temperatures are shown in the di...

Страница 11: ...rry out the soldering work in accordance with the operating instructions of your connected soldering tool 7 Special functions The special functions are divided into 2 menu levels Menu 1 with setting o...

Страница 12: ...channel using the AIR 11 button Resetting the special functions to the factory settings 1 Press and hold down button 3 2 Then press the UP and DOWN buttons simultaneously FSE appears in the display T...

Страница 13: ...time 1 Select the menu item SETBACK in Menu 1 2 Set the setback value with the UP or DOWN button 3 Proceed to the next menu item with the button 1 back or 2 forward Setting the automatic switch off t...

Страница 14: ...erature2 0 Time Soldering tool is switched off in the holder3 after the OFF time has elapsed ON Time Soldering tool is controlled down in the holder3 to the STANDBY temperature2 and is switched off af...

Страница 15: ...e temperature unit from C to F or vice versa 1 Select the menu item C F in Menu 1 2 Set the temperature unit with the UP or DOWN button 3 Proceed to the next menu item with the button 1 back or 2 forw...

Страница 16: ...FF is displayed results in the menu item being exited without a stored lock code 2 Set a 3 digit lock code with the UP or DOWN button 3 Press button 3 for 5 seconds The code is stored The padlock symb...

Страница 17: ...tification ID code so that it can clearly identified 1 Select the menu item REMOTE ID in Menu 2 2 Enter an ID with the UP or DOWN button possible values 0 999 3 Proceed to the next menu item with the...

Страница 18: ...t the menu item FCC in Menu 2 3 Press the UP button Calibration point 450 C 842 F is selected The soldering tip is now heated to 450 C 842 F The control indicator flashes as soon as the temperature is...

Страница 19: ...the next menu option using the 1 back or 1 2 forwards button After activating the ECO button 8 it can be used to set all 2 channels to Standby mode The green LED 9 lights up and the channels are set t...

Страница 20: ...ings on page 15 9 Care and maintenance of the WR 3ME 9 1 Servicing the filter Regularly check the main filter for VACUUM and AIR and replace if necessary WARNING Vacuum pump will be destroyed if opera...

Страница 21: ...HAP Air hose not or incorrectly connected Connect air hose to AIR nipple No vacuum at unsoldering tool Vacuum hose not or incorrectly connected Unsoldering nozzle clogged Connect vacuum hose to Vac ni...

Страница 22: ...50 Soldering bath 150 W T005 27 028 99WHP 80 Preheating plate 80 W T005 13 182 99DXV 80 Desoldering iron set 80 W T005 13 183 99DSX 80 Desoldering iron set 80 W T005 13 198 99DSX 120 Desoldering iron...

Страница 23: ...source of the defect Weller Tools will repair or replace products found to be defective not caused by a part component or accessory manufactured by another company during the warranty period Contact W...

Страница 24: ...ES ES ES ES PT NL SV DK FI GR TR CZ PL HU SK SL EE LV LT WR 3ME Manual de instrucciones E...

Страница 25: ...l 11 Tecla de ajuste de aire caliente Air 12 Interruptor de red 13 Conexi n de vac o Vac 14 Conexi n de aire caliente Air 15 Conector hembra para el soldador canal 1 2 3 16 Indicaci n de temperatura 1...

Страница 26: ...to del mismo Este manual contiene importantes informaciones para facilitarle la puesta en servicio el manejo y el mantenimiento de su estaci n de reparaci n WR 3ME as como para habilitarle para que us...

Страница 27: ...WR 3ME exclusivamente para la finalidad de soldar y desoldar bajo las condiciones indicadas en el manual de instrucciones El uso previsto de la estaci n de reparaci n WR 3ME tambi n significa que uste...

Страница 28: ...rramienta conectada en un margen comprendido entre 50 C y 550 C 150 F 999 F para soldadores El valor te rico y real se muestra de forma digital Las tres teclas de temperatura sirven para la selecci n...

Страница 29: ...65 100 C 450 C 212 F 850 F WP 80 WP 120 50 C 450 C 150 F 850 F WSP 150 50 C 550 C 150 F 950 F WP 200 50 C 550 C 150 F 950 F WMRT WMRP 100 C 450 C 200 F 850 F DSX 80 DXV 80 50 C 450 C 150 F 850 F DSX...

Страница 30: ...dador pueden salir aire caliente y esta o para soldar l quido y provocar lesiones Jam s conecte la manguera de vac o a la boquilla Air 1 Desembalar el aparato cuidadosamente 2 Conectar las herramienta...

Страница 31: ...leccionar uno de los tres canales En la pantalla aparece la temperatura te rica del canal seleccionado as como las temperaturas de programaci n fija stas ltimas en letra peque a O Pulsar la tecla 1 2...

Страница 32: ...eratura 1 2 y 3 Se puede ajustar el valor te rico de temperatura para cada canal por separado mediante la selecci n de tres valores de temperatura preajustados temperaturas fijas Ajustes de f brica 1...

Страница 33: ...real del canal seleccionado Nota Al igual que sucede con las 3 temperaturas fijas tambi n es posible ajustar y seleccionar 3 caudales fijos de aire Ajustes de f brica 1 10 2 50 3 100 6 4 Soldar y deso...

Страница 34: ...en con las teclas 1 2 Volver a salir del men con la tecla 3 EXIT Cambiar el canal con la tecla AIR 11 Restaurar los ajustes de f brica de las funciones especiales 1 Pulsar y mantener pulsada la tecla...

Страница 35: ...mente 1 Seleccionar el punto de men SETBACK en el men 1 2 Ajustar el valor de Setback con la tecla UP o DOWN 3 Con la tecla 1 atr s o 2 adelante se puede cambiar al siguiente punto de men Ajustar el t...

Страница 36: ...desconecta la herramienta de soldar despu s de que haya transcurrido el tiempo OFF ON Time En el soporte 3 la temperatura de la herramienta de soldar se reduce hasta alcanzar la temperatura STANDBY 2...

Страница 37: ...emperatura de C a F o viceversa 1 Seleccionar el punto de men C F en el men 1 2 Ajustar la unidad de temperatura con la tecla UP o DOWN 3 Con la tecla 1 atr s o 2 adelante se puede cambiar al siguient...

Страница 38: ...3 No es posible cambiar ninguno de los dem s ajustes hasta que se realice el desbloqueo Bloquear la estaci n de reparaci n 1 Seleccionar el punto de men LOCK en el men 1 En la pantalla se muestra OFF...

Страница 39: ...tado var a en funci n de las boquillas de aspiraci n utilizadas Ajuste de f brica 600 mbar Ajustable 400 mbar hasta 800 mbar 1 El sistema puntas y filtros deben estar libres 2 Seleccionar el punto de...

Страница 40: ...nte 4 Comparar las temperaturas indicadas del aparato de medici n con la indicaci n de la pantalla 5 Con la tecla UP o DOWN se puede ajustar la diferencia entre el valor mostrado en el aparato de medi...

Страница 41: ...ha restaurado la calibraci n de f brica de la estaci n de reparaci n 4 Con la tecla 1 atr s o 2 adelante se puede cambiar al siguiente punto de men Activar Desactivar el cambio autom tico de canal Med...

Страница 42: ...funciones especiales Esta funci n est descrita en el apartado 7 1 Seleccionar funciones especiales men 1 Restaurar los ajustes de f brica de las funciones especiales en la p gina 11 Restaurar los ajus...

Страница 43: ...e aire a la boquilla AIR No hay vac o en la herramienta de desoldar Manguera de vac o no conectada o conectada incorrectamente Boquilla de desoldar obstruida Conectar la manguera de vac o a la boquill...

Страница 44: ...Vatios T005 27 042 99WSB 150 ba o de soldadura 150 Vatios T005 27 028 99WHP 80 placa calefactora 80 Vatios T005 13 182 99DSV 80 kit de desoldador 80 Vatios T005 33 138 99DSX 80 kit de desoldador 80 V...

Страница 45: ...en un a o despu s de la compra S lo v lido para los derechos del comprador seg n el art 478 479 BGB c digo civil alem n nicamente nos responsabilizamos de los derechos de garant a cuando la garant a d...

Страница 46: ...FR FR FR ES PT NL SV DK FI GR TR CZ PL HU SK SL EE LV LT WR 3ME Notice d utilisation GB...

Страница 47: ...ction de canal 11 Touche de r glage air chaud Air 12 Interrupteur d alimentation 13 Raccord vide Vac 14 Raccord air chaud Air 15 Douilles de raccordement outil souder canal 1 2 3 16 Affichage de temp...

Страница 48: ...strictes en termes de qualit ce qui garantit un fonctionnement irr prochable de l appareil Ce manuel d utilisation contient des informations importantes pour pouvoir effectuer la mise en service de la...

Страница 49: ...tilisez la station de r paration WR 3ME en vous conformant exclusivement au domaine d application indiqu dans la notice d utilisation pour le soudage et le dessoudage dans les conditions mentionn es i...

Страница 50: ...l outil raccord dans une plage allant de 50 C 550 C 150 F 999 F pour les outils de soudage La valeur de consigne et la valeur r elle sont affich es sous forme num rique Trois touches de temp rature p...

Страница 51: ...65 100 C 450 C 212 F 850 F WP 80 WP 120 50 C 450 C 150 F 850 F WSP 150 50 C 550 C 150 F 950 F WP 200 50 C 550 C 150 F 950 F WMRT WMRP 100 C 450 C 200 F 850 F DSX 80 DXV 80 50 C 450 C 150 F 850 F DSX...

Страница 52: ...ccord correctement de l air chaud et de l alliage base d tain liquide peuvent merger lors de l actionnement du fer souder et entra ner des blessures Ne raccordez en aucun cas le flexible vide sur le r...

Страница 53: ...ches 1 2 ou 3 pour s lectionner l un des trois canaux La temp rature de consigne du canal s lectionn appara t sur le visuel ainsi que les temp ratures fixes programm es en petite police Ou Appuyer sur...

Страница 54: ...rature l aide des touches de temp rature 1 2 et 3 La temp rature de consigne peut tre r gl e individuellement pour chaque canal en s lectionnant trois valeurs de temp rature pr r gl es temp ratures fi...

Страница 55: ...fich e apr s 3 secondes Remarque Comme avec les 3 temp ratures fixes il est aussi possible de r gler et de s lectionner 3 d bits d air fixes R glages usine 1 10 2 50 3 100 6 4 Soudage et dessoudage Ef...

Страница 56: ...e des touches 1 2 Pour quitter le menu presser la touche 3 EXIT Changer de canal avec la touche AIR 11 R initialisation des fonctions sp ciales par rapport aux r glages usine 1 Presser la touche 3 et...

Страница 57: ...1 S lectionner l option SETBACK dans le menu 1 2 R gler la valeur Setback l aide de la touche UP ou DOWN 3 Les touches 1 retour ou 2 avance permettent d acc der l option de menu suivante R glage du t...

Страница 58: ...il de soudage dans la plaque reposoir 3 est d sactiv apr s l coulement du temps OFF ON Time L outil de soudage dans la plaque reposoir 3 est ramen la temp rature STANDBY 2 puis est d sactiv apr s l co...

Страница 59: ...s F ou inversement 1 S lectionner l option C F dans le menu 1 2 R gler l unit de temp rature l aide de la touche UP ou DOWN 3 Les touches 1 retour ou 2 avance permettent d acc der l option de menu sui...

Страница 60: ...i s jusqu au d verrouillage Verrouillage de la station de r paration 1 S lectionner l option LOCK dans le menu 1 L affichage OFF appara t sur l afficheur Le symbole de cl clignote Remarque En pressant...

Страница 61: ...et inversement A l aide de la touche UP augmenter la d pression de 50 80 mbar comprimer le tuyau vide et contr ler si le t moin de contr le passe de vert rouge 4 Les touches 1 retour ou 2 avance perm...

Страница 62: ...diff rence de temp rature est pr sent r initialis e sur 0 Le calibrage 100 C 212 F est termin 7 Quitter le menu 2 l aide de la touche 3 Modification du calibrage 450 C 842 F 1 Ins rer la sonde de temp...

Страница 63: ...N ON activer OFF d sactiver 3 Passer au point de menu suivant avec la touche 1 retour ou 1 2 suivant Une fois la touche ECO 8 activ e celle ci permet d imposer le mode veille Standby sur tous les 2 ca...

Страница 64: ...intenance de la station WR 3ME 9 1 Maintenance du filtre Contr ler r guli rement l tat d encrassement du filtre principal VACUUM et AIR et le remplacer si n cessaire AVERTISSEMENT Risque de d t riorat...

Страница 65: ...ble air sur le raccord AIR Pas de vide au niveau de l outil dessouder Flexible vide pas raccord ou mal raccord Buse de dessoudage bouch e Raccorder le flexible vide sur le raccord VAC Nettoyer la buse...

Страница 66: ...soudure 150 W T005 27 028 99WHP 80 plaque de pr chauffage 80 W T005 13 182 99DSV 80 kit fer dessouder 80 W T005 13 183 99DSX 80 kit fer dessouder 80 W T005 13 198 99DSX 120 dessouder 120 W T005 27 118...

Страница 67: ...on expirent 12 mois apr s la livraison Cela n est pas valable pour les droits de recours de l acheteur selon 478 479 BGB La garantie que nous accordons n est valable que dans la mesure o la garantie d...

Страница 68: ...WR 3ME Circuit Diagram DE EN FR IT ES PT NL SV DK FI GR TR CZ PL HU SK SL EE LV LT...

Страница 69: ...WR 3ME Exploded Drawing...

Страница 70: ...x 61 2 6021 7403 CANADA Apex Tools Canada 5925 McLaughlin Rd Mississauga Ontario L5R 1B8 Phone 1 905 501 4785 Fax 1 905 387 2640 CHINA Apex Tool Group A 8 Building No 38 Dongsheng Road Heqing Industri...

Отзывы:

Похожие инструкции для WR 3ME