14-22
WR 3ME
DE
EN
FR
IT
ES
PT
NL
SV
DK
FI
GR
TR
CZ
PL
HU
SK
SL
EE
LV
LT
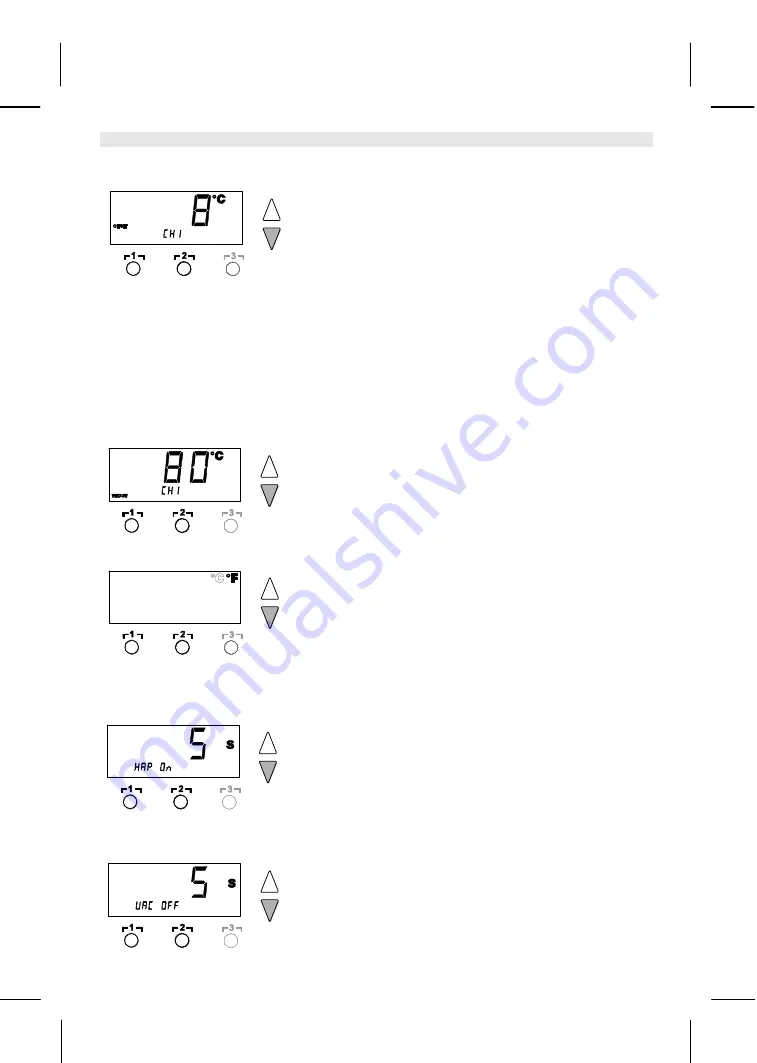
Setting the temperature offset
The real soldering-tip temperature can be adapted by entering a
temperature offset around ± 40 °C (± 72 °F).
1. Select the menu item OFFSET in Menu 1.
2. Set the OFFSET temperature value with the UP or DOWN
button.
3. Proceed to the next menu item with the button ┌ 1 ┐ (back) or
┌ 2 ┐ (forward).
Setting the window function
It is possible, starting from a set, locked temperature, to set a
temperature window of ± 99 °C (± 180 °F) with the aid of the
WINDOW function.
Note To be able to use the WINDOW function, ensure that the repair
station is in the locked state (see "Switching the lock function on/off“
Page 15).
1. Select the menu item WINDOW in Menu 1.
2. Set the WINDOW temperature value with the UP or DOWN
button.
3. Proceed to the next menu item with the button ┌ 1 ┐ (back) or
┌ 2 ┐ (forward).
Switching the temperature unit
Switching the temperature unit from °C to °F or vice versa.
1. Select the menu item °C / °F in Menu 1.
2. Set the temperature unit with the UP or DOWN button.
3. Proceed to the next menu item with the button ┌ 1 ┐ (back) or
┌ 2 ┐ (forward).
Limiting the switch-on time (ON TIME) for hot-air pencil (HAP)
The switch-on time for the HAP hot-air flow can be limited in
increments of 1 from 0 to 60 s. The set time is then identical for all 3
channels. Factory setting is 0 s ("OFF“), i.e. the air flow is activated
as long as the button on the hot-air pencil or the optional foot switch
is pressed.
1. Select the menu item HAP-TIME in Menu 1.
2. Set the time value with the UP or DOWN button.
3. Proceed to the next menu item with the button ┌ 1 ┐ (back) or
┌ 2 ┐ (forward).
Setting the vacuum OFF delay (VAC OFF)
To prevent the unsoldering bit from becoming clogged, it is possible
to set a vacuum OFF delay of 0 to 5 s (factory setting 2 s).
1. Select the menu item VAC OFF in Menu 1.
2. Set the time value (VAC OFF) with the UP or DOWN button.
3. Proceed to the next menu item with the button ┌ 1 ┐ (back) or
┌ 2 ┐ (forward).
Содержание WR 3ME
Страница 1: ...WR 3ME Operating Instructions Istruzioni per l so Manual de uso...
Страница 2: ...EN FR IT ES PT NL SV DK FI GR TR CZ PL HU SK SL EE LV LT WR 3ME Operating Instructions EN...
Страница 24: ...ES ES ES ES PT NL SV DK FI GR TR CZ PL HU SK SL EE LV LT WR 3ME Manual de instrucciones E...
Страница 46: ...FR FR FR ES PT NL SV DK FI GR TR CZ PL HU SK SL EE LV LT WR 3ME Notice d utilisation GB...
Страница 68: ...WR 3ME Circuit Diagram DE EN FR IT ES PT NL SV DK FI GR TR CZ PL HU SK SL EE LV LT...
Страница 69: ...WR 3ME Exploded Drawing...


