


Wireless ADSL2+ Router User’s Guide
Back Panel Connectors
Table 2 shows the function of each connector and switch of the device.
Table 2. Function / Description of Connectors
Connector Description
POWER
Connects to your 802.11n WLAN ADSL2+ router 12Vac power adaptor
SWITCH
Power Switch
LAN1~4
RJ-45 Jack (Ethernet Cable) connection to your PC, or HUB
LINE
Connects to your ADSL2+ line – for ADSL2+ Line input
RESET
Reset button. RESET the 802.11n WLAN ADSL2+ router to its default
settings.
Press this button for at least 5 full seconds to start to reset it to its default
settings.
WPS
Press this button for at least 3 full seconds and the WPS LED will flash to
start WPS.
Now go to the wireless adapter or device and press its WPS button. Make
sure to press the button within 120 seconds (2 minutes) after pressing the
router's WPS button.
If you are using a Wireless adapter connected to a computer, a "WPS
Authentication" screen will appear. Wait until the screen says "Authentication
succeeded." This may take a few minutes.
WLAN
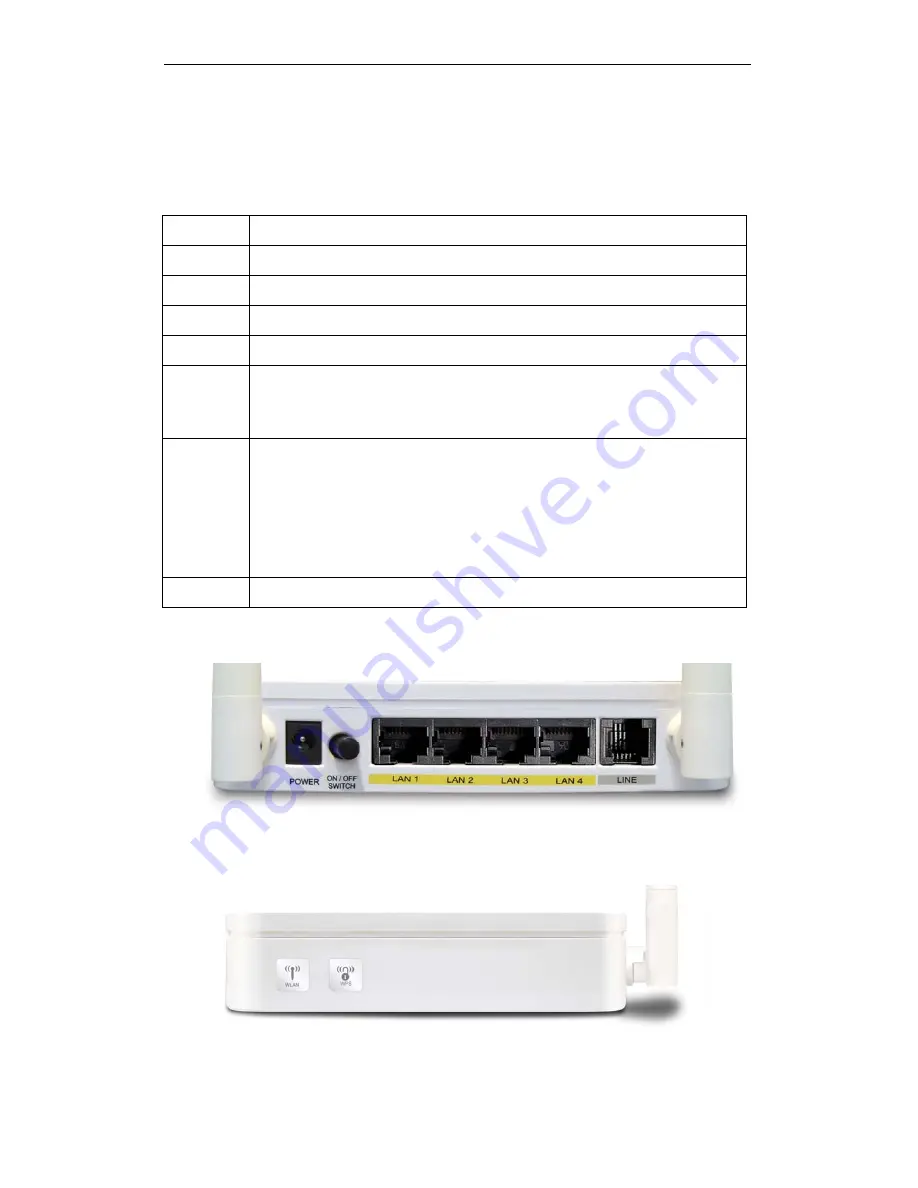
Press this button for at least 3 full second to turn off/on wireless signals
Figure1. Rear View of the 802.11n WLAN ADSL2+ Router
Figure2. WPS and WLAN button
14
Содержание DA-300N
Страница 1: ...Wireless ADSL2 Router User s Guide WELL DA 300N Wireless ADSL2 Router User s Manual 1 ...
Страница 15: ...Wireless ADSL2 Router User s Guide Figure3 RESET button 15 ...
Страница 22: ...Wireless ADSL2 Router User s Guide 4 Double click on Internet Protocol Version 4 TCP IPv4 22 ...
Страница 33: ...Wireless ADSL2 Router User s Guide Figure 1 Homepage 33 ...
Страница 38: ...Wireless ADSL2 Router User s Guide 38 ...
Страница 41: ...Wireless ADSL2 Router User s Guide 41 ...
Страница 53: ...Wireless ADSL2 Router User s Guide 53 ...
Страница 58: ......
Страница 60: ...User s Guide Configuring your Computers 60 ...
Страница 61: ...User s Guide Configuring your Computers 2 From the left hand LAN menu click on DHCP Settings 61 ...
Страница 82: ...User s Guide Configuring your Computers 82 ...
Страница 98: ...User s Guide Configuring your Computers 11 Enter AP s Self PIN Number and click next 98 ...
Страница 100: ...User s Guide Configuring your Computers 13 Enter the Passphrase and then click Next 100 ...
Страница 109: ...User s Guide Configuring your Computers 5 Users must start the PBC method on the station side within two minutes 109 ...
Страница 139: ...User s Guide Configuring your Computers 139 ...
Страница 153: ...User s Guide Configuring your Computers IPv6 DNS This page is used to configure the DNS server ipv6 addresses 153 ...
Страница 171: ...User s Guide Configuring your Computers 171 ...


