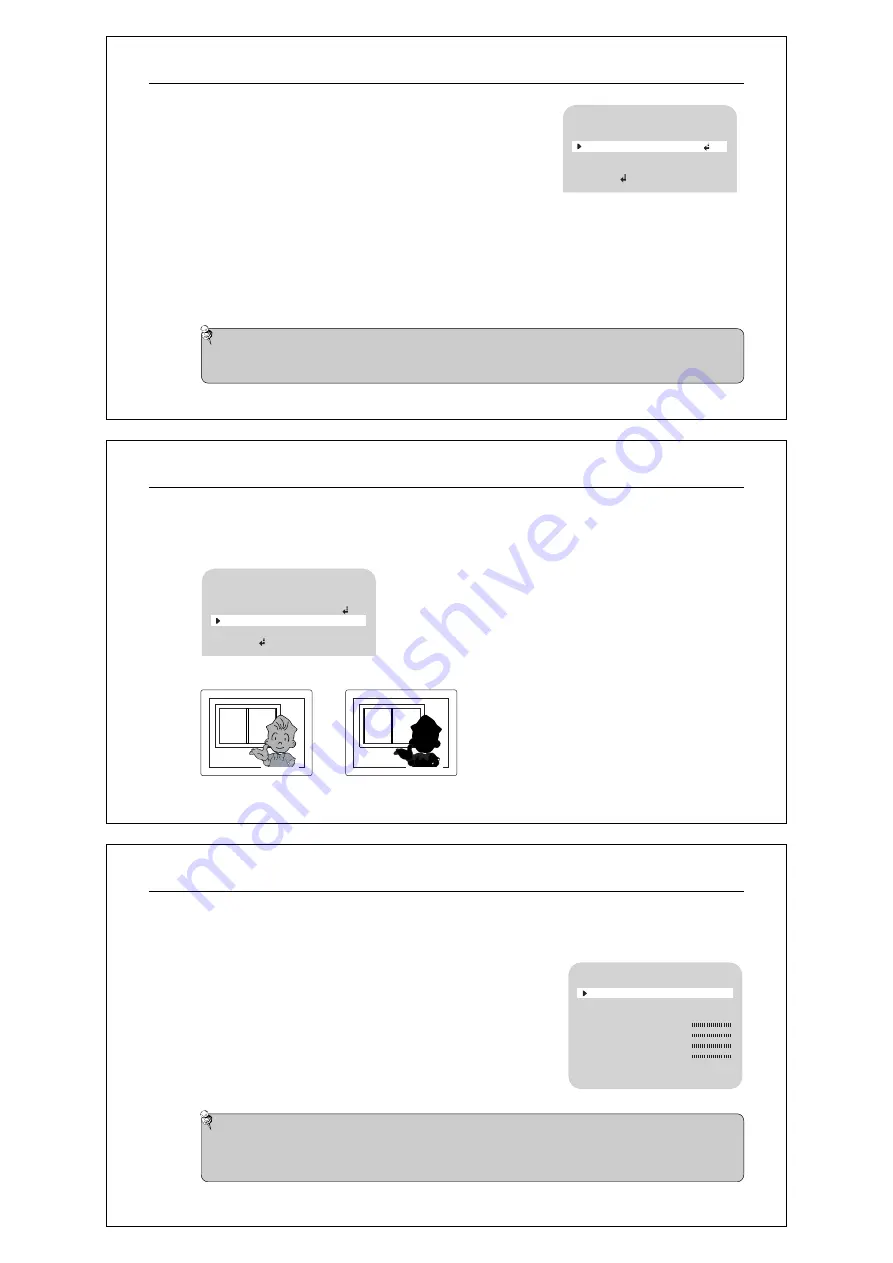
BACKLIGHT ON
BACKLIGHT OFF
7.4.3 Backlight
When there is a strong backlight behind the object, clear images of the background as well as the object can still be obtained by
using the BACKLIGHT function.
u
Please position the arrow to point to 'BACKLIGHT' on the SETUP menu by using the TELE(UP) and WIDE(DOWN ) buttons.
v
Please select the mode you wish to operate by pressing the FAR(LEFT) or NEAR(RIGHT) button.
c
HIGH/MIDDLE/LOW :
You can adjust the sensitivity of Backlight Compensation.
c
OFF :
BACKLIGHT function does not operate.
Day & Night 10X Zoom Camera
20
MAIN SETUP
CAM TITLE
WHITE BAL
BACKLIGHT
MOTION DET
FOCUS
OFF
ATW
OFF
OFF
7.4.4 Motion Detection
This product has a feature that allows you to observe movements of objects in 4 different areas on the screen, and the words
'MOTION DETECTED' appear on the screen when movement is detected; hence a single individual can conduct supervision
efficiently. The camera detects an object's movement by sensing disparity of outline, and level of brightness and color.
u
Please press the SETUP button.
-OFF: MOTION DETECTION mode is cancelled.
-ON: Any motion in the selected areas is observed.
v
Please press the SETUP button.
-OFF: MOTION DETECTION mode is cancelled.
-ON: Any motion in the selected areas is observed.
w
Please select the area you wish to observe from the 4 areas in AREA SEL mode.
x
Please select ON mode for the chosen area.
y
Please adjust the size of the area to be observed by using
the TELE(UP), WIDE(DOWN), FAR(LEFT) or NEAR(RIGHT) button.
z
Please press the SETUP button to save changes and complete the setting.
Day & Night 10X Zoom Camera
21
MD SETUP
DISP ALARM
AREA SEL
AREA MODE
TOP
BOTTOM
LEFT
RIGHT
END
OFF
AREA1
ON
10
50
10
50
Note
Tips on Using the Motion Detection Feature.
q
The camera interprets sudden changes in lighting and subsequent change in brightness of an object as motion.
q
With the feature enabled, other algorithms may require additional time to operate than usual.
q
This system does not guarantee prevention of fire or theft. The manufacturer shall not be held responsible
for any accident or damage incurred.
7.4.2 White Balance Control
Your camera provides three 'WHITE BAL' control modes for your choosing
in adjusting the white balance.
u
Press the SET button to access the main setup menu and move the indicator to
'WHITE BAL' using the
TELE(UP) or WIDE(DOWN)
button.
v
Set 'WHITE BAL' using the FAR(LEFT)
or
NEAR(RIGHT) button.
The three white balance control modes are as follows:
c
ATW(Auto Tracking White Balance):
q
O
UTDOOR: This mode can be used within the color temperature range 1800~10500
°
K
(Ex: fluorescent light, outdoor, sodium vapor lamp or inside tunnels)
.
q
INDOOR: This mode can be used within the color temperature range 3000K~10500
°
K
c
AWC(Auto White balance Control):
The white balance is automatically adjusted in a specific environment. In order to obtain the best result, press the SET
button while the camera focuses on white paper. If the environment including the light source is changed, you have to
adjust the white balance again.
c
Manual:
To fine adjust, select the Manual mode. You can increase or decrease the red or blue factor while monitoring the
difference on the screen. Set to 'MANUAL' mode and press the SET button. Increase or decrease the value for red(R-
Gain) and blue(B-Gain), watching the color of the picture, and press the SET button when you obtain the best color.
Day & Night 10X Zoom Camera
19
Note
Proper White Balance may not be obtained under the following conditions.
j
When the scene contains mostly high color temperature object, such as a blue sky or sunset.
k
When the scene is dim.
l
If your camera directly faces a fluorescent lamp or is used in an environment of varying lighting conditions.
MAIN SETUP
CAM TITLE
WHITE BAL
BACKLIGHT
MOTION DET
FOCUS
OFF
ATW
OFF
OFF


