9�4�1
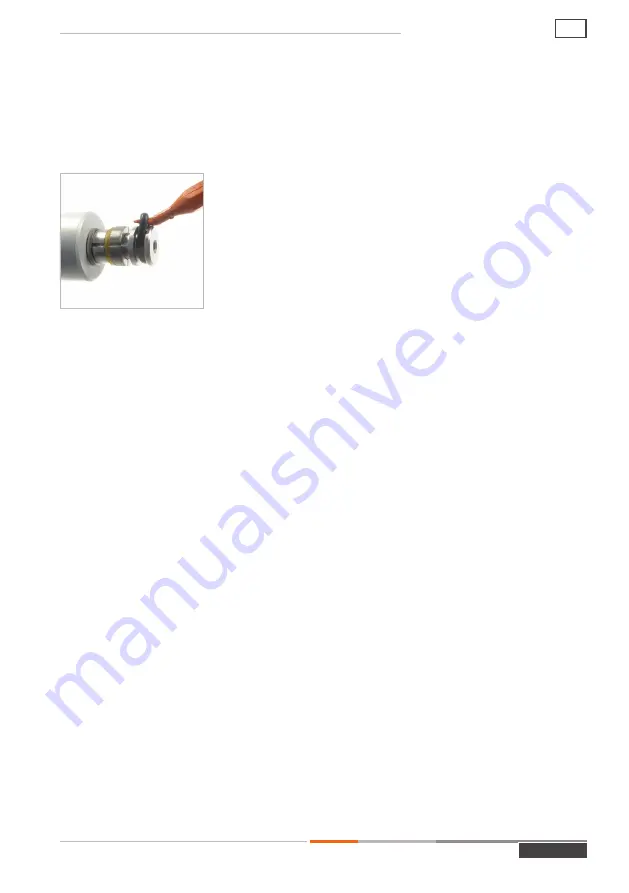
Replacement of front seal (Pos� 7)
Note:
The replacement seal set always contains five front seals (Pos. 7) for replacement
and one or two retaining rings for the clamping jaws (Pos. 5 / Pos. 6). The retaining
rings for the clamping jaws need to be replaced only when they are cracked or damaged,
please refer to
Chapter 9.4.2
and
Chapter 9.4.3.
Î
Move the clamping lever (Pos. 2) to the straight starting
position. The clamping jaws (Pos. 9) and the front seal
(Pos. 7) must be relaxed.
Î
Insert a suitable repair tool behind the front seal (Pos. 7)
with the WEH
®
O-ring picker, part No. E98-101969, and un-
roll it out of the recess over the large diameter of the shaft
(Pos. 11) (
Figure 8
).
Attention:
Make sure not to damage the surface of the
front seal recess when removing the old front seal. Only
the tool recommended by WEH may be used.
Î
Clean the recess of dirt and other residues.
Î
Pull the new front seal (Pos. 7) over the shaft (Pos. 11) into the cleaned recess
between the shaft and the retain plate (Pos. 8). Make sure that the front seal is not
twisted and is properly seated in the recess. The new front seal can be inserted with-
out using any tools.
Attention:
Do not use any sharp tools while assembling. Doing so may damage the
front seal.
Î
Lubricate the new front seal (Pos. 7) with the WEH
®
Lubricant. Spray once briefly
onto the front seal.
Î
Connect the WEH
®
Connector to a test piece a number of times. Visually check the
connector for proper clamping and sealing function and that the clamping jaws are
gripping correctly.
Attention:
During the next pressure test, apply the test pressure to the connector and
media line only gradually.
Figure 8
MD-10015-L51-R1.1.0-03
Page 23
Operating instructions
AE
Содержание TW230
Страница 2: ......
Страница 34: ......
Страница 35: ......
Страница 66: ...NOTES...
Страница 67: ...NOTES...


