Web Mountain Technologies
UPB Timer (TIM-01) Version 3 8
o
The P in the first field will be flashing. Use the UP/DOWN buttons to choose P or T. Then use the RIGHT button and the first initialized
program or trigger number will be flashing. If no programs or triggers have been set up yet you will see NONE in the program/trigger field.
Once you’ve selected either P or T, use the UP/DOWN buttons to get to the program or trigger you want to delete.
o
Use RIGHT/LEFT to cycle to the Y or N after Delete? (Default is N.) Use the UP/DOWN buttons to select Y or N.
o
Press ENTER. If Y was selected, the program or trigger will be deleted and the program or trigger number will be returned to the available
pool. If N was selected, no changes will be made. In either case, the Timer will return to the RUN mode.
•
SET TIME (Push MENU button until SETTIM shows)
o
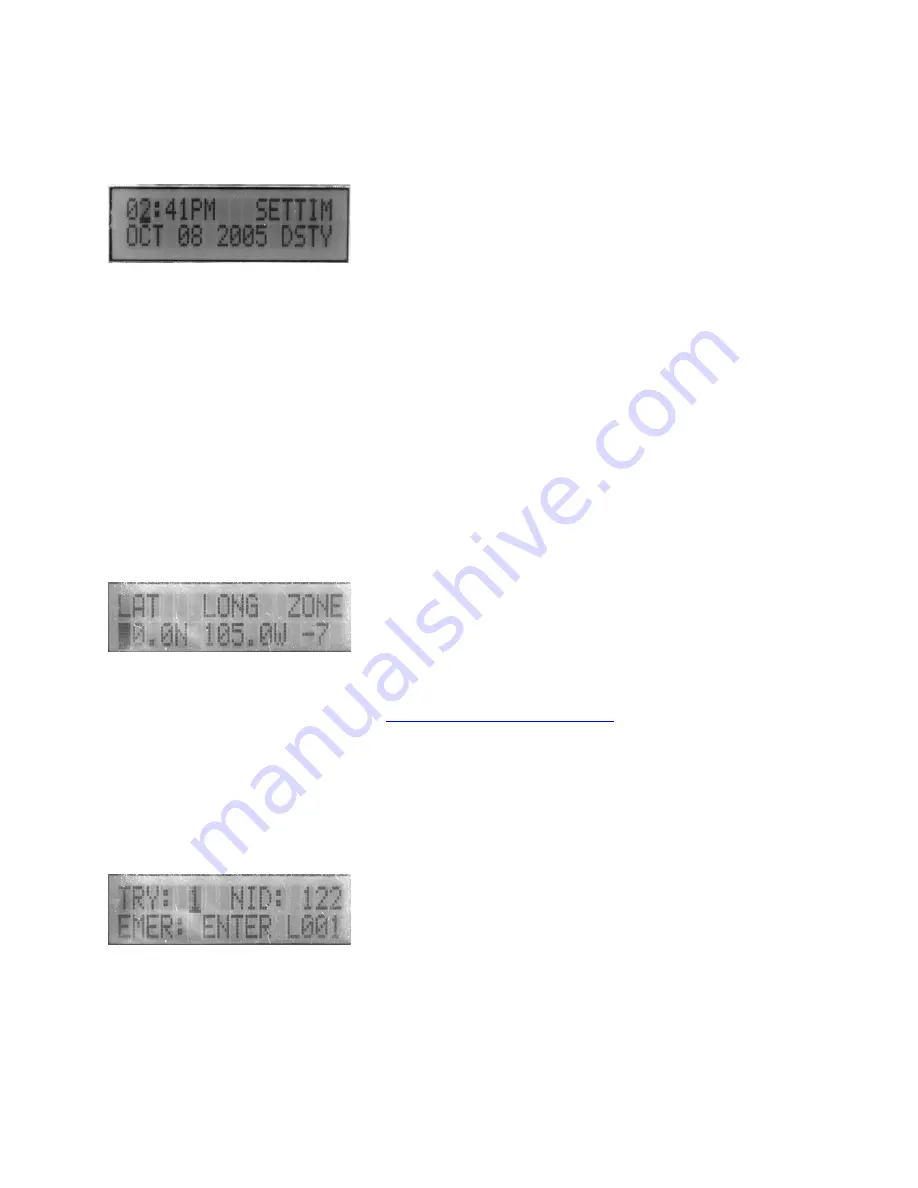
There are 7 fields that can be set on this screen: hour, minute, AM/PM, month, day, year and Y or N for Daylight Savings Time.
o
The hour field will be flashing.
o
Use UP or DOWN buttons to set hours (the Timer will update AM/PM as it crosses midnight or noon).
o
Use RIGHT and LEFT buttons to cycle between hours, minutes, AM/PM, month, day, year and DSTY/N (whichever field is selected
flashes).
o
For the minute field, use UP/DOWN to select the correct value for minutes.
o
For the month field, the display shows the current month flashing.
o
Use UP/DOWN to set the desired month (JAN, FEB, MAR………..)
o
For the day field, the display shows the current day flashing (default is 01). Use UP/DOWN to set the correct day.
o
For the year field, the display shows the current year flashing (default is 2007). Use UP/DOWN to set the correct year value.
o
To select the option for the Timer to adjust its time for daylight savings time, go to the DSTY or DSTN icon (DSTY is the default). The icon
will flash when selected. Use UP/DOWN to select DSTY or DSTN. The Timer is programmed to correct for Daylight Savings time in the
USA only, based on Federal law current as of January 1, 2007. The Timer will handle the changes in daylight savings time legislated to go
into effect in 2007. Should this change not be actually implemented in 2007, the Timer can be set to continue to operate according to prior
law. See the later section on
Reset
for more information.
o
When all fields have been set correctly, push the ENTER button to commit all settings and go back to RUN. The Timer will set its internal
seconds counter to 00 seconds when ENTER is pressed.
o
To aid in testing, if you want to check out a program or trigger quickly, you can force the timer to set a time that is at 58 seconds after the
HH:MM selected on this screen. To accomplish this, make sure to press the LEFT and RIGHT buttons simultaneously before pressing the
ENTER button to save the screen’s settings.
•
SET LAT/LONG/TIME ZONE (Push MENU Button until LAT LONG ZONE is displayed):
o
NOTE: ln the United States all latitudes are North latitudes, all longitudes are West longitudes and all time zones are negative values.
o
Display shows LAT LONG ZONE with default values. It is important to set these values accurately in order for Sunset and Sunrise
functions to operate correctly. The value under LAT will be flashing when you first get to this screen.
o
If you do not know your latitude and longitude, go to
http://www.zipinfo.com/search/zipcode.htm
to find your latitude and longitude based on
your zip code. (If this web site is no longer active, search for “zip code latitude longitude” with one of the Internet search engines.)
o
Use UP/DOWN buttons to select your LATitude. Scroll down through 0.0 to go from North latitudes to South latitudes.
o
Use the RIGHT button to go to the Longitude value.
o
Use UP/DOWN buttons to select your LONGitude. Scroll down through 0.0 to go from West longitudes to East longitudes.
o
Use the RIGHT button to go to the ZONE value.
o
Use UP / DOWN buttons to select your Time Zone. Negative numbers are time zones west of GMT. Positive numbers are time zones east
of GMT. For Eastern Time use -5, for Central Time use -6, for Mountain Time use -7, for Pacific Time use -8. Calculate other time zones
accordingly.
o
Click ENTER to save settings and return to RUN mode.
•
SET TRYs, UPB NID and EMERGENCY mode (Push MENU Button until the TRY/NID screen is displayed):
o
Display shows the values for TRYs, UPB Network ID (NID) and EMERGENCY mode. Defaults are 1 TRY, a NID of 001 and NONE L001
for EMERgency.
o
TRY refers to how many times a program or trigger will issue its UPB Link command. Each Try is about 13 seconds apart. For most
applications, a value of 1 is the best selection. For installations where the Timer will be used only to run scheduled programs, where it will
not be used as a tabletop controller and where either noise or low signal strength make UPB operation less than optimal, it is possible to set
this value to 2, 3 or 4. If you do want to use this device as an emergency indicator, if is strongly recommended that you leave the value of
TRY at 1.
o
The default for UPB Network ID (NID) is 1. See the UPB Operations section (earlier) for more information about this value. NOTE: If you
do not set this value correctly, you will NOT be able to control UPB devices in your home.
o
Use UP/DOWN to set the NID to desired value (1 – 250).


