background image

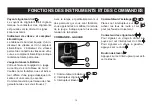
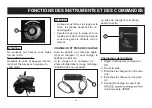
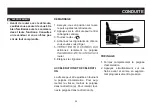
Contacteur de limiteur de vitesse 

(ECO/FAST)

Si vous actionnez le contacteur sur 

“ECO“ la vitesse maximum sera de

 38 km/h.

Si vous actionnez le contacteur sur 

“FAST“ la vitesse maximum sera de 

45 km/h.

LEVIER DU FREIN AVANT

Le  levier  du  frein  avant  est  situé  sur 

la  poignée  droite  du  guidon.  Pour 

l‘activer, appuyez sur le levier pour le 

rapprocher de la poignée.

FONCTIONS DES INSTRUMENTS ET DES COMMANDES

13

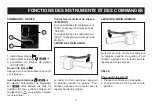
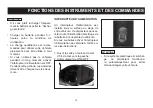
COMMANDE - DROITE

1

2

3

1. Interrupteur klaxon 

2. Interrupteur éclairage 

3. Contacteur  de  limiteur  de  vitesse 

(ECO/FAST)

Bouton de klaxon   

Appuyez sur cet interrupteur pour acti-

ver le klaxon. 

Interrupteur éclairage 

En  plaçant  l‘interrupteur  de  l‘éclairage 

sur 

  vous  activez  les  feux  de 

position,  les  feux  avant  et  arrière.  En 

le plaçant sur  , vous allumez égale-

ment le phare.

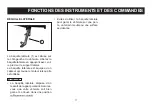
LEVIER DU FREIN ARRIÈRE

Le levier du frein arrière est situé sur 

la  poignée  gauche  du  guidon.  Pour 

l‘activer, appuyez sur le levier pour le 

rapprocher de la poignée.

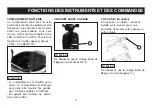
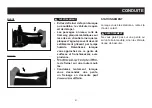
SELLE

Pour ouvrir la selle (2)

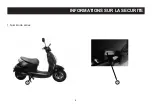
1. Placez le véhicule sur la béquille.


2. Tourner la clé de 1/4 de tour vers la 

gauche.

Содержание E-Start

Страница 1: ...15 ATU IC5212 MANUEL DE L UTILISATEUR GEBRUIKSAANWIJZING BEDIENUNGSANLEITUNG MANUAL DE UTILIZACI N MANUALE D USO MANUAL DO UTILIZADOR USER MANUAL FR 1 41 NL 42 82 DE 83 123 ES 124 164 IT 165 205 PT 20...

Страница 2: ...rfait et du soin que vous portez au fait d tre la page dans vos d placements au quotidien Le pr sent manuel d crit le bon usage de ce v hicule notamment en ce qui concerne la conduite en toute s cu ri...

Страница 3: ...VANT D UTILISER CE V HICULE N UTILILSEZ LE V HICULE QU UNE FOIS QUE VOUS VOUS ETES COMPLETEMENT FAMILIARISE AVEC LES COMMANDES ET LES FONCTIONS ET QUE VOUS AVEZ ASSIMILE LES TECHIQUES DE CONDUITE ADEQ...

Страница 4: ...3 INFORMATIONS IMPORTANTES...

Страница 5: ...batterie 16 Crochet avant casque 16 TOP CASE En option 16 B quille lat rale 17 VERIFICATIONS AVANT UTILISATION 18 19 CONDUITE 20 D marrage 20 Acc l ration et d c l ration 20 Freinage 20 Stationnement...

Страница 6: ...ctiver les clignotants avant de tour ner et ralentir l approche des car refours et des intersections Conserver une distance ad quate avec les autres v hicules et faire conna tre votre position ces der...

Страница 7: ...ionn es par un ac cident Ne portez jamais de v tements amples ils risquent de se prendre dans les leviers de contr le ou les roues et de provoquer des blessures ou un accident Ne touchez jamais les c...

Страница 8: ...en cas de vent lat ral et provoquerait un renversement Lorsque vous quipez le v hicule d accessoires lectriques veuillez pour vous assurer que ces quipe ments n exc dent pas les capacit s du syst me l...

Страница 9: ...INFORMATIONS SUR LA SECURITE 8 1 Num ro de s ries 1 1...

Страница 10: ...3 Clignotant avant 15 B quille lat rale Selle Compartiment de rangement B quille centrale 5 Verrouillage de selle 7 Batterie 13 Roue arri re 12 Frein tambour arri re 11 Lumi re de plaque d immatricula...

Страница 11: ...MMANDES ET INSTRUMENTS 16 Interrupteurs poign e gauche 17 Levier de frein arri re 18 Tableau de bord 22 Interrupteur principal 20 Levier de frein avant 21 Poign e acc l rateur 19 Interrupteurs poign e...

Страница 12: ...rection 1 Tournez le guidon fond vers la gauche 2 Poussez la cl en position puis tournez l sur en continuant l enfoncer 3 Retirez la cl Pour d bloquer la direction Enfoncez la cl puis faites la tourne...

Страница 13: ...e tableau de bord est quip d un in dicateur de vitesse et d un compteur kilom trique L indicateur de vitesse permet de conna tre la vitesse du v hi cule Le compteur kilom trique indique la distance to...

Страница 14: ...2 3 1 Interrupteur klaxon 2 Interrupteur clairage 3 Contacteur de limiteur de vitesse ECO FAST Bouton de klaxon Appuyez sur cet interrupteur pour acti ver le klaxon Interrupteur clairage En pla ant l...

Страница 15: ...e vous recevrez gale ment un chargeur 1 pour charger la batterie du v hicule Si le jauge sur le compteur de vitesse tombe dans le rouge recharger la batterie d s que possible FONCTIONS DES INSTRUMENTS...

Страница 16: ...tilisez pas le v hicule pendant un long moment activez l interrupteur d alimentation sur OFF Pendant cette p riode les batteries doivent tre charg e tous les deux mois INTERRUPTEUR D ALIMENTATION Un i...

Страница 17: ...t est chauff par le soleil Le compartiment de stockage peut alors tre mouill Ne gardez pas d articles sensibles l int rieur Ne gardez pas d objets de valeur dans votre coffre CROCHET AVANT CASQUE 1 AT...

Страница 18: ...ed sur le support lat ral La b quille lat rale est quip e d un capteur qui coupe le moteur lorsqu elle est utilis e ATTENTION La b quille lat rale dispose d un ressort de rappel puissant Assurez vous...

Страница 19: ...curit qu elles apportent vaut largement le temps pass AVERTISSEMENT Si un l ment inspect ne fonctionne pas correctement faites le inspecter nouveau et r parer avant d utiliser le v hicule Si vous ne p...

Страница 20: ...nd jusqu au niveau indiqu Assurez vous que le syst me hydraulique ne pr sente pas de fuites Frein arri re Ajustez si n cessaire Poign e d acc l ration Assurez vous que le fonctionnement se fasse sans...

Страница 21: ...rogressivement la pression D MARRAGE 1 Asseyez vous en position sur la sel le puis ajustez les r troviseurs 2 Appuyez sur le v hicule pour rentrer la b quille centrale 3 Tournez la cl sur 4 Actionnez...

Страница 22: ...glissant par temps humide Ralentissez lorsque vous approchez de ce genre de surfaces et franchissez les avec prudence le de freiner sur une route mouil l e Conduisez lentement lorsque vous descendez...

Страница 23: ...e est un point tr s important pour votre propre s curi t et pour les performances du v hicu fermement sur le v hicule Placez les charges les plus lourdes au centre puis r partissez la charge restant e...

Страница 24: ...pection des pneus 1 2 3 1 Profondeur des rainures des pneus 2 C t du pneu 3 Indicateur d usure du pneu AVERTISSEMENT chaque trajet Si les rainures d un pneu montrent des lignes crois es profon deur mi...

Страница 25: ...en quilibr e chaque fois que le pneu ou la roue elle m me ont t chang s ou rem plac s Une roue mal quilibr e peut provoquer de mauvaises performan et diminuer la dur e de vie du pneu Roulez vitesse mo...

Страница 26: ...i la position de l crou atteint l extr mit faites rem placer l ensemble des machoires par un revendeur 25 ENTRETIEN PERIODIQUE ET REPARATIONS MINEURES LIQUIDE DE FREINAGE AVERTISSEMENT freinage peut p...

Страница 27: ...veau de liquide de freinage peut indiquer une usure des plaquettes de frein et ou une fuite dans le syst me de freinage Si le niveau du liquide de plaquettes et la pr sence de fuites dans le syst me d...

Страница 28: ...ant Levier de frein arri re 27 AVERTISSEMENT Les dommages sur les gaines exter nes des c bles peuvent provoquer une rouille l int rieur et g ner le mouve ment des c bles Remplacez les c b de garantir...

Страница 29: ...intenez le en position le v e 2 Lorsque vous actionnez le frein avant appuyez bien sur les poig n es plusieurs reprises pour v ri se rel che sans probl mes AVERTISSEMENT Lorsque la fourche est endomma...

Страница 30: ...ET TOUTES LES BATTERIES HORS DE POR TEE DES ENFANTS ATTENTION Toujours garder la batterie charg e Le stockage d une batterie d char g e peut causer des dommages ir r versibles la batterie ENTRETIEN P...

Страница 31: ...as de besoin faites ajuster le faisceau du phare Ce mod le comporte en outre un feu de position LED 1 Si le feu de positi on LED d fectueux s il vous pla t con tactez votre revendeur 1 3 30 Clignotant...

Страница 32: ...importante Amenez le alors chez un revendeur ou des techniciens comp tents disposant des outils des connaissances et des comp tences n cessaires pourront r parer correctement votre v hicule N utilise...

Страница 33: ...ettoyage Fermez tous les bouchons couverc les connecteurs lectriques pour vi ter que de l eau ne p n tre l int rieur lorsque vous proc dez au nettoyage ATTENTION Le fabricant ne sugg re pas d utiliser...

Страница 34: ...t des pneus RANGEMENT Court terme Rangez toujours votre v hicule dans un lieu frais et sec et si n cessaire prot gez le contre la rouille l aide d une b che adapt e AVERTISSEMENT Veuillez ranger le v...

Страница 35: ...PNEU ARRI RE Jante 2 15x10 Pneu 90 90 10 DIMENSIONS PRESSION DE L AIR DES PNEUS MESU R E SUR PNEUS FROIDS Avant 2 5 bar Arri re 2 5 bar FREIN AVANT Type Frein disque hydraulique unique 180 mm Fonction...

Страница 36: ...Feu arri re de stop 12 V 5 0 W 21 0 W Clignotant avant 12 V 10 0 W Clignotant arri re 12 V 10 0 W Eclairage plaque d immatriculation 12 V 5 0 W Eclairage instrument 12 V 2 W Indicateur phare 12 V 2 W...

Страница 37: ...N num ro mander des pi ces de rechange aupr s de votre revendeur ou si le v hicule est vol Le num ro de ch ssis est poin onn sur le cadre Pour le voir enlever le couvercle 1 de la paroi interne du car...

Страница 38: ...hicule en mauvais tat ne seront pas accord es Les r parations effectu es sur votre v hicule ne rallongent en aucun cas la dur e de garantie Seul ce document vous galement qu il ait bien enregistr votr...

Страница 39: ...ssoires V REM V REM V REM V REM V REM V REM Accessoires boutons joints V REG V REG V REG V REG V REG V REG Frein avant et arri re V V V V V V Syst me de suspension V V V V L assemblage lectronique V V...

Страница 40: ...e sont ajout s 39 CALENDRIER D ENTRETIEN 300 km Timbres Data 2000 km Timbres Data 4000 km Timbres Data 6000 km Timbres Data 8000 km Timbres Data 10000 km Timbres Data 12000 km Timbres Data 14000 km Ti...

Страница 41: ...SCHEMA DE CABLAGE 40...

Страница 42: ...ESPACE POUR LES NOTES 41...

Страница 43: ...kheid vertegenwoordigt uw uitstekende smaak en wens voor een artistiek uiterlijk Deze gebruiksaanwijzing beschrijft het juiste gebruik van deze voertuig inclusief tips voor veilig rijden simpele onder...

Страница 44: ...DE Voertuig PAS NADAT U GEHEEL OP DE HOOGTE BENT VAN DE BEDIENING EN GEBRUIKSFUNC TIES EN U LES HEEFT GEHAD IN RIJVEILIGHEID EN CORRECTE RIJTECHNIEKEN PERIODIEKE ONDERHOUDSBEURTEN GOED ONDERHOUD EN EE...

Страница 45: ...44 BELANGRIJKE HANDLEIDING INFORMATIE Plak hier het Dealer label...

Страница 46: ...7 Haak voor helm 58 58 Zijstandaard 58 VOOR CONTROLES 59 Voor controlelijst 60 BEDIENING EN BELANGRIJKE RIJ INSTRUCTIES 61 Wegrijden 61 Versnellen en afremmen 61 Remmen 61 Parken 62 PERIODIEK ONDERHOU...

Страница 47: ...Zorg er daarom voor dat u altijd goed zichtbaar bent om dit soort ongelukken te voorkomen Conclusie Draag felgekleurde en beschermen de kleding of een veiligheidsvest Gebruik de richtingaanwijzers vo...

Страница 48: ...ast kunnen komen te zitten in de handels of wielen en daardoor verwondingen of een on geluk kunnen veroorzaken Raak nooit de kabels van de accu terwijl het voertuig in werking is U zou een elektrische...

Страница 49: ...uvres Idien de voertuig wordt uitgerust met elektrische accessoires dient u een plegen zodat de capaciteit van het elektrisch systeem van de voertuig niet wordt overbeladen Onjuiste in stallatie van z...

Страница 50: ...49 1 1 VEILIGHEIDSINFORMATIE 1 Serienummer...

Страница 51: ...RTUIG ZIJAANZICHT 1 Voorwiel 2 Voorste remschijf 4 Koplamp 3 Richtingaanwijzers voor 15 Zijstandaard 6 Zitting 8 Bagagecompartiment 14 Hoofdstandaard 5 Zadelslot 7 Batterij 13 Achterwiel 12 Trommelrem...

Страница 52: ...1 19 BESCHRIJVING VAN HET VOERTUIG BEDIENINGSELEMENTEN EN INSTRU MENTEN 16 Schakelaars linkerhandvat 17 Achterrem hendel 18 Instrumentenpaneel 19 Schakelaars rechterhandvat 20 Voorrem hendel 21 Gashan...

Страница 53: ...elen 1 Draai de handvaten helemaal naar links 2 Duw de sleutel in de positie draai hem vervolgens naar terwijl u erop blijft duwen 3 Verwijder de sleutel H et stuurslot ontgrendelen Voer de sleutel in...

Страница 54: ...l gereden afstand aan Batterijcapaciteitmeter De voltmeter geeft spanningsniveau van de batterij SCHAKEL OP HET STUUR LINKS 1 Dimlicht grootlicht schakelaarr 2 Richtingaanwijzer schakelaar 3 Claxonsch...

Страница 55: ...zetten turns on de positie licht mater licht en taillight Turning de licht schakelaar to turns de koplamp on too Snelheidslimiet schakelaar ECO FAST Als u de schakelaar op ECO de maximumsnelheid van...

Страница 56: ...anneer u juist de auto te parkeren LAADSTATION EN LAADAANSLUI TING Met het voertuig dat u ontvangt ook een oplader 1 om de accu van het vo ertuig te laden Als de laadindicator op de snelheids meter va...

Страница 57: ...n gebruikt Als je niet het voertuig te gebruiken voor een lange tijd zet de hoof dschakelaar op OFF Gedurende deze tijd moeten de batterijen een keer per maand in rekening worden gebracht HOOFDSCHAKEL...

Страница 58: ...R2032 3V LET OP Het compartiment warmt op in de zon Het compartiment kan dus nat worden Bewaar er geen gevoelige voorwerpen in Bewaar geen waardevolle spullen in uw koffer VOORHAAK HELM 1 LET OP PAKJE...

Страница 59: ...oor uw voet op de steun te zetten en deze uit te klappen om de voertuig neer te zetten LET OP De zijstandaar heeft een automa tisch terugveersysteem Zorg ervoor dat uw voertuig stabiel genoeg ge parke...

Страница 60: ...gvuldig de volgende punten elke keer voor u gaat rijden LET OP Elke keer voor de voertuig wordt gebruikt dienen er voorcontroles te worden uitgevoerd en dergelijke inspectie kan in korte tijd worden u...

Страница 61: ...kelijk Controleer de remhandel op speling Aanpassen indien noodzakelijk Gashandel Zorg dat de werking soepel is Indien nodig gecontroleerd door een dealer Wielen en banden Controleer op beschadiging C...

Страница 62: ...t u de gashandel in richting a Om af te remmen draait u de gashandel in richting b REMMEN 1 Draai de gashandel helemaal dicht 2 Knijp tegelijkertijd de voor en ach terrem in terwijl u langzaam meer dr...

Страница 63: ...gelijke gebieden nadert en wees voorzichtig bij het oversteken er van Denk erom dat remmen op een natte weg veel moeilijker is Rijdt langzaam van heuvels af het remmen op een heuvel van erg moeilijk...

Страница 64: ...g Plaats uw lading stevig op de voertuig met het zwaarste gewicht in het midden van de voertuig van waa ruit u het gewicht evenredig naar beide kanten toe verdeeld Hierdoor behoudt u ook met een belad...

Страница 65: ...tuig berijden met extreem versleten banden zal de rijstabiliteit be nvloeden en kan tot verlies van controle over de voertuig leiden Laat extreem versleten banden a u b direct door een dealer vervan g...

Страница 66: ...cteren WAARSCHUWING Een zacht of sponzig gevoel in de rem handel kan een teken zijn dat er lucht in het hydraulisch systeem zit Inden er lucht in het hydraulisch systeem zit moet een dealer het systee...

Страница 67: ...tage van het remblok te controlen dient u de rem in te knijpen en tegelijkertijd de positie van de slijtage indicators te controleren Als een remblok slijtage indicator bijna de remschijf raakt dient...

Страница 68: ...en geen water in de hoofdcilinder kan ko men Water zal het kookpunt van de vloeistof aanzienlijk verlagen en kan resulteren in een dampbelvorming Remvloeistof kan geverfde opperv laktes of plastic ond...

Страница 69: ...VOOR EN ACHTERREMHAN DELS SMEREN De draaipunten van de voor en achter remhandels moeten worden gesmeerd op de momenten die staan aangege ven op de periodieke onderhoudsen smeringkaart Remhandel voor...

Страница 70: ...ntal keren hard neer op de handvaten om te kijken of de voorvork soepel samendrukt en weer terugveert WAARSCHUWING Wanneer schade aan de vork neem dan contact op met uw dealer Als u de behandeling van...

Страница 71: ...deze terug naar normaal Om de levensduur van de batterij te verlengen moeten de batterijen een keer per maand in rekening worden gebracht De scooter is uitgerust met een lagere modus Wanneer nog slec...

Страница 72: ...is uitgerust met een haloge en koplamp Indien een koplamp 2 doorbrandt dient u een dealer deze te laten vervangen en indien noodzakeli jk de straal van de koplamp instellen Dit model heeft verder een...

Страница 73: ...worden verscheept kun nen er problemen ontstaan tijdens het gebruik monteurs over het benodigde gereedschap en de ervaring beschikken en weten hoe zij uw voertuig op de juiste manier moeten onderhoude...

Страница 74: ...optimaliseert Voor het schoonmaken 1 Bedek de uitlaatpijp met een plastic zak om te voorkomen dat er water inkomt Binnenkant A u b alleen schoonmaken nadat de motor uit laatpijp is afgekoeld 2 Sluit a...

Страница 75: ...hoon maakmiddel Test de werking van de remmen en banden voor u de voertuig gebruikt STALLING Korte termijn Stal uw voertuig altijd op een koe le droge plek en indien nodig be scherm deze tegen stof me...

Страница 76: ...etype Stalen buisframe VOORWIEL Rand 2 15x10 Band 90 90 10 ACHTERWIEL Rand 2 15x10 Band 90 90 10 AFMETINGEN BANDDRUK GEMETEN OP KOUDE BANDEN Voor 2 5 bar Achter 2 5 bar VOORREM Type Enkele hydraulisch...

Страница 77: ...V 5 0 W 21 0 W Richtingaanwijzer lamp voor 12 V 10 0 W Richtingaanwijzer lamp achter 12 V 10 0 W Kentekenplaatverlichting 12 V 5 0 W Instrumentenverlichting 12 V 2 W Grootlicht indicatorlampje 12 V 2...

Страница 78: ...UIG VIN Number om vervangende onderdelen te bestellen bij uw dealer of het voertuig wordt gestolen Het chassisnummer is ingeslagen op het frame Om deze visie neem het deksel 1 van de binnenbekleding i...

Страница 79: ...garantie geeft de klant alleen te corrigeren het defect Vergoeding van indirecte schade of gevolgschade wordt uitdrukkelijk uitgesloten Op verlaten voertuigen kunnen geen garantie of garantie worden...

Страница 80: ...Elektronische assemblage Inspecteren I I I I I I Lager van voor en achterwielen Controleer vervang I V I V I Band Aanpassen schoon A S A S Controleur Schoon S S Lader Schoon S S S Lager van voorvork A...

Страница 81: ...OUDSBOEKJE 300 km Stamp Handtekening 2000 km Stamp Handtekening 4000 km Stamp Handtekening 6000 km Stamp Handtekening 8000 km Stamp Handtekening 10000 km Stamp Handtekening 12000 km Stamp Handtekening...

Страница 82: ...81 BEDRADINGSSCHEMA...

Страница 83: ...82 RUIMTE VOOR AANTEKENINGEN...

Страница 84: ...im Stra enverkehr geeignet Das einzigartige Fahrzeugdesign steht f r Ihren hervorragenden pers nlichen Geschmack Diese Bedienungsanleitung erkl rt die korrekte und sichere Benutzung des Fahrzeuges sow...

Страница 85: ...SANLEITUNG ZU IHRER EIGENEN SICHERHEIT AUFMERKSAM DURCH BEVOR SIE DAS FAHRZEUG IN BETRIEB NEHMEN FAHREN SIE ERST LOS WENN SIE VOLLST NDIG MIT DEM FAHRZEUG VERTRAUT SIND REGELM IGE INSPEKTIONEN WARTUNG...

Страница 86: ...85 WICHTIGE INFORMATIONEN ZUR BEDIENUNGSANLEITUNG Fachh ndler Stempel hier...

Страница 87: ...Seitenst nder 99 INSPEKTION VOR FAHRTANTRITT 100 101 FAHRBETRIEB 102 Starten 102 Beschleunigen Verz gern 102 Bremsen 102 Parken 103 REGELM SSIGE WARTUNG UND KLEINERE REPARATUREN 104 Reifen 104 Felgen...

Страница 88: ...en und vorsichtig fahren Blinken Sie beim Fahrspurwechsel und passen Sie Ihre Geschwindigkeit an Halten Sie Abstand zu anderen Verkehrsteilnehmern und machen Sie auf sich aufmerksam Kennen Sie Ihre Gr...

Страница 89: ...keine lose Kleidung diese kann sich im Fahrzeug verfangen und zu Unf llen f hren Ber hren Sie niemals die Akkukabel wenn das Fahrzeug l uft Sie k nnten einen elektrischen Schlag erhalten Verteilen Si...

Страница 90: ...Lassen Sie elektrische Zubeh rteile von einem Fachbetrieb montieren um der Kapazit t des elektrischen Systems zu entsprechen Unsachgem e Montage kann zum Ausfall der Beleuchtung geringer Motorleistung...

Страница 91: ...SICHERHEITSHINWEISE 90 1 Ordnungsnummer 1 1...

Страница 92: ...msscheibe Vorne 4 Scheinwerfer 3 Blinker Vorne 15 Seitenst nder Sitzbank Staufach Hauptst nder 5 Sattelverriegelung 7 Batterie 13 Rad Hinten 12 Trommelbremse hinten 11 Nummernschildbeleuchtung 10 Blin...

Страница 93: ...DES FAHRZEUGES 92 BEDIENELEMENTE UND INSTRUMENTE 16 Schalter am Lenker Links 17 R ckbremshebel 18 Instrumententafel 22 Z ndschloss 20 Vorderbremshebel 21 Gasgriff 19 Schalter am Lenker Rechts 16 17 18...

Страница 94: ...einschlagen 2 Dr cken Sie den Schl ssel in Position und drehen Sie ihn dann bis wobei Sie ihn weiter eindr cken 3 Den Schl ssel abziehen Die Lenkung entsperren Stecken Sie den Schl ssel ein und drehen...

Страница 95: ...wird ausgegeben Tachometer und Kilometerz hler Das Cockpit verf gt ber einen Tachometer und einen Kilometerz hler Der Tachometer zeigt die Geschwindigkeit des Fahrzeugs an Der Kilometerz hler zeigt d...

Страница 96: ...CHALTER AM LENKER RECHTS 1 2 3 1 Hupknopf 2 Lichtschalter 3 Geschwindigkeitsbegrenzerschalter ECO FAST Lichtschalter Sie schalten das Standlicht die Vorderlichter und das R cklicht ein indem Sie den L...

Страница 97: ...e den Schl ssel drehen 1 Die Ladebuchse 2 befindet sich vor dem Sattel 2 Den Akku aufladen 1 Stellen Sie den Hauptschalter auf ON 2 ffnen Sie den Sattel 3 Schlie en Sie das Ladeger t an Ihr Fahrzeug a...

Страница 98: ...ahrzeug l ngere Zeit nicht benutzen stellen Sie den Ein Aus Schalter auf OFF W hrend dieser Zeit muss der Akku einmal im Monat aufgeladen werden EIN AUS SCHALTER Unter dem Sitz Ihres Fahrzeugs befinde...

Страница 99: ...Sie keine empfindlichen Gegenst nde darin auf Bewahren Sie keine Wertsachen im Stauraum auf VORDERER HAKEN HELM 1 berschreiten Sie bei dem vorderen Haken 1 nicht die maximale Tragf higkeit von 1 kg TO...

Страница 100: ...llen Sie das Fahrzeug zeug aufrecht ab Der Seitenst nder verf gt ber einen Sensor der den Motor abschaltet wenn sie verwendet wird Der Seitenst nder springt automatisch zur ck Stellen Sie das Fahrzeug...

Страница 101: ...hrzeug durch einen autorisierten Fachbetrieb reparieren Bei Nachl ssigkeit des Fahrzeughalters wie z B Mangel an Pflege und Wartung Betrieb des Fahrzeuges mit defekten oder wartungs bed rftigen Teilen...

Страница 102: ...Bowdenz ge n tigenfalls schmieren Spiel des Bremshebels pr fen N tigenfalls nachstellen Gasgriff Stellen Sie sicher dass er sich m helos bewegen l sst Lassen Sie ihn gegebenenfalls durch eine Vertrag...

Страница 103: ...d stellen Sie die Spiegel ein 2 Dr cken Sie auf das Fahrzeug um die Mittelst tze einzuklappen 3 Drehen Sie den Schl ssel auf 4 Bet tigen Sie den Blinker auf der Seite zu der Sie fahren wollen 5 Versch...

Страница 104: ...Ihre Geschwindigkeit und berqueren Sie diese Gefahrenquellen mit u erster Vorsicht Denken Sie daran dass Bremsen auf nasser Fahrbahn schwieriger ist Bergab fahren Sie bitte langsam das Bremsen bei Ta...

Страница 105: ...n mittig auf das Fahrzeug Damit behalten Sie die Kontrolle ber das Fahrzeug H chstlast 150 kg Gesamtgewicht Fahrer Mitfahrer Ladung und Zubeh r Sicherheit und Zustand des Fahrzeuges h ngen von der ric...

Страница 106: ...egen Ihrem Fachh ndler 105 Reifeninspektion 1 2 3 1 Profiltiefe 2 Seitenwand 3 Verschlei anzeige berpr fen Sie den Zustand der Reifen vor jeder Fahrt Zeigt ein Reifen kreuzweise Linien Mindestprofilti...

Страница 107: ...ren an den Felgen vor Eine verformte oder gebrochene Felge muss ausgetauscht werden Das Rad muss nach einem Reifenwechsel ausgewuchtet werden Ein nicht ausgewuchtetes Rad f hrt zu schlechter Fahrleist...

Страница 108: ...hn gegebenenfalls ein Zur berpr fung der Bremse berpr fen Sie die Position der Einstellmutter Erhalten Sie keine korrekte Einstellung so lassen Sie die Einstellung von Ihrem Fachh ndler vornehmen 107...

Страница 109: ...dichtigkeit im Bremssystem hinweisen Bei niedrigem Bremsfl ssigkeitsstand berpr fen Sie bitte die Bremsbel ge auf Verschlei und das Bremssystem auf Undichtigkeiten Achten Sie beim berpr fen des Bremsf...

Страница 110: ...emshebel Hinterradbremshebel 109 Sch den an der Kabelumh llung k nnen zu Rostbildung und Schwerg ngigkeit f hren Tauschen Sie besch digte Bowdenz ge unverz glich aus um unsichere Situationen zu vermei...

Страница 111: ...und aufrecht ab 2 Ziehen Sie die Vorderradbremse und dr cken Sie den Lenker mehrmals kr ftig nach unten um die Federung der Gabel zu berpr fen Bei Sch den an der Gabel wenden Sie sich bitte an Ihren...

Страница 112: ...rmen hat er wieder seine normale Kapazit t Um die optimale Kapazit t des Akkus zu erhalten muss er einmal im Monat aufgeladen werden Der Motorroller verf gt ber ein Notfahrprogramm Bei 9 Restkapazit t...

Страница 113: ...tionslicht defekt kontaktieren Sie den Fachh ndler 1 3 112 Blinker Vorne Blinker Hinten 4 Wenn die Blinkerbirnen 4 nicht funktionieren wenden Sie sich bitte an Ihren H ndler Dieses Modell ist mit eine...

Страница 114: ...hrzeug Reparaturen so wenden Sie sich bitte an Ihren Fachh ndler der ber die notwendigen Werkzeuge Fachkenntnisse und Erfahrung verf gt um Ihr Fahrzeug ordnungsgem zu warten Benutzen Sie ausschlie lic...

Страница 115: ...ngern auch die Haltbarkeit und verbessern die Leistung Vorbereitung Schlie en Sie alle Abdeckkappen Deckel elektrische Anschl sse damit kein Wasser eindringen kann Benutzen Sie am besten nur Wasser u...

Страница 116: ...trocken und sch tzen Sie es n tigenfalls mit einer Abdeckplane Lagern Sie das Fahrzeug gut bel ftet bei trockener Luft ein Hohe Luftfeuchtigkeit f hrt zu Rostsch den Langfristige Lagerung ber Wochen...

Страница 117: ...90 90 10 HINTERRAD Felge 2 15x10 Reifen 90 90 10 ABMESSUNGEN REIFENDRUCK BEI KALTEN REIFEN Vorn 2 5 bar Hinten 2 5 bar VORDERRADBREMSE Typ Hydraulische Einscheibenbremse 180 mm Funktionsweise Bet tigu...

Страница 118: ...35 W R cklicht Bremslicht 12 V 5 W 21 W Blinker vorn 12 V 10 W Blinker hinten 12 V 10 W Kennzeichenbeleuchtung 12 V 5 W Instrumentenbeleuchtung 12 V 2 W Scheinwerfer Kontrollleuchte 12 V 2 W Blinker...

Страница 119: ...Identifikationsnummer zur Bestellung von Ersatzteilen von Ihrem Fachh ndler oder wenn das Fahrzeug gestohlen wird Die Fahrgestellnummer ist in den Rahmen gestanzt Um sie zu finden den Deckel 1 von de...

Страница 120: ...paratur oder Austausch eines schadhaften Teils Ersatz f r mittelbare und unmittelbare Sch den werden nicht gew hrt Auf verwahrloste Fahrzeuge kann keine Garantie oder Gew hrleistung geltend gemacht we...

Страница 121: ...ems l Schmierung Radaufh ngung vorn Schmierung Radaufh ngung hinten Schmierung Getriebe Schmierung Kabelbaum Schmierung Akku Anschluss Schmierung Lager der Gabel Schmierung P P P P P P P ERS P ERS P E...

Страница 122: ...ndlerstempel Datum H ndlerstempel Datum H ndlerstempel Datum H ndlerstempel Datum 2000 km 4000 km H ndlerstempel Datum 6000 km 8000 km 12000 km 14000 km FAHRGESTELLNUMMER MODELL NAMEDESKUNDEN UNTERSC...

Страница 123: ...SCHALTPLAN 122...

Страница 124: ...RAUM F R NOTIZEN 123...

Страница 125: ...tipo de veh culos Este manual describe el uso correcto de la veh culo incluyendo la conducci n segura los m todos simples de inspecci n y as sucesivamente Para una m s c moda y segura conducci n por f...

Страница 126: ...ETA USE LA MOTO CICLETA CUANDO USTED EST COMPLETAMENTE FAMILIARIZADO CON LOS CONTROLES Y FUNCIONES Y SI USTED HA ASIMILADO LAS T CNICAS DE CONDUCCI N ADECUADAS CON TODA TRANQUILIDAD LAS REVISIONES DE...

Страница 127: ...126 INFORMACI N IMPORTANTE Distribuidor sello aqu...

Страница 128: ...140 Caballete lateral 141 COMPROBACIONES ANTES DE UTILIZACI N 141 Lista de comprobaci n preliminar 142 OPERACI N Y PUNTOS IMPORTANTES CONDUCCI N 143 Arranque 143 Aceleraci n y desaceleraci n 143 Freno...

Страница 129: ...cidentes prestando atenci n y estando pendiente de los otros conductores Por lo tanto usted debe Usar ropa protectora una chaqueta de color brillante Activar los intermitentes antes de gi rar y frenar...

Страница 130: ...se ropa suelta ya que pue de quedar atrapada en las palancas de control o las ruedas y causar le siones o un accidente Nunca toque los cables de las ba ter as mientras el veh culo est en funcionamient...

Страница 131: ...olcado Al equipar la motocicleta de acces orios el ctricos consulte a una per que estas instalaciones no superan las capacidades del sistema el c trico de la motocicleta La instalaci n incorrecta de e...

Страница 132: ...131 1 1 INFORMACI N SOBRE LA SEGURIDAD 1 N mero de serie...

Страница 133: ...ra 2 Freno de disco delantero 4 Faro 3 Intermitente delantero 15 Caballete lateral 6 Asiento 8 Compartimento bajo asiento 14 Caballete central 5 Cerradura del asiento 7 Bater a 13 Rueda trasera 12 Fre...

Страница 134: ...L VEH CULO MANDOS E INSTRUMENTOS 16 Interruptores izquierdos del manillar 17 Palanca de freno trasero 18 Panel de control 19 Interruptores derechos del manillar 20 Palanca de freno delantero 21 Pu o d...

Страница 135: ...a izquierda 2 Pulse la tecla de la posici n lue go gire a la posici n contin e em pujando 3 Retire la llave Para desbloquear la direcci n Presione sobre la llave y luego gire a la posici n contin a pr...

Страница 136: ...uipado con un tac metro y con un cuentakil met ros El indicador de velocidad permite conocer la velocidad del veh culo El cuentakil metros indica la distancia total recorrida Indicador de autonom a de...

Страница 137: ...la velocidad m xima del veh culo puede ser de 45 km h PALANCA DEL FRENO DELANTE RO La palanca del freno delantero est situada sobre el pu o derecho Para accionarlo apriete la palanca y ac r quelo al p...

Страница 138: ...cleta UNIDAD DE CARGA Y TOMA DE CARGA Con el veh culo que recibir tambi n una unidad de cargador 1 para car gar la bater a del veh culo Si el indicador de carga en el veloc me tro cae en el rojo recar...

Страница 139: ...usted no utiliza el veh culo duran te un largo tiempo ponga el interrup tor de encendido en OFF Durante este tiempo las bater as necesitan ser cargadas una vez al mes INTERRUPTOR DE ALIMENTACI N Un in...

Страница 140: ...ienta con el sol El compartimento de almacenamiento puede mojarse No guarde objetos sensibles en su interior No guarde objetos de valor en el maletero GANCHO DELANTERO CASCO 1 TOP CASE opcional 1 139...

Страница 141: ...culo Libe re el caballete lateral apretando con su pie el soporte lateral PRECAUCI N El caballete lateral dispone de un sistema de estribo autom tico Aseg rese que su motocicleta est bien aparcada y q...

Страница 142: ...veh culo Estas comprobaciones pueden ser efectuadas muy r pidamente El aumento de seguridad que aportan compensan ampliamente el tiempo invertido ADVERTENCIA Si un elemento inspeccionado no funciona c...

Страница 143: ...able si es necesario Ajuste si es necesario Pu o del gas Aseg rese que el funcionamiento se hace sin esfuerzos Si es necesario hagalo revisar por un concesionario Ruedas y neum ticos Aseg rese de su b...

Страница 144: ...del gas Para aumentar la velocidad gire el pu o en la direcci n a Para disminuir gire el pu o en la direcci n b FRENO 1 Cierre completamente el pu o del gas 2 Apriete simult neamente ambos fre nos aum...

Страница 145: ...su dencia No olvide que es m s dif cil frenar En una pendiente conduzca len tamente Es m s dif cil frenar en bajada ESTACIONAMIENTO Cuando est aparcado apague el mo tor luego retira la llave de conta...

Страница 146: ...eh culo es un punto muy importante para su propia seguridad y para el ren dimiento del veh culo Instale su carga y loque la carga m s pesada en centro luego reparta el resto entre ambos lados para obt...

Страница 147: ...antera y trasera 1 6 mm ADVERTENCIA La utilizaci n de la motocicleta con neum ticos demasiado gastados disminuye la estabilidad del veh culo y puede provocar p rdidas de control Por favor haga reempla...

Страница 148: ...juego Su usted detecta este problema h galo reparar por un concesionario ADVERTENCIA de ser debido a la presencia de aire en el sistema hidra lico Si hay aire en el sistema hidr ulico h galo purgar po...

Страница 149: ...er que desmontar el freno Para cadores de desgaste en el momento del frenado Si una pastilla de freno est gastada hasta el punto que el in dicador de desgaste toque el disco del freno acuda a un conce...

Страница 150: ...o en el sistema El l quido de frenos puede dete elementos pl sticos Limpie siem pre inmediatamente el l quido derra mado A medida que las pastillas de freno se gastan es normal que el nivel del l quid...

Страница 151: ...seguridad LUBRICACI N DE LAS PALANCAS DE FRENO Los puntos de pivote de la palanca de freno delantero y trasero del freno de ben ser lubricados con regularidad Palanca de freno delantero Palanca de fre...

Страница 152: ...ra comprobar si se compri me y rebota suavemente 1 Coloque el veh culo sobre una su ADVERTENCIA Si usted comprueba que hay pro blemas con la horquilla delantera concesionario Si usted trata el tenedor...

Страница 153: ...sted la reemplaza en un lugar cerrado CONSERVE LA BATER A FUERA DEL ALCANCE DE LOS NI OS PRECAUCI N Conserve siempre la bater a carga da El almacenamiento de una ba ter a descargada puede da arla de m...

Страница 154: ...1 Si la luz de posici n LED es defectuosa por favor p ngase en contacto con el distribuidor Indicador de direcci n delantero Si la bombilla del indicador de direcci n 4 no se enciende solicite a un c...

Страница 155: ...argo que su motocicleta requiera una intervenci n de su concesionario o de un profesional con las herra mientas conocimientos y habilidades para reparar su moto Solo use recambios originales Las pieza...

Страница 156: ...a una bolsa de pl stico sobre el tubo de escape para evitar la ent rada de agua Espere hasta que el motor y el escape se hayan enfria do 2 Cierre todas las tapas cerraduras y conexiones el ctricas par...

Страница 157: ...ecialmente si el veh culo est cubierto La corrosi n es favore cida por la formaci n de condensaci n debajo de la cubierta A largo plazo Limpie el veh culo Engrase todos los cables de control las junta...

Страница 158: ...ico 90 90 10 NEUM TICO TRASERO Llanta 2 15x10 Neum tico 90 90 10 DIMENSI N PRESI N DEL AIRE DE LOS NEUM TI COS MEDIDA SOBRE NEUM TICOS FR OS Delantero 2 5 bar Trasero 2 5 bar FRENO DELANTERO Tipo Fren...

Страница 159: ...W Luz trasera stop 12 V 5 0 W 21 0 W Luz intermitente delantera 12 V 10 0 W Luz intermitente trasera 12 V 10 0 W Iluminaci n matr cula 12 V 5 0 W Iluminaci n instrumento 12 V 2 W Indicador faro 12 V 2...

Страница 160: ...olicitar piezas de repuesto a su distribuidor o para el caso de que el veh culo sea sustraido El n mero de chasis se encuentra graba do en el bastidor Para ver esto se quita la tapa 1 en el marco inte...

Страница 161: ...t n cubiertos por la garant a Los trabajos d e reparaci n realizados en periodo de garant a no implican que se alargue el periodo de garant a S lo este documento le da derecho a recurrir a los servici...

Страница 162: ...I I I conjunto electr nico Inspeccionar I I I I I I Cojinete de las ruedas delanteras y traseras Inspeccionar reemplazar I R I R I neum tico Ajustar limpiar A L A L controlador Limpiar L L cargador L...

Страница 163: ...o si el veh culo ha sido mantenido de acuerdo con este plan de mantenimiento 162 SERVICIO FOLLETO 300 km 2000 km 4000 km 6000 km 8000 km 10000 km 12000 km 14000 km N MERODEIDENTIFICACI N MODELO NOMBRE...

Страница 164: ...163 ESQUEMA EL CTRICO...

Страница 165: ...164 ESPACIO PARA NOTAS...

Страница 166: ...a persona lit stilistica rappresenta il vostro eccezionale gusto e preferenza nell inseguire lo stato dell attitudine alla live art Questo manuale descrive il corretto utilizzo di questo scooter inclu...

Страница 167: ...R USA RE LO SCOOTER SOLO DOPO AVER ACQUISITO ADEGUATA CONOSCENZA DEI COMANDI E DELLE CARATTERISTICHE DI FUNZIONAMENTO E DOPO ESSERE STATI ISTRUITI SULLE TECNICHE DI GUIDA SICURA E CORRETTA VERIFICHE P...

Страница 168: ...167 INFORMAZIONI IMPORTANTI SUL MANUALE Etichetta del rivenditore...

Страница 169: ...nale 180 Cavalletto laterale 181 CONTROLLI PRE UTILIZZO 182 Lista controlli pre utilizzo 183 FUNZIONAMENTO E PUNTI IMPORTANTI 184 Avvio 184 Accelerazione e decelerazione 184 Frenata 184 Parcheggio 185...

Страница 170: ...ttivi e dai colori accesi Accendere gli indicatori di direzio ne prima di svoltare e rallentare la velocit quando ci si avvicina e si oltrepassa un incrocio Mantenere una distanza approp riata dagli a...

Страница 171: ...tterie mentre il veicolo in funzione Si potrebbe ricevere una scossa elet trica ter non approvate da il produttore o la rimozione dell equipaggiamento origi nale potrebbe rendere poco sicuro lo scoote...

Страница 172: ...rico dello scooter Un installazione impropria di tali apparecchi potrebbe causare una pericolosa perdita di lu minosit una potenza motore ridotta o anche danni al veicolo ALTRI PUNTI DI GUIDA SICURA I...

Страница 173: ...172 1 1 INFORMAZIONI DI SICUREZZA 1 Numero di serie...

Страница 174: ...e 4 Luce principale 3 Indicatore di direzione anteriore 15 Cavalletto laterale 6 Sedile 8 Vano portaoggetti sedile 14 Cavalletto centrale 5 Serratura della sedile 7 Batteria 13 Ruota posteriore 12 Fre...

Страница 175: ...ESCRIZIONE DEL VEICOLO CONTROLLI E STRUMENTI 16 Interruttori manopola sinistra 17 Leva freno posteriore 18 Tachimetro 19 Interruttori manopola destra 20 Leva freno anteriore 21 Manopola acceleratore 2...

Страница 176: ...loccare lo sterzo 1 Girare il manubrio tutto a sinistra 2 Portare la chiave in posizione poi ruotarla in posizione continuando a tenerla premuta 3 Togliere la chiave Per sbloccare lo sterzo 1 Premere...

Страница 177: ...di direzio ne destro Questa spia lampeggia quando l interruttore dell indicatore di svolta premuto a destra Tachimetro e contachilometri Il cruscotto dotato di tachimetro e contachilometri Il tachimet...

Страница 178: ...AST Se si imposta l interruttore a ECO la velocit massima del veicolo pu essere 38 kmh Se si imposta l interruttore su FAST la velocit massima del veicolo pu essere 45 km h LEVA DEL FRENO ANTERIORE La...

Страница 179: ...o corretto CARICABATTERIE E PRESA DI RI CARICA Con il veicolo si ricever anche un ca ricabatterie 1 per caricare la batteria del veicolo Se l indicatore di carica sul tachimetro scende in rosso ricari...

Страница 180: ...momento Se non si utilizza il veicolo per un lungo periodo di tempo impostare l interruttore di accensione su OFF Durante questo tempo le batterie devono essere caricate una volta al mese INTERRUTTOR...

Страница 181: ...le Il vano portaoggetti pu quindi essere bagnato Non tenere oggetti sensibili all interno Non riporre oggetti di valore nel vano portaoggetti GANCIO FRONTALE CASCO 1 BAULETTO SUPERIORE opzionale 1 180...

Страница 182: ...emere sul supporto del cavalletto la terale in posizione verticale per tenere in piedi il veicolo ATTENZIONE Il cavalletto laterale dotato di una molla di richiamo automatico As sicuratevi che il vost...

Страница 183: ...zioni dello scooter ispezionare velocemente le parti importanti per evitare allo scooter serie conseguenze o un incidente Controllare attentamente i seguenti punti prima di ogni corsa ATTENZIONE porta...

Страница 184: ...Regolare se necessario Manopola d accelerazione Assicurarsi che il funzionamento sia scorrevole Se necessario hanno controllato da un concessionario Ruote e pneumatici Controllare eventuali danni Cont...

Страница 185: ...e in direzione a Per ridurre la velocit girare la manopola d accelerazione in direzione b FRENATA 1 Chiudere completamente il gas 2 Azionare contemporaneamente il freno anteriore e quello posteriore m...

Страница 186: ...e quando vi avvicinate a tali zone ed attraver satele con attenzione Tenete a mente che frenare su una strada bagnata molto pi Guidate piano scendendo da una collina perch frenare in difesa PARCHEGGIO...

Страница 187: ...ed il peso del vostro veicolo molto importante per la vostra sicurezza ed il rendimento del vei colo Sistemate saldamente il carico sul veicolo e mettete il bagaglio pi pesan te al centro dello scoot...

Страница 188: ...one del pneumatico 1 Spessore del battistrada del pneu matico 2 Parete laterale del pneumatico 3 Indicatore di usura del pneumatico AVVERTIMENTO Gli pneumatici devono essere cont rollati prima di ogni...

Страница 189: ...osa potrebbe indicare la presen za di aria nel sistema idraulico Se c aria nel sistema idraulico fatelo spur gare da un rivenditore prima di usare la motocicletta L aria nel sistema idrau lico diminui...

Страница 190: ...rivenditore MANUTENZIONE PERIODICA E RIPARAZIONI MINORI Ganasce del freno posteriore Controllare e regolare sempre prima dell uso la leva del freno Per control dado regolabile Se il dado arriva alal d...

Страница 191: ...ni basso pu indicare pastiglie dei freni usurate e o perdite del sistema frenante Se il livel lo del liquido dei freni basso accerta tevi di controllare l usura delle pastiglie dei freni ed eventuali...

Страница 192: ...il pi presto possibile per evitare condizi oni nonsicure LUBRIFICARE LA LEVA DEL FRE NO Il funzionamento della manopola d accelerazione dovrebbe essere cont rollato prima di ogni uso Leva del freno an...

Страница 193: ...premere forte verso il basso sulle manopole diverse volte per control lare se la forcella anteriore si com AVVERTIMENTO Se si rileva un danno o la forcella ante riore non funziona correttamente farla...

Страница 194: ...nto dal 20 al 25 e una volta riscaldata torner alla normalit RUOTA I cuscinetti della ruota anteriore e pos teriore devono essere controllati agli ATTENZIONE Se c gioco nel mozzo della ruota o se la r...

Страница 195: ...inoltre una luce LED posizione 1 Se la luce di posizione a LED difettoso si prega di contattare il rivenditore Indicatore frontale Se il segnale di svolta lampadine 4 non si accendono si prega di con...

Страница 196: ...cui tecnici esperti hanno gli strumenti l esperienza ed il know how necessari ad eseguire una corretta manutenzione del vostro scooter Usate solo parti di ricambio originali Delle imitazioni potrebber...

Страница 197: ...eguite la pulizia ATTENZIONE Il prduttore sconsiglia di usare sgrassanti acidi per la pulizia ma se devono essere usati tali prodot zona circoscritta ed usare acqua asciugarla e usare uno spray anti s...

Страница 198: ...AVVERTIMENTO Conservare lo scooter in una stanza ben areata con aria asciutta se possib le Un luogo con molta umidit causer ruggine A lungo termine Pulire il veicolo i punti giratori di tutte le leve...

Страница 199: ...EUMATICO POSTERIORE Cerchio 2 15x10 Pneumatici 90 90 10 DIMENSIONI PRESSIONE DELLO PNEUMATICO MISURATA A PNEUMATICI FREDDI Anteriore 2 5 bar Posteriore 2 5 bar FRENO ANTERIORE Tipo Freno a disco idrau...

Страница 200: ...luce del freno 12 V 5 0 W 21 0 W Indicatore di direzione anteriore 12 V 10 0 W Indicatore di direzione posteriore 12 V 10 0 W Luce della targa 12 V 5 0 W Misuratore d illuminazione 12 V 2 W Spia dell...

Страница 201: ...presso il rivenditore o il veicolo deve essere rubato Il numero di telaio stampigliato sul te laio Per questo punto di vista prendere il coperchio 1 dal rivestimento interno del piede ATTENZIONE tocic...

Страница 202: ...a o garanzia pu essere richiesto Si prega di prestare attenzione alle seguenti note Il corpo e le componenti del trim sono regolarmente rimuovere lo sporco Utilizzare Non utilizzare una rondella di pr...

Страница 203: ...RE I RE I RE Freni anteriori e posteriori Ispezionare I I I I I I sistema di sospensione Ispezionare I I I I assemblaggio elettronico Ispezionare I I I I I I Cuscinetti delle ruote anteriori e poster...

Страница 204: ...ono aggiunti 203 PROGRAMMA DI ASSISTENZA 300 km Timbro Data 2000 km Timbro Data 4000 km Timbro Data 6000 km Timbro Data 8000 km Timbro Data 10000 km Timbro Data 12000 km Timbro Data 14000 km Timbro Da...

Страница 205: ...204 PIANO DI CABLAGGIO...

Страница 206: ...205 SPAZIOPERLENOTE...

Страница 207: ...ram o seu gosto perfeito e o cuidado que tem em cada uma das suas desloca es no dia a dia Este manual descreve a adequada utiliza o do ve culo nomeadamente no que diz respeito condu o em seguran a m t...

Страница 208: ...A indica o de ATEN O indica as precau es especiais que devem ser tomadas para evitar danos ao ve culo A indica o ATEN O sinaliza informa es importantes ATEN O ATEN O ADVERT NCIA Este manual cont m inf...

Страница 209: ...208 Local de identifica o do vendedor INFORMA ES IMPORTANTES...

Страница 210: ...LATERAL 222 VERIFICA ES ANTES DA UTILIZA O 223 LISTA DE VERIFICA O PRELIMINAR 224 CONDU O 225 ARRANQUE 225 ACELERA O E DESACELERA O 225 TRAVAGEM 225 ESTACIONAMENTO 226 MANUTEN O PERI DICA E REPARA ES...

Страница 211: ...o a outros indiv duos que n o sejam capazes de o conduzir Respeitar sempre os limites de velocidade e o c digo da estrada As posi es do condutor e do passageiro s o pontos importantes para garantir um...

Страница 212: ...ulo quanto poss vel Tenha cuidado para distribuir o peso de forma t o equilibrada quanto poss vel em ambos os lados do ve culo a fim de minimizar as desigualdades e a instabilidade do motor Acess rios...

Страница 213: ...to lateral e que provoque uma invers o Sempre que equipar o ve culo com acess rios el tricos queira por favor consultar um t cnico qualificado para garantir que esse equipamento n o excede a capacidad...

Страница 214: ...213 1 1 INFORMA ES DE SEGURAN A 1 N mero de s rie...

Страница 215: ...nteiro 3 Indicador de mudan a de dire o dianteiro 4 Farol 5 Bloqueio do selim 6 Selim 7 Bateria 8 Compartimento de arruma o 9 Luz traseira Luz de travagem 10 Indicador de mudan a de dire o traseiro 11...

Страница 216: ...18 22 20 21 19 DESCRI O DO VE CULO 16 Interruptores do punho esquerdo 17 Alavanca de trav o traseiro 18 Painel de bordo 19 Interruptores do punho direito 20 Alavanca de trav o dianteiro 21 Punho do a...

Страница 217: ...te o bloqueio da dire o As diferentes posi es s o descritas abaixo Todos os circuitos el tricos s o alimentados o motor pode ser iniciado A chave n o pode ser retirada Paragem Bloqueio A dire o est bl...

Страница 218: ...ainel est equipado com veloc metro e od metro O veloc metro permite lhe saber a velocidade do ve culo O od metro indica a dist ncia total percorrida Indicador de Autonomia da Bateria O seu ve culo est...

Страница 219: ...em FAST a velocidade m xima ser de 45km h ALAVANCA DO TRAV O DIANTEIRO A alavanca do trav o dianteiro est localizada no punho direito do volante Para ativ la aperte a alavanca de forma aproxim la do...

Страница 220: ...rregar a bateria do ve culo Se o indicador do veloc metro indicar a cor vermelha recarregue a bateria assim que poss vel 1 ATEN O N o fa a for a quando roda a chave 1 A tomada de carga 2 est localizad...

Страница 221: ...bateria e evite a descarga profunda Carregue a bateria durante 5 a 7 horas dependendo das condi es de utiliza o Recomenda se uma carga di ria para utilizar plenamente o seu ve culo a qualquer momento...

Страница 222: ...E CAPACETE 1 ATEN O N o exceda o limite de carga de 1 kg para o gancho da frente 1 TOP CASE Opcional Uma top case opcional pode ser instalada na scooter para permitir que armazene o seu capacete ou ou...

Страница 223: ...o com um sensor que corta o motor assim que este utilizado ATEN O O suporte lateral disp e de uma potente mola de retorno Certifique se de que o seu ve culo est bem estacionado e localizado numa posi...

Страница 224: ...vor confira cuidadosamente os seguintes pontos antes de cada viagem ATEN O ADVERT NCIA Se um elemento inspecionado n o est a funcionar corretamente inspecione novamente e repare o antes de utilizar o...

Страница 225: ...o de trav es recomendado at ao n vel indicado Certifique se de que o sistema hidr ulico n o apresenta fugas Verificar se funciona Lubrifique o cabo se necess rio Verifique a folga na alavanca Ajuste s...

Страница 226: ...de mudan a de dire o para o lado onde se vai dirgir 5 Verifique o estado do tr nsito e de seguida rode lentamente o punho do acelerador para come ar a circular 6 Desativar o indicador de mudan a de d...

Страница 227: ...bita o ve culo corre o risco de derrapar As passagens de n vel faixas de el trico placas de metal nos locais de constru o bem como as tampas de esgoto pode tornar se extremamente escorregadias em temp...

Страница 228: ...das no centro e de seguida divida a carga entre os dois lados de modo a obter um bom controlo da dire o uma vez que a carga esteja instalada Carga m xima 150kg Peso total do condutor passageiro carga...

Страница 229: ...or N o tente MANUTEN O PERI DICA E REPARA ES MENORES Inspe o dos pneus Os pneus devem ser verificados antes de cada trajeto Se os sulcos de um pneu mostram as linhas cruzadas profundidade m nima dos s...

Страница 230: ...umentar a folga da alavanca do trav o rode a porca de ajuste 1 sobre a base do trav o na dire o a Para reduzir a folga da alavanca do trav o rode a porca de ajuste na dire o b VERIFICA O DA FOLGA DA A...

Страница 231: ...ca e de lubrifica o 1 2 3 MANUTEN O PERI DICA E REPARA ES MENORES PASTILHAS DE TRAV O MAXILAS DE TRAV O Pastilhas de trav o dianteiro Cada pastilha de trav o dianteiro fornecida com indicadores de des...

Страница 232: ...cabos e suas extremidades devem ser lubrificados se necess rio Se um cabo estiver danificado ou n o ativar sem esfor o pe a a um revendedor que o verifique ou substitua Lubrificante recomendado Castr...

Страница 233: ...erior e interferir com o movimento dos cabos Substitua os cabos danificados assim que poss vel para garantir uma boa seguran a LUBRIFICA O DAS ALAVANCAS DE TRAV O Os eixos das alavancas dos trav es di...

Страница 234: ...r verificados do modo seguinte nos intervalos indicados na tabela de manuten o peri dica e de lubrifica o Cuidados recomendados Castrol Motorcycle DWF pulveriza o de leo ADVERT NCIA Pare o ciclomotor...

Страница 235: ...ade de restitui o el trica e a autonomia s o correspondentemente reduzidas 20 a 25 ao primeiro MANUTEN O PERI DICA E REPARA ES MENORES Se h folga no eixo da roda ou se a roda n o girar sem esfor o pe...

Страница 236: ...ndedor que a substitua e se necess rio ajuste o feixe do farol Este modelo inclui tamb m um farol de estacionamento LED 1 Se o farol de estacionamento LED est com defeito por favor contacte o seu reve...

Страница 237: ...r Leve o a um revendedor ou a t cnicos competentes munidos de ferramentas conhecimento e compet ncias necess rias que poder o reparar adequadamente o seu ve culo Use apenas pe as de reposi o originais...

Страница 238: ...s o uma vez que tenha terminado Por favor utilize apenas detergentes suaves e gua para limpar as coberturas de pl stico carenagens vidros dos far is e indicadores no painel de bordo etc Ap s a limpeza...

Страница 239: ...s pontos de todas as alavancas pedais girat rios bem como o descanso lateral descanso central Verifique e se necess rio ajuste a press o de enchimento dos pneus em seguida eleve o ve culo de modo a qu...

Страница 240: ...TRASEIRO Jante 2 15 x 10 Pneu 90 90 10 DIMENS ES PRESS O DE AR DOS PNEUS MEDIDA COM PNEUS FRIOS Frente 2 5 bar Atr s 2 5 bar TRAV O DIANTEIRO Tipo Trav o de disco hidr ulico nico 180mm Funcionamento C...

Страница 241: ...12V 5 0W 21 0W Indicador de mudan a de dire o dianteiro 12V 10 0W Indicador de mudan a de dire o traseiro 12V 10 0W Ilumina o da placa de matr cula 12V 5 0W Ilumina o de instrumentos 12V 2W Indicador...

Страница 242: ...s de reposi o junto do seu revendedor ou se o ve culo for roubado O n mero de chassis est gravado no quadro Para v lo remova a cobertura 1 da parede interna da carenagem 1 ATEN O O n mero de identific...

Страница 243: ...cumento lhe permite solicitar a garantia Verifique ent o por favor que este documento lhe entregue corretamente preenchido pelo vendedor certifique se de que tem corretamente registado o seu ve culo n...

Страница 244: ...ar substituir V SUB SUB V Pneu Regular limpar REG L REG L Regulador Limpar L L Carregador Limpar L L L Rolamentos de garfo Regular limpar REG L REG L Sistema de travagem Lubrifica o SUB SUB SUB SUB SU...

Страница 245: ...dos 244 AGENDAMENTO DE MANUTEN O 300 km Carimbos Data 2000 km Carimbos Data 4000 km Carimbos Data 6000 km Carimbos Data 8000 km Carimbos Data 10000 km Carimbos Data 12000 km Carimbos Data 14000 km Car...

Страница 246: ...ESQUEMA DE CABLAGEM 245...

Страница 247: ...ESPA O PARA ANOTA ES 246...

Страница 248: ...chnology represents your outstanding taste and favor to pursue the state of the art living attitude This manual describes the correct usage of this vehicle including safety riding simple inspection me...

Страница 249: ...ORE OPERATION THIS VEHICLE ONLY OPERA TE THE VEHICLE UNTIL YOU HAVE COMPLETELY AWARE OF ADEQUATE KNOWLEDGE OF CONTROLS AND OPERATION FEATURE AND YOU HAVE BEEN TRAINED IN SAFE AND PROPER RIDING TECHNIQ...

Страница 250: ...249 IMPORTANT MANUAL INFORMATION Dealer label here...

Страница 251: ...E 255 Side view 255 Controls and instruments 256 INSTRUMENT AND CONTROL FUNCTIONS 257 257 257 258 259 259 259 259 260 261 262 262 262 263 264 265 OPERATION AND IMPORTANT RIDING POINTS 266 266 266 266...

Страница 252: ...y effective in reducing the change of this kind of accidents Therefore Wear a brightly colored and protecti ve clothes Jacket Operate the turning signals before turning and slow down the Speed when ap...

Страница 253: ...t approved by maker or the removal of original equipment may let vehicle unsafe for use and cause severe per make your vehicle illegal touse Loading and accessories Adding accessories or cargo to your...

Страница 254: ...not exceed the capacity of the vehicle s electrical system Unpro per install of such items may cause a dangerous loss of lights lower en gine power or even damage the ve hicle OTHER SAFE RIDING POINTS...

Страница 255: ...254 1 Serial number 1 1 SAFETY INFORMATION...

Страница 256: ...HICLE SIDE VIEW 1 Front wheel 2 Front disc brake 4 Headlight 3 Front turn signal light 15 Side stand 6 Seat 8 Seat box 14 Main stand 5 Seat lock 7 Battery 13 Rear wheel 12 Rear drum brake 11 License p...

Страница 257: ...8 22 20 21 19 DESCRIPTION OF THE VEHICLE CONTROLS AND INSTRUMENTS 16 Left handlebar switches 17 Rear brake lever 18 Dashboard unit 19 Right handlebar switches 20 Front brake lever 21 Throttle grip 22...

Страница 258: ...ck the steering 1 Turn the handlebars all the way to the left 2 Push the key in and turn it to the position while still pushing it 3 Remove the key Unlock the steering Push the key in and then turn it...

Страница 259: ...meter and an odometer The speedometer shows the riding speed The odometer shows the total distance traveled Voltage meter The voltage meter indicates voltage le vel of the battery HANDLEBAR SWITCHES L...

Страница 260: ...CO FAST Speed limit switch ECO FAST If you set the switch to ECO the maximum speed of the vehicle can be 38 km h If you set the switch to FAST the maximum speed of the vehicle can be 45 km h FRONT BRA...

Страница 261: ...ing or when you park the vehicle CHARGER AND CHARGING SO CKET With the vehicle you will receive also the vehicle If the charge indicator on the speedo meter drops into the red recharge the vehicle as...

Страница 262: ...ure your vehicle has full power to be used at all times If you do not use the vehicle for a long time set the power switch to OFF During this time the batteries need to be charged once a month POWER S...

Страница 263: ...ompartment is heated by the sun The storage compartment can therefore get wet Do not keep sensitive items inside Do not keep valuable items in the trunk FRONT HOOK HELMET 1 Do not exceed the maximum l...

Страница 264: ...using your feet to step on the bracket of side stand to up right positi on to stand the vehicle CAUTION The side stand with auto rebound system Make sure your vehic le have been park well are stable e...

Страница 265: ...ing points before each ride CAUTION Pre operation checks should be made each time the vehicle is used Such an inspection can be accomplished in a very short time and the added safety it assures is mor...

Страница 266: ...m s s i n o i t a r e p o t a h t e r u s e k a M p i r g e l t t o r h T If necessary have checked by a dealer e g a m a d r o f k c e h C s e r i t d n a s l e e h W Check tire condition and tread...

Страница 267: ...ND DECELERA TION and closing the throttle To increase the speed turn the throttle grip in direction BRAKING 1 Close the throttle completely 2 Apply both front and rear brakes si multaneously while gra...

Страница 268: ...approaching such areas and cross them with caution Keep in mind that braking on a Ride slowly down a hill as bra WARNING Avoid braking hard or suddenly otherwise the vehicle may skid Railroad crossing...

Страница 269: ...could cause damge or even lead to accident Allocation of your cargo and weight of your vehicle is very important for your own safety and vehicle performance Load your cargo rmly on vehicle and put the...

Страница 270: ...u es of your region Minimum tire tread depth Front and rear 1 6 mm WARNING Drive with worn tire is illegal redu ces stability and can lead to loss of control over the vehicle Let worn or damaged tires...

Страница 271: ...a ke lever end If there is free play have a dealer inspect the brake system in the hydraulic system If there is air in the hydraulic system have a dealer bleed the system before operating the motorcyc...

Страница 272: ...n to the point that a wear indicator almost touches the brake disc have a dealer replace the brake pads as a set Front brake pads Each front brake pad is provided with wear indicators which allows you...

Страница 273: ...performance Be careful that water does not enter in vapor lock surfaces or plastic parts Always cle As the brake pads wear it is normal level goes down suddenly have a dealer check WARNING after the...

Страница 274: ...conditions LUBRICATING THE FRONT AND REAR BRAKE LEVERS The pivoting points of the front and rear brake levers must be lubricated at the tenance and lubrication chart Front brake lever Rear brake lever...

Страница 275: ...and push the handlebars several times down hard to verify the suspension of the fork WARNING When damage to the fork please contact your dealer If you treat the telescopic fork with cleaning agents m...

Страница 276: ...sed to cold temperatures the battery life and efficiency will be reduced by 20 25 it will return to normal once it has warmed up To preserve the life of the battery charge it fully at least twice a mo...

Страница 277: ...ING Headlight bulb This model is equipped with halogen burn out have a dealer replace it and if This model has furthermore a LED po defective please contact your dealer 2 1 Front indicator come on hav...

Страница 278: ...peration However should your vehicle require any repair take it to a dealer whose skilled technicians have the necessary tools experience and knowhow to service the vehicle properly Use only genuine r...

Страница 279: ...id to get into while you CAUTION Do not use acid based cleaners If such funds used for stubborn stains so use this only occasionally dry it immediately after and then apply a corrosion protection spra...

Страница 280: ...hicle cover WARNING Please store the vehicle in a well air place with wet humidity will cause rust Long term for weeks Clean the vehicle Lubricate all control cables and the pivoting points of all lev...

Страница 281: ...C engine in wheel hub CHASSIS Frame type Steel tube backbone FRONT TIRE Rim 2 15x10 Tyre 90 90 10 REAR TIRE Rim 2 15x10 Tyre 90 90 10 TIRE AIR PRESSURE COLD TIRES Front 2 5 bar Rear 2 5 bar FRONT BRAK...

Страница 282: ...35 W 35 0 W Tail brake light 12 V 5 0 W 21 0 W Front turn signal light 12 V 10 0 W Rear turn signal light 12 V 10 0 W License plate light 12 V 5 0 W Meter lighting 12 V 2 W High beam indicator light 1...

Страница 283: ...r dealer or the vehicle should be stolen The chassis number is stamped into the from the inner lining in the foot CAUTION to identify your motorcycle and may be used to register your vehicle with the...

Страница 284: ...mages are immediately being the reparation respectively the exchange of a damaged part in an authorized workshop after our approval Compensation for remote or instantaneous damages cannot be granted V...

Страница 285: ...e s s a c i n o r t c e l E I R I R I e c a l p e r t c e p s n I s l e e h w k c a b d n a t n o r f f o g n i r a e B Tire C A C A n a e l C r e l l o r t n o C C C n a e l C r e g r a h C C C C Be...

Страница 286: ...ith this service plan 285 300 km Stamp Signature 2000 km Stamp Signature 4000 km Stamp Signature 6000 km Stamp Signature 8000 km Stamp Signature 10000 km Stamp Signature 12000 km Stamp Signature 14000...

Страница 287: ...WIRING DIAGRAM 286...

Страница 288: ...SPACE FOR NOTES 287...

Страница 289: ...100 BURJASSOT Norauto Italia SPA Corso Savona 85 10024 MONCALIERI Norauto Portugal LDA Av dos Cavaleiros n 49 Alfragide 2794 057 CARNAXIDE F r Deutschland importiert von A T U Auto Teile Unger Handels...

Отзывы: