27
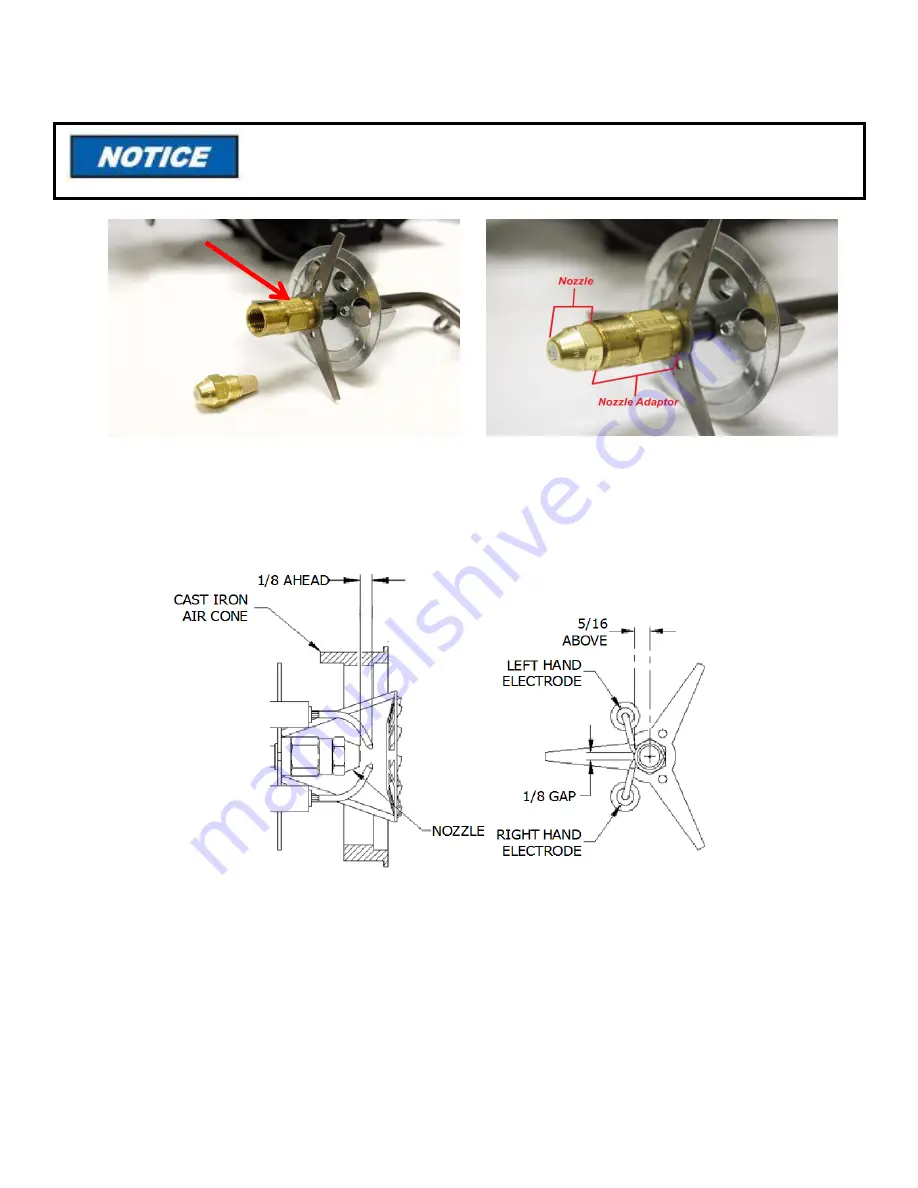
7. Thread the nozzle into the nozzle adaptor finger tight, then tighten the nozzle
securely with a 5/8” wrench, while using
a
3/4" backing wrench to hold the nozzle adapter. Do not over tighten. There is a brass stamp that reads “TOP” on the
nozzle adapter that should be orientated up (Figure 14).
Figure 14- Oil Gun Nozzle Installation (Flamelock and electrodes removed for clarity).
8. Identify which burner model you have, then measure and verify that the electrode spacing is per Figure 15 or Figure
16 on pages 27-28, if not correct to factory settings.
Figure 15
–EH-DC Electrode Positions, Factory settings
DO NOT touch the new nozzle’s filter or touch the face of the nozzle. Oil from
your fingers on either surface can adversely affect nozzle performance
Stamp


