
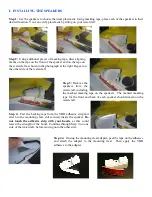


Step 2:
Once the volume switch wires have been routed, peel the backing tape from the volume switch and
apply the switch to the desired location.
Do not touch the adhesive strip with your hands
, as this could lessen
the strength of the bond. Be certain of the location before the switch is pressed into place, as
once the adhesive
has been applied, it cannot be moved.
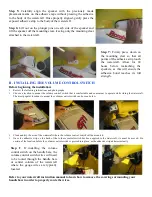
III. INSTALLING THE AMPLIFIER MODULE
Before beginning the installation:
•
Review the instructions and photographs below.
•
Choose a central location in the front hull section of the watercraft to mount the amplifier module, making sure that the speaker
cables will reach the speaker locations.
•
Clean and dry the area of the watercraft where the amplifier module will be mounted.
•
It is important to note that once the adhesive strip on the back of the amplifier module is applied to the watercraft, it
cannot be moved. Be certain of location before the amplifier module is pressed into place, as the adhesive strip adheres
instantly.
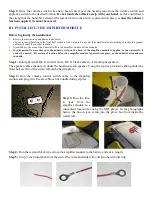
Step 1:
Run right out (R-OUT) and left out (L-OUT) black cables to left and right speakers.
The speaker cables should exit under the hood near each speaker. Using the zip ties provided, cabling under the
front hull section of the watercraft can be held in place.
Step 2:
Run the volume control switch cable to the amplifier
module and plug it in. Excess cable can be bundled using zip ties.
Step 3:
Run the line-
in jack from the
amplifier module to a
convenient location for using the MP3 player. In the photographs
below, the line-in jack is run into the glove box from inside the
watercraft.
Step 4:
Run the red and black wires from the amplifier module to the battery and cut to length.
Step 5:
Strip
¼
inch insulation from the end of the wires and slide wire end into the terminal ring.


