background image


 III.   OPERATION 


A.


INSTALLATION 


1.


Proper pretreatment must be determined and installed prior to the RO system. 

2.


The water supply and pretreatment equipment should be sufficient to provide a 
minimum of 10-psig at the maximum feed flow.  


3.


An electrical receptacle with a ground fault interrupt (GFI) is highly recommended. 

4.


Responsibility for meeting local electrical and plumbing codes lies with the owner / 
operator. 

5.


Install indoors in an area protected from freezing.  Space allowances for the removal 
of the membranes from the pressure vessels should be provided.  

6.


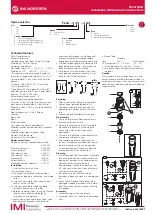
Verify that a prefilter cartridge is installed in the housing. (see figure #1, item I). 


B.  PLUMBING CONNECTIONS 
 

Note: It is the responsibility of the end user to ensure that the installation is done according to 
local codes and regulations.


1.


Connect the pretreated feed water line to the prefilter inlet (Figure # 1 item M). A 
feed water shutoff valve should be located within 10 feet of the system.  

2.


Temporarily connect the product water outlet to a drain.  The product outlet is located 
behind the panel at the top of the product flow meter. The product water line should 
never be restricted.  Membrane and/or system damage may occur if the product line is 
blocked.  

3.


Connect the reject water outlet to a drain.  The reject outlet is located behind the 
panel at the top of the reject flow meter. The reject drain line should never be 
restricted.  Membrane and/or system damage may occur if the reject drain line is 
blocked. An air gap must be located between the end of the drain line and the drain. 
The use of a standpipe or other open drain satisfies most state and local codes and 
allows for visual inspection and sampling.  
 

C.


ELECTRICAL  


Note: It is the responsibility of the end user to ensure that the installation is done according to 
local codes and regulations.


1.


Make sure the on / off switch in the off position (Figure # 1 item A). 

2.


Plug the unit into a 115 volt 3 prong outlet.  Note – The R4X40-2 requires a 20 amp 
outlet.  Systems configured for 230 volts do not come with a plug. 

3.


If a tank level switch and/or pretreatment interlock is used, remove the jumper(s) 
from the terminals on the controller and install the switch leads into the terminals (see 
figure #2). The tank level and pretreatment interlock switches should be closed for the 
RO system to run.  When the circuit is open the RO system turns off and the front 
panel indicator turns on.    

Содержание R4X40

Страница 1: ...REVERSE OSMOSIS INSTALLATION AND OPERATION MANUAL Model R4X40...

Страница 2: ......

Страница 3: ...ty of the end user Successful long term performance of an RO system depends on proper operation and maintenance of the system This includes the initial system startup and operational startups and shut...

Страница 4: ...nt II Controls Indicators and Components III Operation A Installation B Plumbing Connections C Electrical D Startup E Control Function F Operation and Maintenance Log G Troubleshooting IV Replacement...

Страница 5: ...0 ppm TDS and pH 7 Individual membrane productivity may vary 15 May be operated on other feed waters with reduced capacity Percent Rejection is based on membrane manufactures specifications overall sy...

Страница 6: ...suspended solids sediment from the feed water Backwashing the media removes the trapped particles Backwash can be initiated by time or differential pressure Water Softener Used to remove calcium and m...

Страница 7: ...solubility Additionally the solubility is highly pH and temperature dependent Silica fouling can be prevented with chemical injection and or reduction in recovery II CONTROLS INDICATORS and COMPONENT...

Страница 8: ...Figure 1...

Страница 9: ...Figure 2 Controller Connections...

Страница 10: ...he product water line should never be restricted Membrane and or system damage may occur if the product line is blocked 3 Connect the reject water outlet to a drain The reject outlet is located behind...

Страница 11: ...rating data using the log sheet E CONTROL FUNCTION 1 When the on off switch is in the on position the inlet valve opens and the pump runs There is a five second delay between the opening of the inlet...

Страница 12: ...ater TDS The meter will automatically turn it self off after a few seconds The quality meter is powered by two AAA batteries To replace the batteries lift the meter out of the bracket and remove the b...

Страница 13: ...ED WATER TEMP FEED WATER HARDNESS FEED WATER CHLORINE LEVEL PRE FILTER INLET PRESSURE PRE FILTER OUTLET PRESSURE REMARKS Note Change the prefilter when the differential pressure increases by 5 10 psi...

Страница 14: ...and reject Slime in pipes and vessels Shock dosage of sodium bisulfite Continuous feed of low conc bisulfite at reduced pH Peracetic acid sterilization Clean with alkaline anionic surfactant Chlorine...

Страница 15: ...Low feed water temperature Adjust reject valve or replace pump Increase membrane feed pressure or heat the feed water IV REPLACEMENT PARTS LIST A list of common replacement parts is provided below Co...

Страница 16: ...e the end caps The new membranes should be installed in the same orientation as the old membranes Note It is very important that the brine seal does not flip up or roll when installing the membrane br...

Страница 17: ...perating at 50 recovery with a feed water SDI 1 R4X40 1 R4X40 2 R4X40 3 Product GPM 1 5 3 0 4 5 Reject GPM 1 5 3 0 4 5 Nominal flows for systems operating at 50 recovery with a feed water SDI 3 R4X40...

Страница 18: ...0 68 0 86 19 66 2 0 84 18 64 4 0 81 17 62 6 0 79 16 60 8 0 77 15 59 0 74 14 57 2 0 72 13 55 4 0 70 12 53 6 0 68 11 51 8 0 66 10 50 0 64 9 48 2 0 62 8 46 4 0 61 7 44 6 0 59 6 42 8 0 57 5 41 0 55 Multip...

Отзывы: