9
Changing Filters Procedures
•
Shut off the system by turning off the water supply, and turn off the tank valve, open
the spigot to depressurize
•
Prepare a towel under the unit for water spills
•
Use a filter wrench (part no. 566) or use hands to open the filter housing, unscrew it
from right to left. To open is clockwise looking from the top.
•
Throw away the used filter, and clean the inside of the housing by rinsing or
scrubbing it with dish soap.
•
Check condition of the O-ring. It should be replaced every 3 years to prevent leak
•
Place the new filter inside the filter housing. For carbon filters, the rubber gaskets
should be on both ends.
•
Put some Vaseline or silicon-based O-ring lubricant on the side of the housing thread
and the O-rings (optional procedure)
•
Use a filter wrench or both hands to screw the housing back by turning it from left to
right (Don’t lay down the unit when turning it, the unit should be standing upright to
prevent the o-ring or filters from misalignment)
•
Repeat the above steps for other filters
•
The 5
th
stage inline carbon filter has penny-sized protective caps on both ends.
Please use a screw driver or knife to pry open the caps.
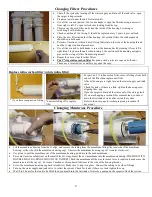
Replace inline carbon filter: (white inline filter)
* if you have compression fitting
*unscrew fitting off to replace
filter
For part no. 213 inline carbon filter, remove fittings from both
ends of the filter then replace new filter.
After all housings are tight, turn on the water supply and tank
valve.
Check for leaks, if there is a leak; tighten the housing or re-
aligning the o-ring.
Open the spigot to drain all the water out of the storage tank.
If you are changing a carbon filter or membrane, you must
drain the first tank of water after restart the system.
Refer to the next page for recharging tank procedure (if
necessary)
Changing Membrane Procedure
•
Lift the membrane housing from the U-clips, and remove the tubing from the membrane fitting (the inlet side of the membrane
housing, or the side with the membrane housing cap). Unscrew the membrane housing cap off (counter-clockwise)
•
Use pliers to pull the membrane out of the membrane housing, and discard the used membrane.
•
Put some Vaseline or lubricant on the small black O-rings. Insert the new membrane into the membrane housing (THE SIDE WITH
DOUBLE BLACK O-RINGS SHOULD GO IN FIRST) Push the membrane all the way in (some force is required to make sure the
membrane is all the way in). Put some Vaseline or silicon based lubricant to the side of the housing threads.
•
Screw the membrane-housing cap back (clockwise). Make sure O-ring is in place. Connect the tubing to its elbow fittings.
•
Turn on the water supply and tank valve to restart the system. Check for leaks, if there is a leak, tighten the cap
•
Wait 2 to 3 hours for the tank to be filled then you must drain the first tank of water by opening up the spigot to flush the system.


