5
6
5. Using Your Ice Maker
1. Please unsure that the Ice Maker has been thoroughly cleaned before
use.
2. Open the Lid of the Ice Maker and remove the Ice Basket
3. Pour water into the Water Reservoir, ensure the water DOES NOT go
over the maximum water level mark.
4. Place the Ice Basket back into the Ice Maker and close the Lid.
5. Plug in the unit into the wall socket and turn the wall socket on. The
“Power” indicator light will start to blink. Press the “Power” Button on the
control panel to begin the ice making cycle. The “Power” indicator light
will light up.
7. Select the size of the ice block required by the “Select” button. If the
surrounding ambient temperature is below 15°C, we recommend to select
the small or medium size to avoid the ice blocks from sticking together.
8. The ice making cycle lasts 6 to 15 minutes, depending on the size of
the ice cube selection & room temperature.
*NOTE: A new machine may sometimes take a few hours to adjust, the
rate of ice production may be slow and the ice blocks produced may
be small in size. This is considered normal, the Ice Maker will start to
make the ice blocks faster once the Ice Maker has settled.
9. While the Ice Maker is on, check the water level to ensure there is
sufficient water to produce ice. If the Water Pump cannot inject water into
the Ice Bucket the Ice Maker will STOP and the “Water” indicator light will
come on. Press the “Power” button to turn off the Ice Maker, and fill the
Water Reservoir with water up to the maximum level mark. Allow the Ice
Maker to stand for 3 minutes for the refrigerant to settle before restarting
the ice production cycle again. Press the “Power” button once again to
turn on the Ice Maker and start the ice production cycle.
10. The Ice Maker automatically stops producing ice once the Ice Basket is
full.
11. Always change the water in the Ice Maker every 24 hours to prevent
the water from becoming stagnant.
12. If the Ice Maker is not in use, ensure that all water is drained from the
Water Reservoir. To use refill the Water Reservoir and start from
Point 1 above.
C. Cleaning and Maintaining Your Ice Maker
* Always ensure the Ice Maker is unplugged from the wall socket before
cleaning
1. Remove the Ice Basket, and wash in warm soapy water, rinse
thoroughly and dry.
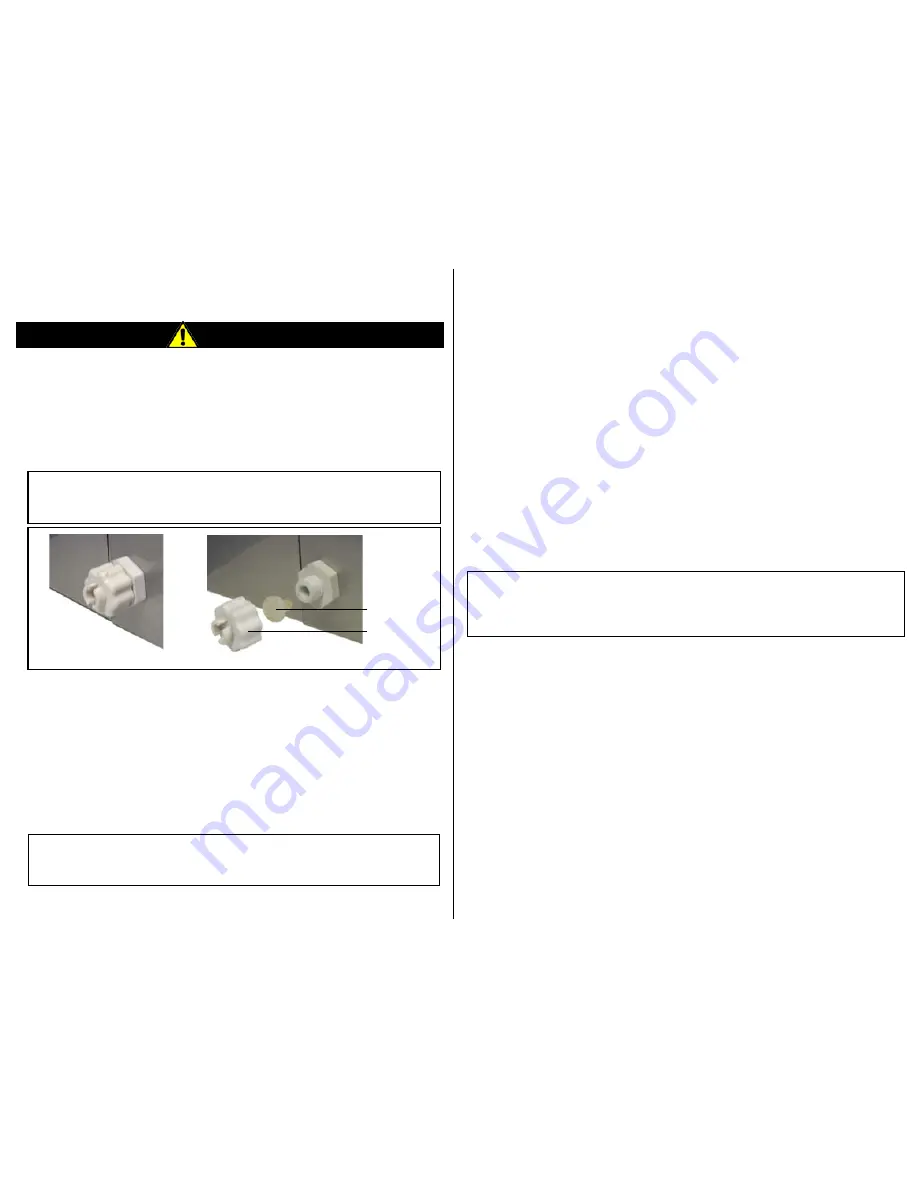
2. Twist the Drain Cap off and remove the Silicone Stopper. Place in a
safe place. (This will allow any water in the Water Reservoir and
pipes to flow out of the Ice Maker
*NOTE: always ensure that you have a bucket handy to collect the
water that flows from the Drain Pipe, as water drains very
quickly
3. Clean the interior of the Ice Maker with diluted cleaning detergent,
warm water and a soft cloth. Rinse the interior thoroughly to remove
any soapy residue and dry thoroughly with a soft cloth.
4. The outside of the Ice Maker should be cleaned regularly with a mild
detergent and water, then dried thoroughly with a soft cloth.
5. Once the unit is clean, re-insert the silicone stopper and twist the
Drain Cap back on and ensure that these are securely tightened.
6. Plug the Ice Maker back into the wall socket.
7. Please see Section 5 to start producing ice.
*NOTE: When the Ice Maker is not in use please ensure that you
drain all water from the machine and clean thoroughly before
use.
WARNING
Closed Drain Cap
Open Drain Cap
Silicone
Stopper
Drain Cap


