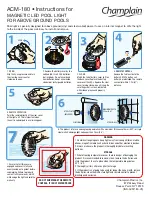
USING YOUR CLEANER
The battery pack for your cleaner has been shipped in a low voltage condition. It should be charged overnight prior to use.
WARNING:
The cleaner charger is for indoor use only.
WARNING:
Do not expose charger to excessive moisture or extreme heat or
cold. Charge battery only with the battery charger provided.
PRECAUTIONS:
•
Make sure power supply is normal household voltage, 120 volts,
60 Hz (240 volts, 50Hz International), AC only.
•
Do not handle cleaner while charging with wet hands or without shoes.
•
Do not use or store your charger outdoors.
Charge battery
indoors
in a
clean dry
place
. For best results, your cleaner battery should be charged in a location where the temperature is
above 50 degrees F and below 100 degrees F.
TO CHARGE
•
Turn the cap on the back of your cleaner counterclockwise to expose the charging jack connection.
NOTE:
When removing the battery cap, it is normal to hear air escaping. The air inside has simply
expanded from being heated by the motor.
•
Connect the lead from the charger to the charging jack on the cleaner.
•
Connect the charger to the appropriate electrical outlet.
•
After charging, ensure that the battery cap is fully secure before attempting to use
your cleaner.
CAUTION:
Replace the battery cap after charging. Placing cleaner in water
without replacing the battery cap will void your warranty.
BATTERY LIFE
•
The batteries are factory sealed
in the motor box, and CANNOT BE
REPLACED. Do not attempt in any
way to destroy or disassemble motor
box or any of its components.
Under
no circumstances should you attempt to open the
battery pack and replace the batteries yourself. Your
battery pack should give you many hours of use. If
your motor, batteries, or charger stop working, take
the cleaner to an authorized service center.
•
NEVER LEAVE your cleaner plugged
in for long term storage.
Please follow these instructions carefully:
•
Place the cleaner on its end on a stable and secure surface.
•
Place the filter bag/seal ring (part no.PBW022AP) into the cleaner, as shown in diagram. Make sure the rub-
ber seal ring sits on the funnel. All of the filter bag must be inside the funnel to ensure the head closes fully.
•
Put the nose cap (part no.PBA002) on the funnel, as shown. Align the lock tabs with the openings.
•
Turn clockwise until nosecap locks in place.
NOTE: You should not need to apply excessive force in order to close the latch. If you have trouble, make sure the filter bag is
not between the seal and the nose cap or funnel and there are no other obstructions such as sand.
Setting up your cleaner for use
CHARGING JACK
ON/OFF SWITCH


