background image

CHAPTER 2: Preparation, Installation, and Connection

10

MUVPN Client

5

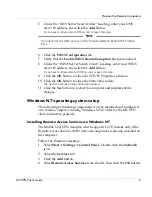
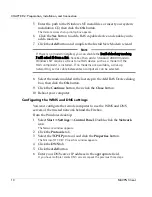
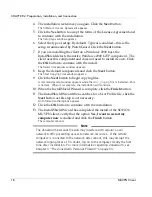
Enter the path to the Windows NT install files or insert your system 
installation CD, then click the 

OK

 button.

The Remote Access Setup dialog box appears.

6

 Click the 

Yes

 button to add a RAS capable device and enable you to 

add a modem.

7

Click the 

Add

 button and complete the Install New Modem wizard.


N

OTE

If there is no modem installed, you can enable the Don't detect my modem; 
I will select it from a list checkbox then add a Standard 28800 modem. 
Windows NT requires at least one RAS device such as a modem if the 
RAS component is installed. If no modems are available, a dial-up 
networking, serial cable between two computers can be selected.

8

Select the modem added in the last step in the Add RAS Device dialog 
box, then click the 

OK

 button.

9

Click the 

Continue

 button, then click the 

Close

 button.

10 Reboot your computer.

Configuring the WINS and DNS settings

You 

must

 configure the remote computer to use the WINS and DNS 

servers of the trusted network behind the Firebox.

From the Windows desktop:
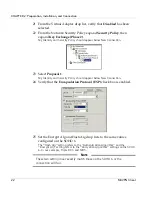
1

Select 

Start

 => 

Settings

 => 

Control Panel

. Double-click the 

Network


icon.

The Network window appears.

2

Click the 

Protocols

 tab.

3

Select the 

TCP/IP

 protocol and click the 

Properties

 button.

The Microsoft TCP/IP Properties window appears.

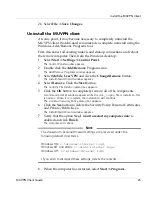
4

Click the 

DNS 

tab.

5

Click the 

Add

 button.

6

Enter your DNS server IP address in the appropriate field.

If you have multiple remote DNS servers repeat the previous three steps.

Содержание Firebox SOHO 6 Wireless

Страница 1: ...WatchGuard Firebox SOHO 6 MUVPN Clients Guide SOHO 6 1...

Страница 2: ...ing in your computer s environment please refer to your system user manual The following conventions are used in this guide Convention Indication Bold type Menu commands dialog box options Web page op...

Страница 3: ...6739 and 5146221 and other patents pending Microsoft Internet Explorer Windows 95 Windows 98 Windows NT and Windows 2000 are either registered trademarks or trademarks of Microsoft Corporation in the...

Страница 4: ...DIRECT INDIRECT INCIDENTAL SPECIAL EXEMPLARY OR CONSEQUENTIAL DAMAGES INCLUDING BUT NOT LIMITED TO PROCUREMENT OF SUBSTITUTE GOODS OR SERVICES LOSS OF USE DATA OR PROFITS OR BUSINESS INTERRUPTION HOWE...

Страница 5: ...E LIABLE FOR ANY DIRECT INDIRECT INCIDENTAL SPECIAL EXEMPLARY OR CONSEQUENTIAL DAMAGES INCLUDING BUT NOT LIMITED TO PROCUREMENT OF SUBSTITUTE GOODS OR SERVICES LOSS OF USE DATA OR PROFITS OR BUSINESS...

Страница 6: ...BUSINESS INTERRUPTION HOWEVER CAUSED AND ON ANY THEORY OF LIABILITY WHETHER IN CONTRACT STRICT LIABILITY OR TORT INCLUDING NEGLIGENCE OR OTHERWISE ARISING IN ANY WAY OUT OF THE USE OF THIS SOFTWARE EV...

Страница 7: ...TE GOODS OR SERVICES LOSS OF USE DATA OR PROFITS OR BUSINESS INTERRUPTION HOWEVER CAUSED AND ON ANY THEORY OF LIABILITY WHETHER IN CONTRACT STRICT LIABILITY OR TORT INCLUDING NEGLIGENCE OR OTHERWISE A...

Страница 8: ...viii MUVPN Client...

Страница 9: ...stem setup 7 Windows NT operating system setup 9 Windows 2000 operating system setup 11 Windows XP operating system setup 14 Install the MUVPN Client 17 Configuring the MUVPN Client 19 Uninstall the M...

Страница 10: ...y network log in information even when I m not connected to the network 38 I am not prompted for my user name and password when I turn my computer on 38 Is the Mobile User VPN tunnel is working 38 My...

Страница 11: ...mpliant devices allowing data from an entire network rather than a single remote user This chapter describes how to configure a SOHO 6 for use with the WatchGuard Mobile User VPN MUVPN client Redeem y...

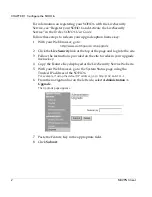
Страница 12: ...the LiveSecurity link at the top of the page and log into the site 3 Follow the instructions provided on the site to redeem your upgrade license key 4 Copy the Feature Key displayed at the LiveSecurit...

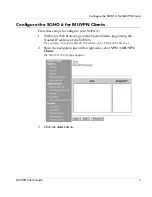
Страница 13: ...s to configure your SOHO 6 1 With your Web browser go to the System Status page using the Trusted IP address of the SOHO 6 For example if using the default IP address go to http 192 168 111 1 2 From t...

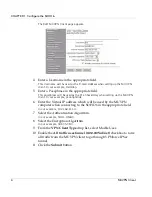
Страница 14: ...e MUVPN client In our example pL4n3phr34k 6 Enter the Virtual IP address which will be used by the MUVPN computer when connecting to the SOHO 6 in the appropriate field In our example 192 168 111 4 7...

Страница 15: ...ard Internet connection and activates the MUVPN client The MUVPN client then creates an encrypted tunnel to your trusted network protected behind a SOHO 6 The MUVPN client allows you to provide remote...

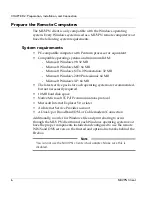
Страница 16: ...Professional 64 MB Microsoft Windows XP 64 MB The latest service packs for each operating system are recommended but not necessarily required 10 MB hard disk space Native Microsoft TCP IP communicati...

Страница 17: ...b 4 Enter a name for the remote computer This must be a unique name on the remote network 5 Enter the domain name you are connecting to This should be the same as the Logon to Windows NT domain value...

Страница 18: ...mmunications checkbox and click the OK button The Copying Files dialog box appears and copies the necessary files 4 The Dial Up Networking Setup dialog box appears and prompts you to restart the compu...

Страница 19: ...Properties window 10 Click the OK button to close the Network window The System Settings Change dialog box appears 11 Click the Yes button to restart the computer and implement the changes Windows NT...

Страница 20: ...e a dial up networking serial cable between two computers can be selected 8 Select the modem added in the last step in the Add RAS Device dialog box then click the OK button 9 Click the Continue butto...

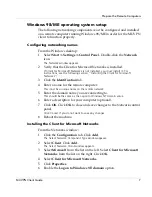
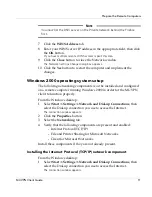
Страница 21: ...on a remote computer running Windows 2000 in order for the MUVPN client to function properly From the Windows desktop 1 Select Start Settings Network and Dial up Connections then select the Dial up co...

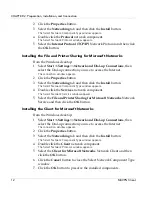
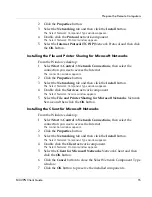
Страница 22: ...he Select Network Component Type window appears 4 Double click the Services network component The Select Network Service window appears 5 Select the File and Printer Sharing for Microsoft Networks Net...

Страница 23: ...operties button The Internet Protocol TCP IP Properties window appears 5 Click the Advanced button The Advanced TCP IP Settings window appears 6 Click the DNS tab 7 Under the DNS server addresses in o...

Страница 24: ...m setup The following networking components must be installed and configured on a remote computer running Windows XP in order for the MUVPN client to function properly From the Windows desktop 1 Selec...

Страница 25: ...t Network Component Type window appears 4 Double click the Services network component The Select Network Service window appears 5 Select the File and Printer Sharing for Microsoft Networks Network Ser...

Страница 26: ...e Properties button The Internet Protocol TCP IP Properties window appears 5 Click the Advanced button The Advanced TCP IP Settings window appears 6 Click the DNS tab 7 Under the DNS server addresses...

Страница 27: ...UVPN installation files are available at the WatchGuard Web site http www watchguard com support The installation process consists of two parts installing the client software on the remote computer an...

Страница 28: ...ing files A command prompt window appears while the dni_vapmp file is installed this is normal When it is complete the installation will continue 10 When the InstallShield Wizard is complete click the...

Страница 29: ...Edit Add Connection A New Connection will appear under the My Connections folder within the Network Security Policy field on the left side of the Editor NOTE The ZoneAlarm personal firewall may immedi...

Страница 30: ...has been selected 8 Enable the Connect using checkbox and select Secure Gateway Tunnel from the drop list 9 From the ID Type drop list select IP Address 10 Enter the External IP Address of the SOHO 6...

Страница 31: ...ate field In our example pL4n3phr34k 18 From the Select Certificate drop list verify that None has been selected 19 From the ID Type drop list select E mail Address 20 Enter the same Username configur...

Страница 32: ...ct Proposal 1 My Identity and Security Policy should appear below New Connection 24 Verify that the Encapsulation Protocol ESP check box is enabled 25 Set the Encrypt Alg and Hash Alg drop lists to th...

Страница 33: ...n The Confirm File Deletion dialog box appears 5 Click the OK button to completely remove all of the components A command prompt window appears while the dni_vapmp file is installed this is normal Whe...

Страница 34: ...de area network WAN From the Windows desktop system tray 2 Verify the MUVPN client status it must be activated If it is not right click the icon and select Activate Security Policy For information on...

Страница 35: ...nsecured data Activated and Connected The MUVPN client has established at least one secure MUVPN tunnel connection but is not transmitting data Activated Connected and Transmitting Unsecured Data The...

Страница 36: ...the MUVPN client which you must allow through the personal firewall in order to establish the MUVPN tunnel MuvpnConnect exe IreIKE exe The personal firewall will detect the attempt of these programs t...

Страница 37: ...click the Mobile User VPN client icon 2 Select Disconnect All The MUVPN Client closes all tunnels This process does not affect your connection to the Internet You must disconnect from the Internet se...

Страница 38: ...t Log Viewer The Log Viewer window appears The Connection Monitor The Connection Monitor displays statistical and diagnostic information for each active connection in the security policy This module s...

Страница 39: ...to establish or has not been established yet A key indicates that the connection has a Phase 2 IPSec SA or both a Phase 1 and Phase 2 SA A key with a black line moving below it indicates that the clie...

Страница 40: ...CHAPTER 2 Preparation Installation and Connection 30 MUVPN Client...

Страница 41: ...mputer is most vulnerable at its doors called ports Without ports no connection to the Internet is possible ZoneAlarm protects these ports by following a simple rule Block all incoming and outgoing tr...

Страница 42: ...des a brief tutorial of the product immediately after installation of the MUVPN client Carefully read each step to familiarize yourself with the application For more information on ZoneAlarm features...

Страница 43: ...his program access each time the application is executed enable the Remember the answer each time I use this program checkbox Here is a list of a few essential programs which will need access through...

Страница 44: ...lick the Yes button to continue with uninstalling the TrueVector service and disable its Internet Security features The Select Uninstall Method window appears 4 Verify that Automatic is selected and t...

Страница 45: ...ZoneAlarm Features MUVPN Client Guide 35 6 The Install window appears and prompts you to restart the computer Click the OK button to reboot your system...

Страница 46: ...CHAPTER 3 The ZoneAlarm Personal Firewall 36 MUVPN Client...

Страница 47: ...ient are described below My computer is hung up just after installing the MUVPN client This is most likely due to either the ZoneAlarm personal firewall application interfering with regular Local netw...

Страница 48: ...ion for use by network adapters and networked applications Later when you connect to your ISP and start the MUVPN client your computer uses the stored user name password and domain to connect to the c...

Страница 49: ...2 Select Map Network Drive The Map Network Drive dialog box appears 3 Use the drop list to select a drive letter Either use the drop list or type a network drive path For example techsupport share2 ro...

Страница 50: ...a MUVPN session the Windows operating system waits for a signal from the network before it times out and completes the shut down cycle I lost the connection to my ISP and now I can t use the company...

Отзывы: