


9
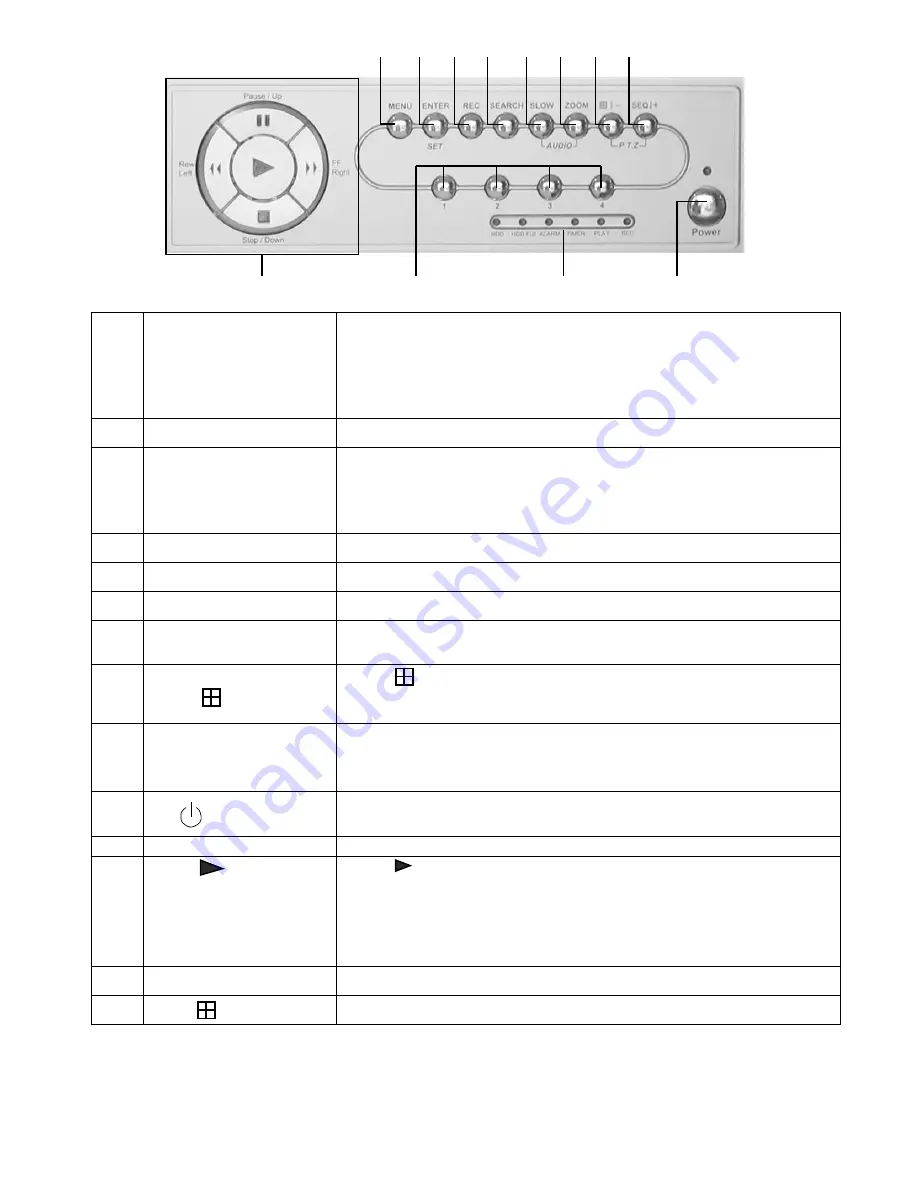
Operation
1
“
LED LIGHTS
”
HDD
: HDD is reading or recording
HDD Full
: HDD is full.
ALARM
: Once the alarm is triggered
TIMER
: When timer recording is turned on
PLAY
: Under playing status
REC
: Under recording status
2
“
MENU
”
Press “MENU” button to enter the main menu.
3
“
ENTER
” / “
SET
”
Press “ENTER” button to confirm the setting.
Press “SET” to change the position of the channel display.
Press “
▲▼
◄►
“ to select the channel which you would like to change.
Press “
+
” or “
-
” to select the channel which You would like to show.
4
“
REC
”
Press “REC” button to activate the manual recording.
5
“
SEARCH”
Press “SEARCH” button to enter the search menu.
6
“SLOW”
Under the playback mode, press “SLOW“ button to show slow playback.
7
“
ZOOM
”
Press “ZOOM” button to enlarge the picture of selected channel (under the live
mode).
8
“ ” / “
-
”
Press “ “ button to show the 4 channel display mode.
Press “
-
” button to change the setting in the menu.
9
“
SEQ
” / “
+
”
Press “SEQ” button to activate the call monitor function and press “SEQ” button
again to escape the call monitor mode.
Press “
+
” button to change the setting in the menu.
10
“ “
or
“
Power
”
Press this button to turn (On / Off) the DVR.
(Under the recording mode, please stop recording before turning off the DVR).
11
“
CH1
” “
CH2
” “
CH3
” “
CH4
” Press “
1
” “
2
” “
3
” “
4
” buttons to select the channel to display
12
“ ”
or
“
PLAY
”
UP
/
PAUSE
DOWN
/
STOP
LEFT
/
REWIND
RIGHT
/
FAST
FORWARD
Press “ “ to playback the recorded data.
Press “
▲▼
◄►
“ to move the cursor up / down / left / right.
Under the playback mode, press “
II
“ button to pause playback.
Under the playback mode, press “
■
“ button to stop playback.
Under the playback mode, press “
►►
“ button to fast forward.
Under the playback mode, press “
◄◄
“ button to fast rewind.
OPT
SLOW & ZOOM
Press these two buttons to select live or playback sounds of the audio channels.
OPT
& SEQ
Press these two buttons at the same time to enter / exit the PTZ control mode.
2 3 4 5 6 7 8 9
12 11 1 10


