


Page 24 of 102
Page 25 of 102
Doc: DRX Installation
Version: 7.1 January 2021
Doc: DRX Installation
Version: 7.1 January 2021
DRX INSTALLATION MANUAL
DRX INSTALLATION MANUAL
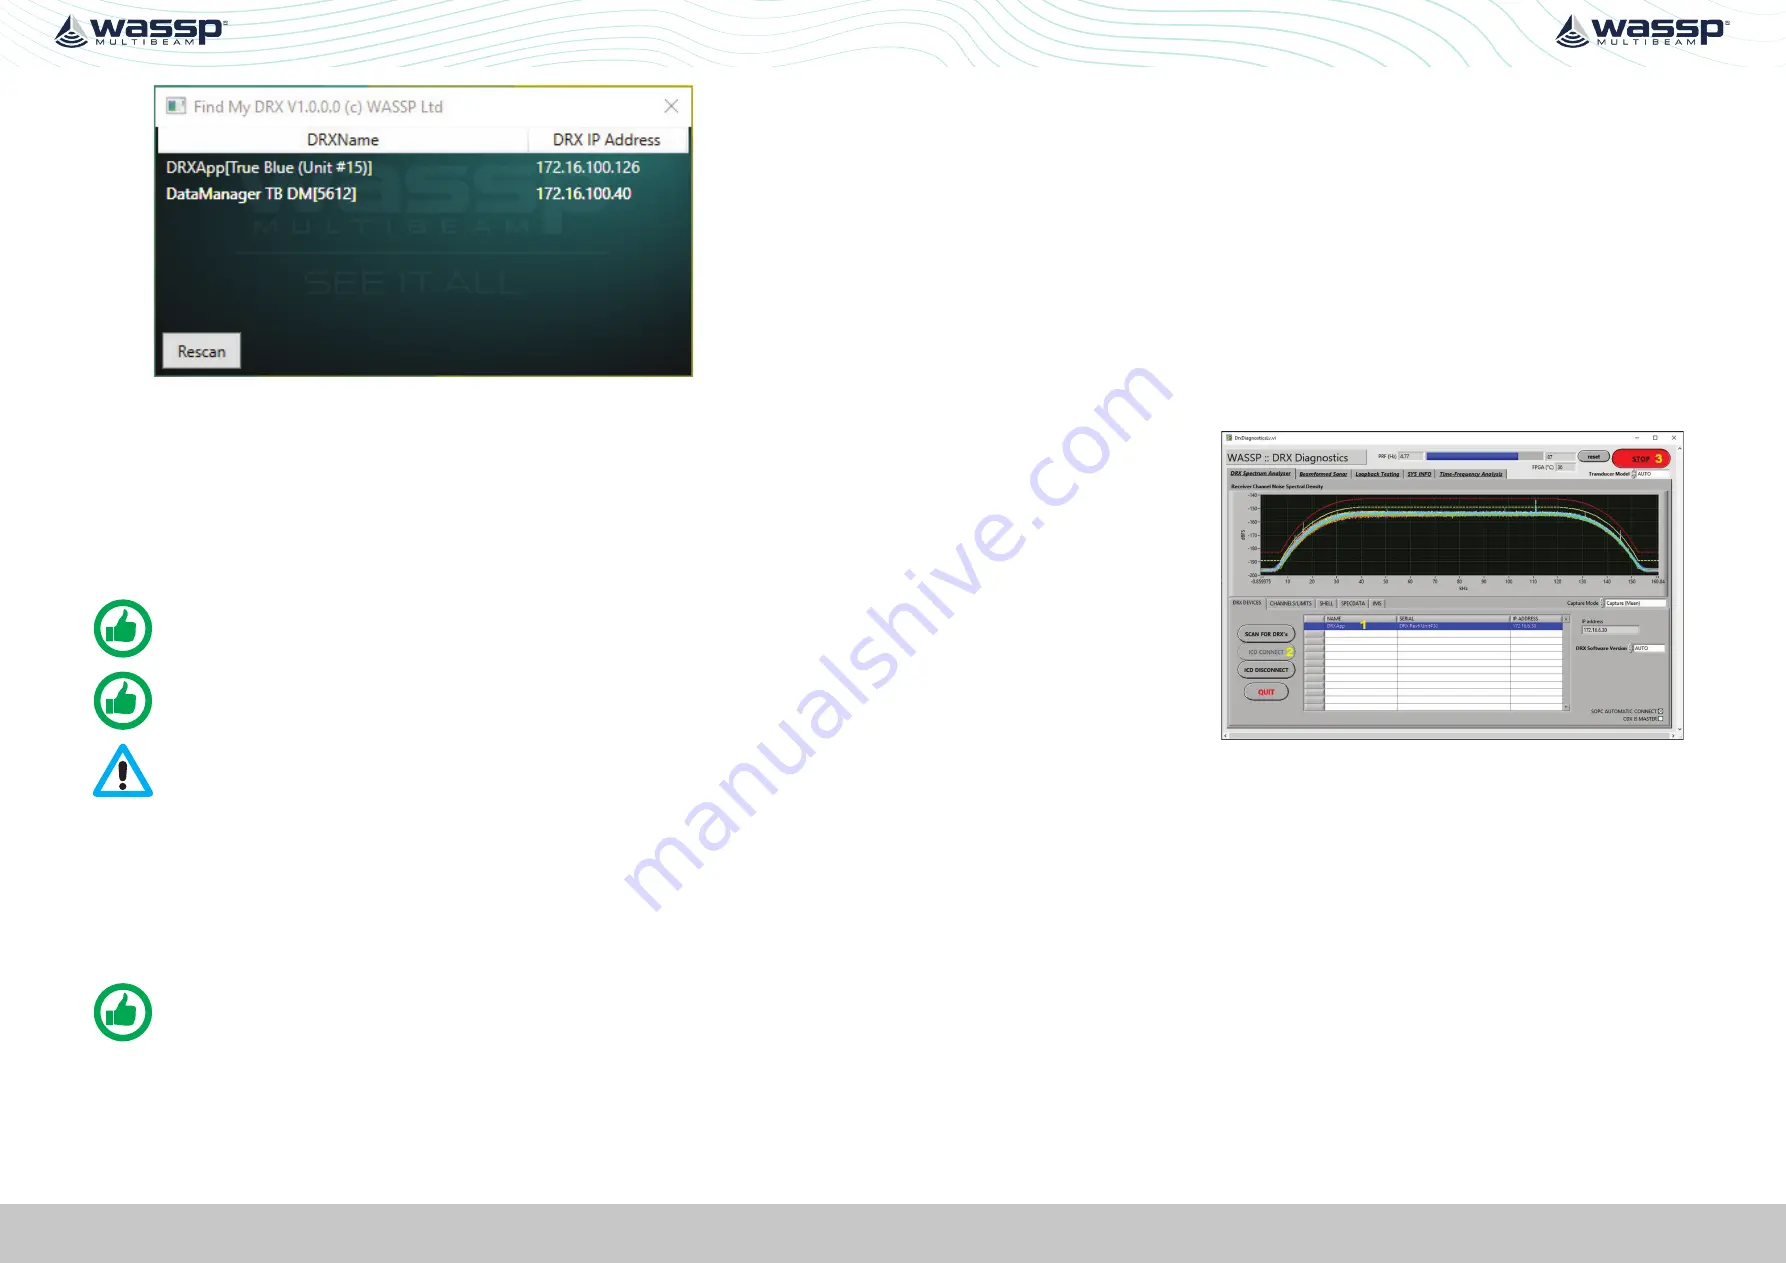
Figure 9. Find My DRX App
3.6.1. DRX Setup Webpages
DRX SETUP WEBPAGES
are used for upgrade, setup, feature licencing and configuration.
For more details
see
“4 Operating the DRX” on page 26 and “5 Sensor Configuration”
The
DRX SETUP WEBPAGES
are launched by opening any supported web browser and
entering the DRX IP address followed by port 2001 e.g. 169.254.54.69:2001
NOTE: Clicking on the appropriate DRX in ‘FIND MY DRX’ will automatically
launch the web browser with the appropriate URL.
NOTE: Chrome browser, shipped with DRX, is fully supported. Other
browsers may not behave as expected. If webpage does not update use
CTRL F5.
CAUTION: Only one instance of ‘DRX SETUP WEBPAGES’ should be run
otherwise a corruption may occur.
3.6.2. DRX Client Applications
Ethernet IP is used for discovery, control and data through supported DRX client
applications. Current supported client applications include WASSP CDX, 3rd Party
Navigation, sounder and survey applications and are described in
Application Support” on page 60.
NOTE: For DRX client application connection, the DRX and client application
need to be on the same TCP/IP subnet.
If DRX and client applications have incompatible IP addresses, discovery will
succeed but connection will fail.
3.7. ELECTRICAL ENVIRONMENT CHECK
It is important to validate the electrical environment in dock after installing the DRX,
connecting all the sensors and transducer.
Steps to validate electrical environment:
1. Turn all electrical equipment and engines on
2. Ensure no acoustic equipment is in a transmitting state
3. Turn the DRX on
4. Run DRX Diagnostics
»
Select the DRX
»
Connect
»
Start
See “Figure 10. Example of
an Electrical Environment
Check of an 80kHz
install”
Each coloured line
represents a transducer
channel and all of them
should ideally be under the
red line in the operating
spectrum of the specific
WASSP transducer.
Operating spectrum
transducer:
80KHz: 40 to 100kHz
160KHz: 80 to 180kHz
Figure 10. Example of an Electrical Environment Check of an
80kHz install
Please contact your local dealer for support or refer to our Knowledge Base (
see
“Appendix I - Product Registration, Support and Resources” on page 101
channels are not all under the red line.


