background image

5

Installation

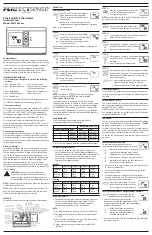
Separate the front housing of thermostat from wall module:

1. 

Unscrew both closing screws (bottom of stat) until they will not turn any further.

2. 

Release front housing by gripping lower half of outer frame and pulling outwards then upwards

3. 

Place front housing somewhere safe

4. 

Run all wires to the wall box. Check to ensure that you have included the following:

Power (Live and Neutral)

Heater (Live and Neutral or Switch Live only)

Floor sensor

Fil pilote (if necessary)

External/ 2nd floor Sensor (if necessary)

5. 

Pull wires through wall box and complete terminal wiring. 

IMPORTANT: Ensure that multi stranded wires are fully inserted into the terminals and secured tightly. Any loose strands should be trimmed as they could cause a short-circuit.

If connecting more than two heaters, an electrical junction box will be required. 

NOTE:

 Always ensure that the sensor cable is installed in a separate 

conduit to the power cables supplying the thermostat and heating system.

Содержание 4iE WiFi

Страница 1: ...4iETM WiFi 4IE 01 XX 01 4IE 01 XX 02 UK FR DE ES PT ...

Страница 2: ...2 ...

Страница 3: ...3 4 8 12 16 20 UK FR DE ES PT ...

Страница 4: ...o be in accordance with latest IEE Wiring Regulations and appropriate Statutory Regulations Location The thermostat should be installed inside a single gang electrical wall box that is at least 30mm deep For optimal performance the thermostat should be located in an area with good ventilation It should not be beside a drafty window door in direct sunlight or above another heat generating device e ...

Страница 5: ... and Neutral Heater Live and Neutral or Switch Live only Floor sensor Fil pilote if necessary External 2nd floor Sensor if necessary 5 Pull wires through wall box and complete terminal wiring IMPORTANT Ensure that multi stranded wires are fully inserted into the terminals and secured tightly Any loose strands should be trimmed as they could cause a short circuit If connecting more than two heaters...

Страница 6: ... be used Contact Warmup for more details Connecting the 4iE directly to extra low voltage or volt free boilers may cause damage to the boiler circuit Hydronic Underfloor Installation see numbering on diagram below 2 Connect to Power Supply Live MAX 240V 3 Connect to Power Supply Neutral MAX 240V 4 Connect to wiring centre Neutral if present MAX 3600W 16 Amps 5 Connect to wiring centre Switch Live ...

Страница 7: ...click is heard 5 Ensure front housing is securely fixed 6 IMPORTANT Tighten both retaining screws Powering Up You can now power up the thermostat and begin the programming process An easy to follow menu will guide you through the rest If you want to turn on off the thermostat and heating system then hold down the recessed button on the bottom of the stat for 3 seconds Error Messages Your thermosta...

Страница 8: ...tance au 0805 639 905 Pas de Connexion WiFi Pas de connexion au Server Introduction Le Thermostat 4iE a été conçu afin d améliorer le confort dans votre habitation en apportant une régulation programmée de votre système de chauffage Une sonde d air est fournie avec le thermostat 1 Une sonde de sol sera fournie pour le plancher chauffant 2 Vous pouvez bénéficier d une seconde sonde optionnelle sur ...

Страница 9: ...ase et neutre ou phase commutée Sonde de sol Fil pilote 2ème sonde de sol sonde externe si nécessaire 5 Rentrer tous les câbles dans le boitier mural et compléter le câblage terminal IMPORTANT S assurer que les câbles torsadés sont bien enfoncés dans le boitier et sécurisés N importe quel fil électrique trop long devra être coupé afin de ne pas créer de court circuit Si le thermostat est lié à plu...

Страница 10: ...urra endommager le système d eau chaude sanitaire Installation avec plancher chauffant hydraulique Regarder les nombres suivants sur le diagramme qui suit 1 Fil Pilote 2 Brancher au système électrique Phase 230 V 3 Brancher au système électrique Neutre 230 V 4 Brancher à l unité de contrôle Si Neutre MAX 3600W 16 Amps 5 Connecter à l unité de contrôle 3600W 16 Amps 7 Brancher au premier câble de l...

Страница 11: ... la partie basse jusqu à entendre un clic 5 S assurer que tout est bien fixé 6 IMPORTANT Serrer bien les deux visses de retenue Activer Vous pouvez à présent allumer le thermostat et commencer la programmation Un Menu facile à suivre vous guidera pour la suite Si vous souhaitez allumer éteindre le thermostat il vous suffit d appuyer sur le bouton central pendant 3 secondes Messages d erreurs Votre...

Страница 12: ...elag zu vermeiden sollten hierzu während der Programmierung unbedingt die korrekten Angaben gemacht werden Technische Daten Betriebsspannung 230V 15 at 50Hz Das Thermostat ist nur für unterbrechungsfreie Stromversorgung geeignet Max geschaltete Last 16A Ohm sche Last Schutzklasse II Schutzgrad IP33 Standards EN60730 1 EN60730 2 9 Sicherheitshinweise Elektrische Installationen müssen von einem qual...

Страница 13: ...terung zu den Klemmen geführt werden Stromanschluss Phase und Null Leiter Anschlussleitung Verbraucher entweder Phase und Null Leiter oder nur geschaltete Phase Bodenfühler Fil pilote falls erforderlich Externer bzw zweiter Bodenfühler falls erforderlich Wichtig Leitungslitzen müssen sorgfältig und vollständig angeklemmt werden da lose Stränge einen Kurzschluss verursachen können Bei Anschluss von...

Страница 14: ...en Direkte Verbindungen mit Niederspannungs oder spannungsfreiem Anschluss des Boilers kann diesen beschädigen Installation Wassergeführtes System siehe Nummernvergabe auf untenstehender Abbildung 2 Stromanschluss Phase MAX 240V 3 Stromanschluss Null Leiter MAX 240V 4 Anschlussleitung Verbraucher Null Leiter wenn vorhanden MAX 3600W 16 A 5 Anschlussleitung geschaltete Phase MAX 3600W 16 A 7 Erste ...

Страница 15: ...tellen Sie sicher dass das Frontgehäuse sicher befestigt ist 6 WICHTIG Ziehen Sie beide Fixierschrauben fest Inbetriebnahme Sie können nun den Thermostaten einschalten und mit dem Programmiervorgang beginnen Folgen Sie einfach der Menüführung Zum Ein Ausschalten des Thermostaten und des Heizsystems halten Sie die vertiefte Taste an der Unterseite des Thermostaten für 3 Sekunden gedrückt Fehlermeld...

Страница 16: ...el sistema el sistema correcto y el tipo de suelo debe ser seleccionado durante el proceso de programación del termostato Especificación eléctrica Tensión de alimentación 230V 15 a 50Hz El termostato no está diseñado para su uso con la fuente de alimentación intermitente Interruptor de carga máxima 16A resistivo Clase de aislamiento II Vivienda IP33 Normas normas EN60730 1 y EN60730 2 9 ADVERTENCI...

Страница 17: ...ase y neutral o el interruptor de la fase vivo solamente Sonda de suelo Fil pilote si es necesario Sonda de suelo externa segundo si es necesario 5 Tire de los cables a través de caja de la pared y complete el cableado del terminal IMPORTANTE Asegúrese de que varios cables trenzados son totalmente insertada en los terminales y asegurado firmemente cualquier hilo suelto debe ser recortados ya que p...

Страница 18: ...actor debe de ser usado Contacte con Warmup para más detalles Conectar directamente el 4iE a baja tensión o sin tensión adicional puede causar daños en el circuito de la caldera Instalación suelos radiantes hidraúlicos ver la numeración en el diagrama de abajo 2 Conectar a la fuente de alimentación fase MAX 240V 3 Conectar a la fuente de alimentación Neutro MAX 240V 4 Conecte al centro de cableado...

Страница 19: ...a carcasa frontal hasta un oir un Click 5 Asegurarse que la carcasa frontal se fija de forma segura 6 IMPORTANTE Apriete los dos tornillos de sujeción Encendido Ahora puede encender el termostato y comenzar el proceso de programación Un menú fácil le guiará a través del resto Si desea activar desactivar el sistema de termostato y la calefacción a continuación mantenga pulsado el botón empotrado en...

Страница 20: ...consulte o manual do sistema de aquecimento para mais informações 3 Segundo sensor opcional O termostato não é um dispositivo de segurança Por forma a evitar danos no sistema de aquecimento deverá seleccionar o tipo de sistema e ou pavimento correcto durante o processo de programação ESPECIFICAÇÕES TÉCNICAS Voltagem 230V 15 50Hz Carga máxima 16A 3600W Sensor NTC 10K 25 C Isolamento Classe II Prote...

Страница 21: ...es cabos Alimentação fase e neutro Sistema de aquecimento fase e neutro Sensor de pavimento Fil pilote França apenas 2º sensor sensor externo se necessário 5 Puxe os cabos através da caixa de parede e termine as ligações eléctricas IMPORTANTE Verifique que todos os fios estão inseridos nos terminais na sua totalidade e se encontram devidamente fixos Nota Em espaços onde faça a ligação de 2 ou mais...

Страница 22: ... em sistemas com muito baixa voltagem deverá ser utilizado um contactor Ligar o 4iE directamente a estes sistemas poderá causar danos ao circuito da caldeira INSTALAÇÃO PISO RADIANTE HIDRÁULICO ver diagrama na página seguinte 2 Ligar a fase da alimentação eléctrica MAX 240V 3 Ligar o neutro da alimentação eléctrica MAX 240V 4 Ligar á central de ligações neutro caso exista MAX 3600W 16A 5 Ligar á c...

Страница 23: ...erior até ouvir um click 5 IMPORTANTE Aperte ambos os parafusos de fixação LIGAR O TERMOSTATO Pode agora alimentar e ligar o termostato e iniciar o processo de programação O termostato irá apresentar um menú fácil de seguir e guiá lo á através de todo o processo de programação Se desejar ligar ou desligar o termostato deverá premir o botão na parte inferior do termostato durante 3 segundos MENSAGE...

Страница 24: ...allation costs and shall not apply if it is shown by Warmup that the defect or malfunction was caused by failure to follow the instruction manuals incorrect installation or damage which occurred while the product was in the possession of a consumer Warmup s sole responsibility shall be to repair or replace the product within the terms stated above WARMUP SHALL NOT BE LIABLE FOR ANY LOSS OR DAMAGE ...

Отзывы: