background image

Introduction

The 

4iE

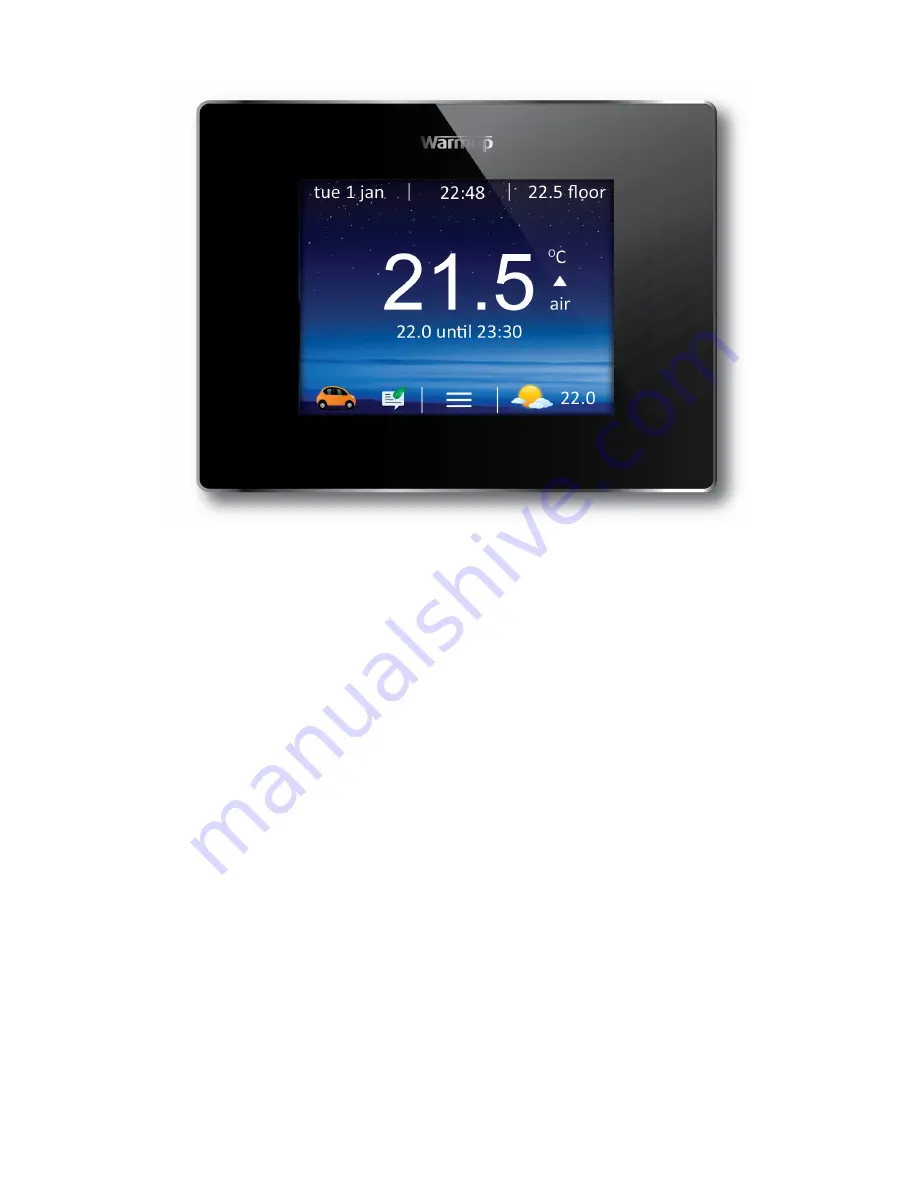
 default screen is the home screen. Pressing the temperature figure in the centre of the screen allows you 

to override it, pressing the menu button allows you to start programming and setting up the 

4iE

. You’ll often find a 

help

 button on pages with several options to give more information. 

If you do not press any button for 1 minute the 

4iE

 screen will dim and revert to the home screen. To wake the 

4iE

 just tap the screen or press 

Wake. 

Hold the power button on the bottom of the device for 3 seconds to turn the 

thermostat on or off. 

The icons at the bottom of the screen are your WarmApps. These can be set up on MyWarmup to show things 
like traffic and journey alerts, along with your energy saving advice

MyWarmup

You can also program and set-up your 4iE with your tablet or computer by visting 

my.warmup.com

. If you use 

a smartphone to access 

MyWarmup

 you will be shown a mobile version which gives quick access to important 

features like 

Smart Overrides.


2

3

Содержание 4iE WiFi

Страница 1: ...ome is at the right temperature at the right time Energy monitoring Graphical display of your energy usage and cost with comparisons and forecasts WarmAppsTM Get apps on your 4iE like traffic alerts a...

Страница 2: ...the home screen To wake the 4iE just tap the screen or press Wake Hold the power button on the bottom of the device for 3 seconds to turn the thermostat on or off The icons at the bottom of the scree...

Страница 3: ...rocedure as below and you can set up a MyWarmup account at any time in the future Important Ensure you choose the correct System Type Electric underfloor Hydronic underfloor or Conventional central he...

Страница 4: ...mail you can connect your 4iE to the account Ensure your 4iE is connected to the internet If you see an error icon on the homescreen like below then your thermostat is not connected to the internet If...

Страница 5: ...re finished The programming works by setting Comfort Periods of warm temperatures shown with a green line Any time not covered by a Comfort Period will use a lower Setback temperature to save energy T...

Страница 6: ...til you raise the temperature again Preset Programs You can select a preset program schedule to get you started You can edit the program whenever you like by following the steps in Set Your Heating Pr...

Страница 7: ...f your system Press Energy Settings and select if you have a single rate tariff or a standard low energy tariff where you have a discounted cost during part of the day Enter your cost per KWH and rele...

Страница 8: ...stats 3 Use low voltage cable to connect terminal 7 of both thermostats in addition to floor sensor cables on the Master thermostat 4 Set Relay thermostat to Relay mode first then set the Master therm...

Страница 9: ...portant 8 Connect to 2nd wire of floor sensor colour not important Special Installation see numbering on diagram below Second sensor installation 2nd floor probe or exterior probe 6 Connect to 1st wir...

Страница 10: ...h latest IEE Wiring Regulations and appropriate Statutory Regulations Location The thermostat should be installed inside a single gang electrical wall box that is at least 30mm deep For optimal perfor...

Страница 11: ...ll not apply if it is shown by Warmup that the defect or malfunction was caused by failure to follow the instruction manuals incorrect installation or damage which occurred while the product was in th...

Отзывы: