23 March 2017
Due to continued product improvement, Warmington Ind LTD reserves the right to change product specifications without prior notification.
All Dimension are in mm……….Copyright
6
FIREBOX INSTALLATION
This is a general installation guide only – contact a “NZHHA Installer” for installation advice or go to
www.homeheat.co.nz then select Members & follow instructions, to find a certified NZHHA SFAIT installer.
1.
All the dimensions are minimums
2.
Fit the plinth into position in the cavity. If onto a wooden floor ensure that an insulating plinth is fitted as per specifications.
En-
sure that the plinth is elevated to allow for finishing on the hearth (see hearth and plinth details).
3.
Fit the firebox into the cavity. Bolt the fire box to the plinth or through to the floor with the bolting point provided on the left and
right hand side of the firebox or drill holes through base for bolts (seismic restraints bolts not provided).
4.
Install the flue system. Ensure that the flue system comply to the latest AS/NZS 2918:2001.
5.
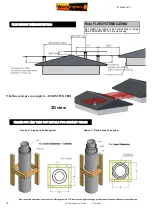
Fit the Autoclaved Concrete (ACC) heat cell around the fire. A general minimum lay out is shown in this specification.
Note: hearth and plinth construction.
For combustible flooring an insulating hearth and plinth of
75mm Autoclaved Concrete (ACC) is required.
Plinth to be off set above hearth by the hearth finishing
(e.g. tiles/granite/plaster/etc.)
IMPORTANT NOTE:
*Note: If solid plastering the heat cell structure, it is rec-
ommended to use a fibreglass mesh with a latex plaster
to minimise the chance of the plaster cracking (see your
plasterer for correct materials and applications).
Offset
Offset for
Hearth
Finishing
Hearth
Plinth
HEARTH & PLINTH CONSTRUCTION DETAILS
HEARTH PROJECTION
380 400
450
500
550
600
650
700
750
800
850
900
Minimum Specified
Thickness
100
150
200
250
300
350
450
400
500
Hearth Projection mm (A)
Raise
d Hea
rth H
eight m
m (B)
75
900
900
900
Minimum Hearth Projection 380mm (A)
380


