CURA WANHAO EDITION USER MANUEL REV.B
12
/
23
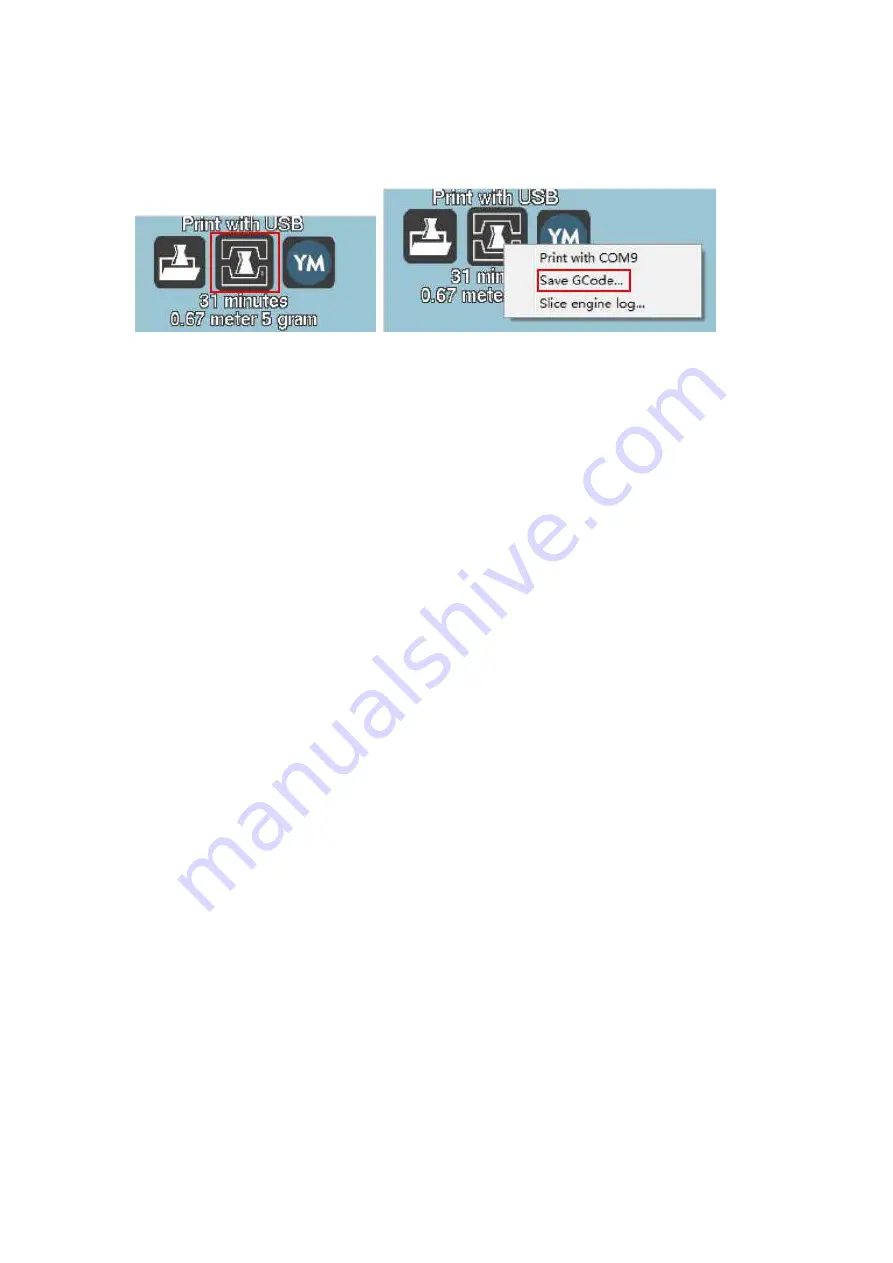
After finishing setting, the CURA “save” button will change to “Print” button. Left click this button
to start printing directly. Or if you still want to print from Micro SD card. Right click the print
button and choose “save Gcode”. Then repeat the option 1 print from micro SD card.
Figure 1.15: Printing button Figure 1.16: Save Gcode
Important notice: There are many factor may interfere the direct USB link printing can cause
stop in the middle. The Micro SD card printing is highly recommended.
Removing Your First Print
After your first print has finished, you need to wait for the part to cool down. Your parts will be
easier to remove if you allow your heated bed to cool down to optimal temperature. This will
allow the plastic to contract, making it easier to remove. Your print bed will move forward once it
is ready to be removed. Once your heated bed has cooled, use the blue handled knife that was
included with your printer to remove the item. Carefully insert the blade of the knife between
your print and heated bed. Once underneath the part rotate the blade- lifting with the sharp edge
into the part, to gently pop the piece off your plate.
1.5
Full Settings
Full settings should not be used until enough experience with 3D printing has been gained to feel
comfortable with all aspects of the printer and its operation. The simple settings will provide
good results for most models. The first time Cura is launched it will default to the Quick Print
interface. In order to have more control of your slicing and Gcode generation, switch to Full
Settings. Select Expert > Switch to full settings. The following tabs will now be available: Basic,
Advanced, Plugins, and Start/End-Gcode. You will also have access to the Expert Settings.
Содержание Duplicator i3
Страница 1: ...CURA WANHAO EDITION USER MANUEL...


