background image

Wanhao I3 unboxing and hardware set up. Rev.D                                                                                           

7

 / 

10


You  have  now  finished  unpacking  your  Duplicator  i3!  We’re  really  proud  of  it!  Also,  we 

recommend  that  you  keep  the  box  that  it  was  shipped  in  for  future  transport  and  long-term 

storage. 


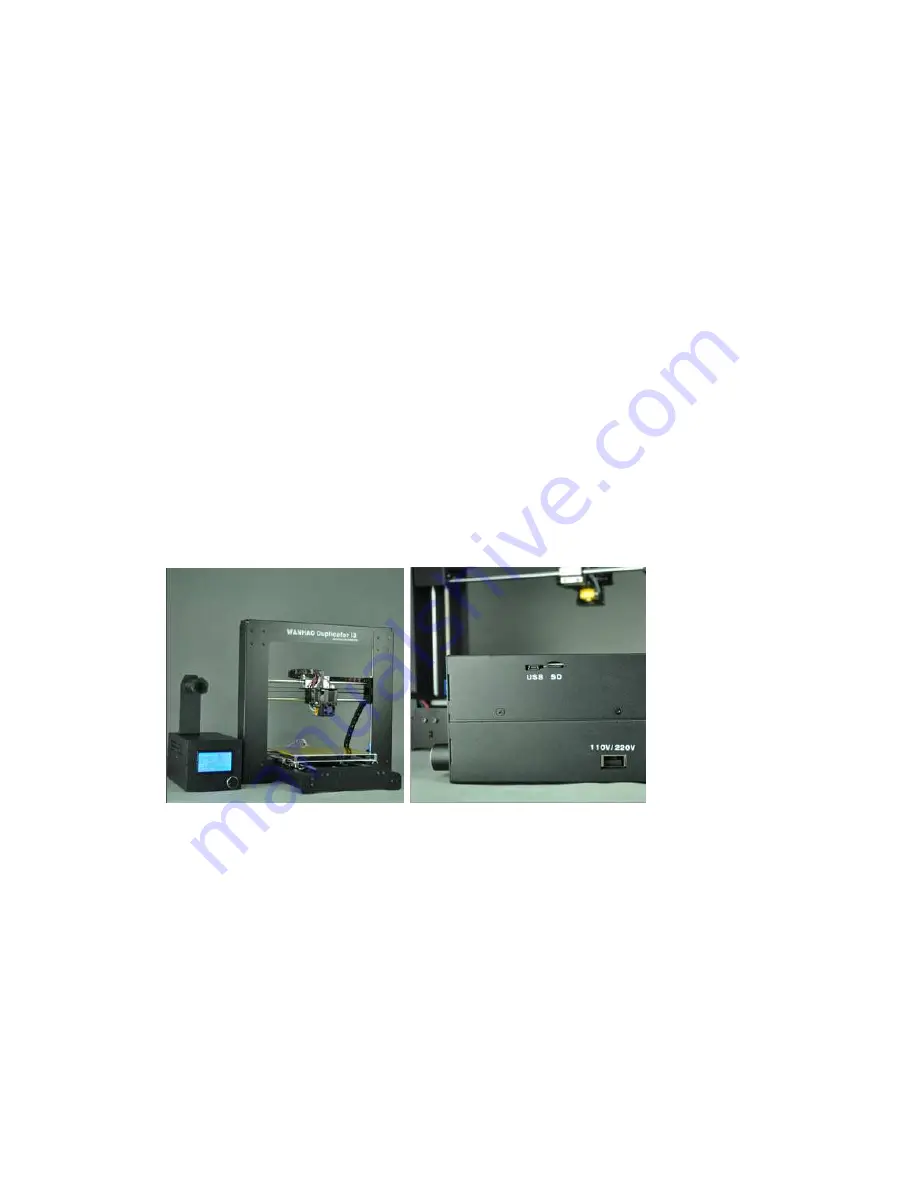
The Duplicator i3 Diagram 

Before  we  continue,  let’s  familiarize  ourselves  with  some  of  the  main  features  of  The  Wanhao 

Duplicator i3. 


3.1 Front: 

1.    Step exstruder MK10 

2.    Build Platform 

3.    LCD Interface Panel 

5.    SD Card slot (on side panel) 


3.2 Back and side: 

6.    Power switch

110V or 220V


7.    Power input 

8.    USB cable input 

9.    spool holder 


Initial Hardware Setup

.


Now, set the Spool holder on the control box. Insert 2 screws through the 2 holes of 

spool holder 

stand

. Lock the 2 screws onto the stand. Then insert the filament spool holder through the stand 

hole and lock it by 2 plastic nuts. 

Содержание Duplicator i3

Страница 1: ...WANHAO i3 UNBOXING AND HARDWARE SET UP...

Страница 2: ...while it is in operation and allow time for The Duplicator i3 to cool down after operation The Duplicator i3 is sensitive to electrostatic discharge Make sure you don t have a static charge on you by...

Страница 3: ...on the names of important parts of the machine will be in bold type First place The Duplicator i3 s box on the work table next to a clean flat work space Open from the up side Cut the plastic bag So y...

Страница 4: ...set up Rev D 3 10 5 Put the Base onto a table or floor Never drag the black cable 6 Put the control box onto table or floor 7 Stand the tower on the table take 8 Cut the white secure ribbon Of secure...

Страница 5: ...I3 unboxing and hardware set up Rev D 4 10 9 Raise the right X axis manually 10 Raise the left axis manually 11 Insert the Base into the tower and match the bolt hole 12 Lock the 2 bolts on left righ...

Страница 6: ...ase 14 Lock the left motor cable 15 Cut the black ribbon 16 Short cable for Z Long for X black for end stop switch 17 Connect end stop switch to socket switch directly onto it s position For some prin...

Страница 7: ...cator i3 by the black cable 2 3 In the packaging underneath your Duplicator i3 you ll find the Power cable as well as your USB A to B cable and Filament Take these out and put them aside You should be...

Страница 8: ...s with some of the main features of The Wanhao Duplicator i3 3 1 Front 1 Step exstruder MK10 2 Build Platform 3 LCD Interface Panel 5 SD Card slot on side panel 3 2 Back and side 6 Power switch 110V o...

Страница 9: ...rnational cable types if you re out side the China Next plug the cable into the Power Supply socket next to the power switch 4 7Before connecting anything make sure that the Duplicator i3 power switch...

Страница 10: ...in future locate the USB A to B cable and plug it into the USB B port on The Duplicator i3 Don t plug the other end into anything yet For updating firmware check www wanhao3dprinter com software down...

Страница 11: ...REV C 1 Delete Gently pull The Duplicator i3 out of its packaging and place it on your work surface 2 4 2 Add take off secure sticker on the switch and wing nuts 3 Add Connect end stop switch to sock...

Отзывы: