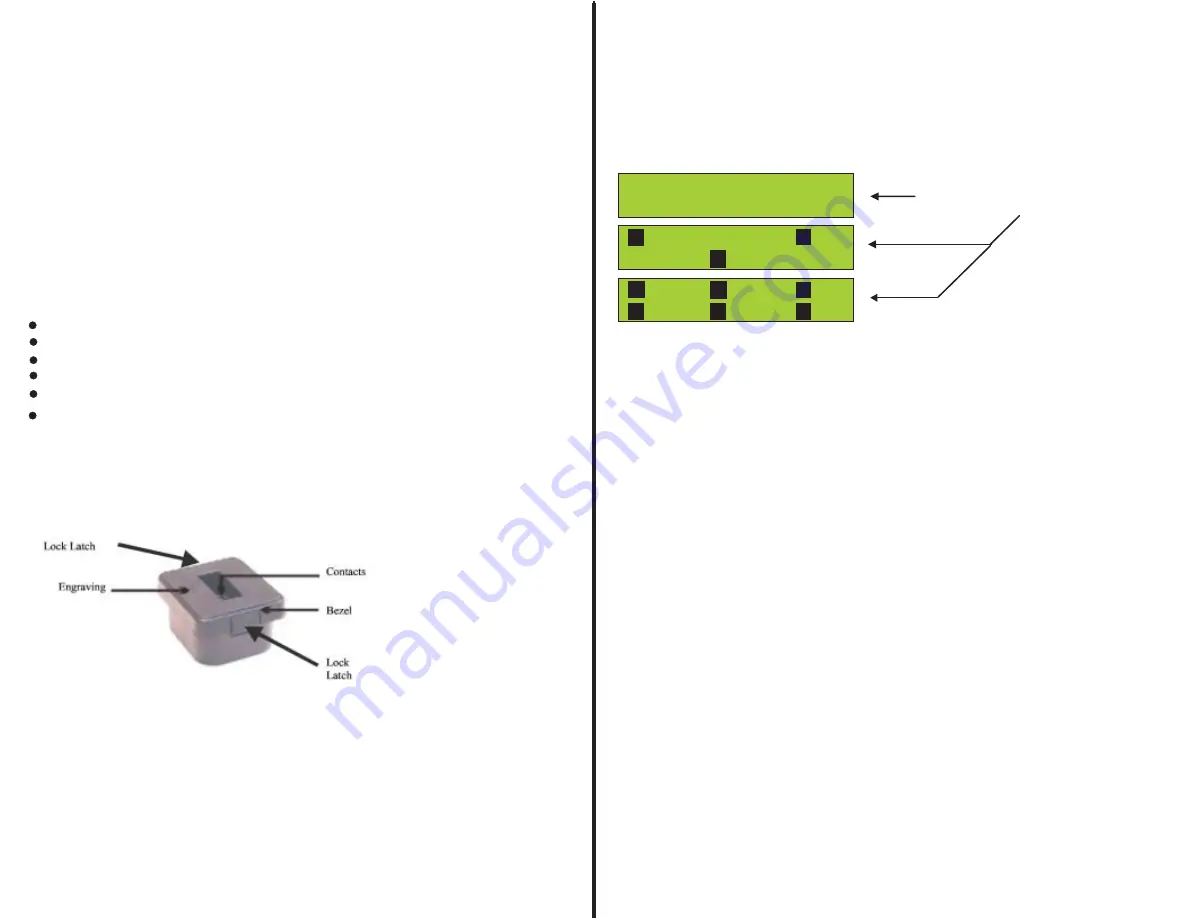
Understanding the Analyzer X3’s and X6’s Adapter CUP
The “Adapter Cup” allow different batteries to be serviced by the Analyzer X3 and X6.
Each “Adapter Cup” is made for a specific battery model. There are 5 memory locations
(data profile locations) within each “Adapter Cup”. The first four profiles store pre-stored
battery information and can only be altered using an optional software interface. The type
of data stored for example is chemistry (NiCD, NiMH, Lithium Ion and Lithium Polymer),
capacity, impedance, charge current, and discharge current.
The fifth profile location is used for a user defined battery type or the same OEM model.
To invoke this location and store data, use the “Learn Mode”. See the Section on “Learn
Mode” in order to enter data.
Highlighted Features
Physically accommodates battery pack in the analyzer
Holds five different Muti -chemistry parameter profiles.
Learn Mode
profile location for user defined parameters of a unique battery.
Locking Latch system allows cups to be changed without tools.
UP to 4 OEM battery pack’s profiles programmed at factory
Prime mode
, allows the unlocking of a Li-ion Battery protection
circuits, both at the upper and lower limits. The Prime mode will
also put a charge on a nickle based battery that has been
allowed to self discharge to a level that the X3 or the X6 or a battery charger
could not recognize it when the battery is placed in a charger or the
X3 or X6.
Adapter cup
7
Getting Started
Power Up
- Connect the unit to the proper AC voltage and
Turn-on power using the switch located on the
Back of the unit.
You are now ready to service a battery.
.
Placing the appropriate “adapter cup” in the analyzer will allow
you to service an OEM battery. The cup contains pre-stored data e.g. chemistry type, capacity, impedance,
charge rate and discharge rate for 4 battery types.
There is a fifth data position in the “cup” reserved for user defined information during the Learn Mode.
See “
” for more information.
Learn Mode
1. Place a battery into the “adapter cup”. The display “Press Function to Proceed” should be displayed.
The analyzer should detect your battery and give chemistry and capacity options as the function button is
Pushed. See note below, should the aforementioned not occur. *
*Note: If you do not see your chemistry during this process, remove the battery and reinsert it after pressing
the function button momentarily. This operation will place you in the “Learn Mode”. See “Learn Mode” on how
To proceed.
2. Scroll through the menu until your battery appears (using the Function Button). When your battery
appears, stop pressing the Function Button and wait until the display stop blinking. An acknowledgement
beep will be heard and the display will also acknowledge your selection.
3. The display will now show a menu of “Test options”as you press the function button e.g.
,
QUICK TEST
CYCLE/AUTO/CONDITION, Dis-charge Charge
Impedance
,
and
Test. This sequence only occurs for Station (1).
As you press the Function button the display should scroll through the menu of “Tests”. When the test you
have select appears in the display, just simply stop pressing the function button and wait until the display
stop blinking. Once the display stops blinking, an acknowledgement beep will be heard along with a visual
of the test you Selected in the display.
4. The test you selected will now start. Results will be displayed upon completion and if you have the
optional printer attached a print out will also be printed upon test completion.
WW Manufacturing
V3.20P Date: 2.09.03
EMPTY
EMPTY
EMPTY
EMPTY
EMPTY
EMPTY
EMPTY
EMPTY
EMPTY
ONCE THE UNIT HAS BEEN
POWERED, THE DISPLAY
SHOULD SHOW, AND THEN SHOW
1
1
4
2
X3
X6
3
6
3
2
5
For Stations (2) and (3) you will see the following sequence:
,
and
CYCLE/AUTO/CONDITION DIS-CHRG BATTERY
CHARGE BATTERY
8


