• Always wear the regulation breathing masks, protective clothing and hearing protection
when using the spray gun.
• Exhaust air which contains particles must be kept away from the working area and
operating personnel. Make sure that adequate exhaust extraction is provided.
• When spraying materials, keep your hands and other parts of the body away from the
pressurised nozzle of the spray gun.
• Do not direct the spray gun at persons or animals.
• Before carrying out maintenance or servicing, ensure that the air and material feed to
the spray gun have been depressurised.
• You must ensure that the spray gun is properly earthed (grounded) either separately or
in connection with the equipment with which it is being used (maximum resistance
10
6
Ω
).
• After carrying out assembly and maintenance work, ensure that all nuts, bolts and
screw connections have been fully tightened.
• Use only original spare parts, since WALTHER can only guarantee safe and fault-free
operation for original parts.
For further information on the safe use of spraying equipment, please contact
WALTHER Spritz- und Lackiersysteme GmbH, Wuppertal.
4
Using the Spray Gun
Before using the spray gun, ensure that the following conditions apply:
• The control air pressure is applied to the spray gun
• The atomising air pressure is applied to the spray gun
• The material pressure is applied to the spray gun
4.1
Connections for Control Air, Atomising Air and Material
• Connect the control air connector (via the 3/2-way valve) to the spray gun and set the
control air pressure (min. 4.5 bar).
• Connect the atomising air connector to the air hose (filtered compressed air sup-
ply) and to the atomising air connection.
• Switch on the compressed air and set the required atomising air pressure at the
reducing valve (max. 8 bar).
• Fill the pressure pot with the material to be sprayed and close the lid.
• Connect the material feed hose to the pressure pot or the pump and to the
material connection. Set the required material pressure (max. 8 bar).
• Open the material valve on the pressure pot.
4.2
Spraying a Test Pattern
A test spray pattern should always be made whenever:
• the spray gun is used for the first time
• the spraying material is changed
• the spray gun has been disassembled for maintenance or servicing.
The test pattern can be sprayed on a test workpiece, panel, cardboard or paper.
4.3
Changing the Spray Pattern
• Round-fan or wide-fan air caps are available.
• The fan width can be varied by changing the atomising air.
• The material flow rate is determined by the material pressure and the diameter
of the material nozzle.
4.4
Correction of Spray Pattern Imperfections
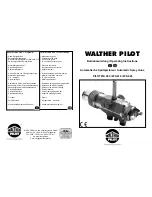
The following table shows how to correct a defective spray pattern.
Desired Spray Pattern
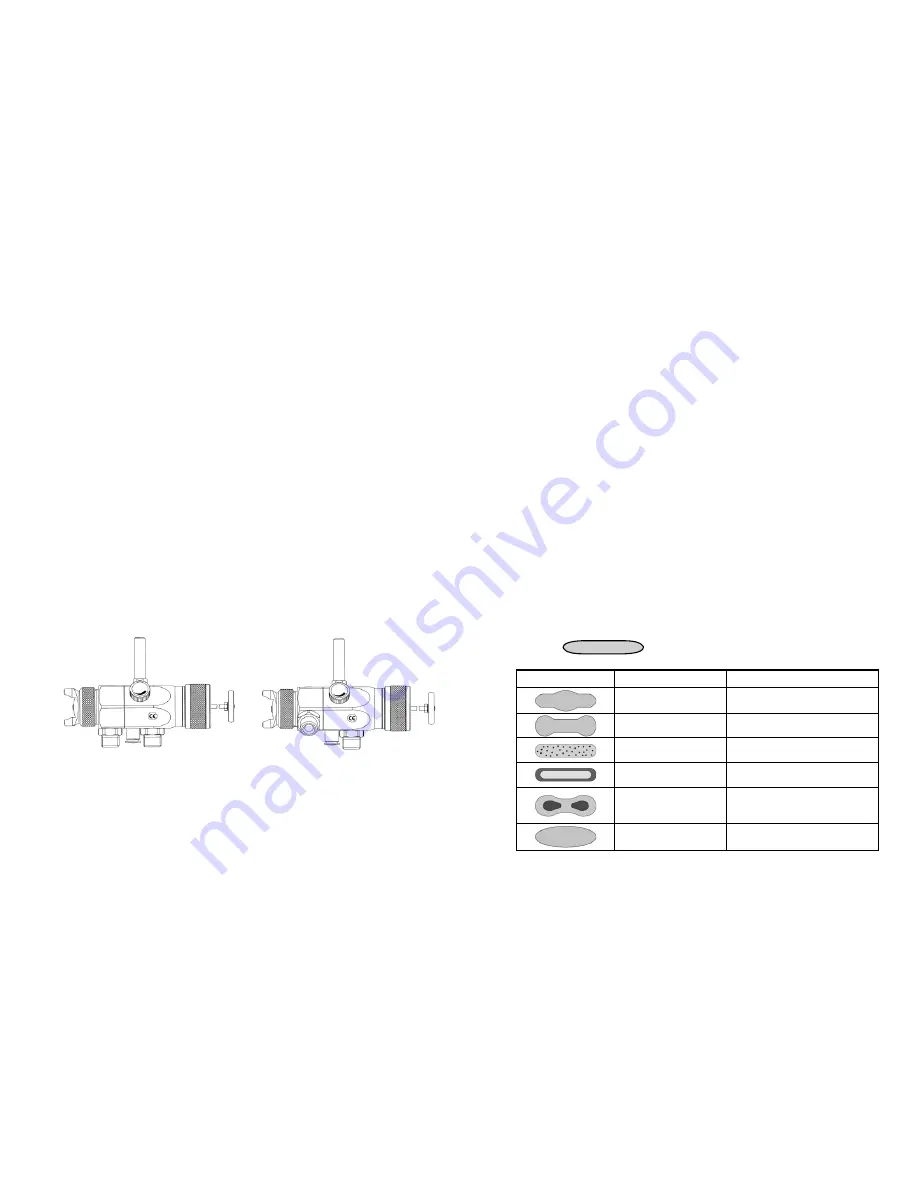
1 2 3
1 2 3
1 = Material connection
2 = Control air connection 3 = Atomizing air connection
5
4
Spray pattern test
Fault
Necessary adjustment
Swollen centre
• Spray jet should be flatter
Swollen ends
• Spray jet should be rounder
Coarse pearl effect
• Increase atomising air pressure
Unduly thin paint
layer in centre
• Decrease atomising air pressure
Split centre
• Increase nozzle diameter
• Reduce atomising air pressure
• Increase material pressure
Split centre
• Decrease material pressure
• Increase atomising air pressure


