


24
6.4 Switching the glowstick on and off
1.
To switch on the unit, bring the on/off switch to the (7) to the [ON].position.
NOTICE
NOTE - Switch off the glowstick after use and disconnect it from the smartphone or similar
or from the power supply if you are not going to use it for a longer period of time.
2.
To switch off, move the on/off switch (7) to the [OFF] position.
Recommendations for handling the battery of your glowstick:
•
When charging is complete, unplug the USB-C charging cable.
•
If you have not used the glowstick for a long time, charge the battery before using the
glowstick. Otherwise, it will not switch on without power.
•
To prolong the life of your battery, we recommend charging it every three months.
•
Strictly adhere to the instructions for using the glowstick or battery, otherwise a fire may
occur.
NOTICE
NOTE - Your glowstick has a built-in rechargeable lithium battery, which has a limited life
span. After a certain period of use, the performance decreases. However, this is a normal
phenomenon!
7. Operating and operating the glowstick
You operate the glowstick manually using the elements in the operating area (3).
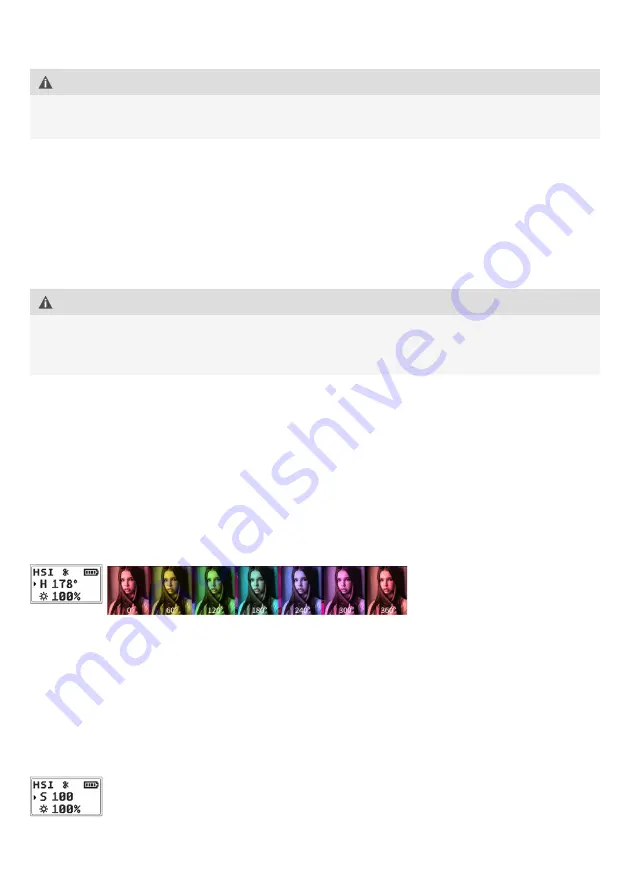
7.1 Set colour mode (H 0-360°) on the glowstick
1. Switch on the glowstick as described in the chapter 6.
2.
Press the M button (5) once briefly to select the colour setting mode HSI.
- The display shows HSI in the upper line of the display.
3.
Press the adjustment knob + or – (6) repeatedly until the desired colour (H 0-360°) is
displayed.
- The selected colour is shown in the middle line of the display (4).
7.2 Setting the colour saturation (S 1-100) on the glowstick
1. Switch on the glowstick as described in the chapter 6.
2.
If you are already in colour mode, press the M button (5) briefly once more.
3.
Press the M button (5) twice briefly to select the colour setting mode HSI.
- The display shows HSI in the upper line of the display.
4.
Press the adjustment knob + or – (6) repeatedly until the desired saturation (S 1-100) is
displayed.
- The selected saturation is shown in the middle line of the display (4).


