background image

32

33

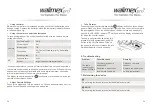
•  Take Pictures

Press the trigger shutter-release button 

9

 halfway and check focus and ex-

posure. When you focus, the green light lights up. And then click to complete 

the photographs. When the shutter opens, the device issues a beep every 

second, the RELEASE indicator 

8

 will fl ash, and the display will show time 

for which the shutter is open.
To keep the shutter-release button fully 

pressed for bulb photography, slide the 

button to the HOLD position. Slide it in 

the opposite direction to release the lock. 

Release the button to end shooting.

6. Troubleshooting

Problem

Possible cause

Remedy

The radio 

remote trigger 

has no function

The radio receiver is 

switched off 

Switch on the radio 

receiver

Batteries in transmitter/

receiver are too weak

Replace the battery, see 

battery replacement

7. Maintaining the device

Do not bring the device into contact with moisture or water.

NOTE

Do not bring the device into contact with moisture or water.

•  Using the timer

BBefore using the timer for extended periods, check that the batteries have 

enough charge. Replace the batteries when the low battery indicator fl ashes 

in the show panel 

4

.

•  Using the camera to select shutter speed

To take photographs at the shutter speed selected with the camera, adjust 

settings as follows:

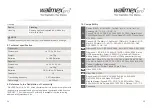
Camera

Exposure mode

M or S

Shutter speed

Any

Interval timer

Off 

Focus mode

AF-C select “release priority” if available 

or M

Shooting mode

S

MC

Exposure time

0 sec.

Interval

Longer than camera shutter speed*

*When using autofocus, choose an interval at least two seconds longer than 

the camera shutter speed to allow the camera time to focus. When using long 

exposure noise reduction (available with some digital cameras), choose an 

interval at least double the camera shutter speed.
The trigger shutter release button 

9

 functions in much the same way as the 

camera shutter-release button.

•  Adjust Camera Settings

Connect the trigger and turn the camera on. Choose exposure mode, shutter 

speed, focus mode and shooting mode as desired.

Содержание Walimex Pro C1

Страница 1: ...erstrasse 23 86368 Gersthofen Germany info walser de www walser de EN Made in China ES Fabricado en China IT Fabbricato in China Gebrauchsanleitung Instruction Manual Digitaler Timer Funkfernausl ser...

Страница 2: ...e Daten 18 9 Verweis auf die Konformit tserkl rung 18 10 Kompatibilit t 19 EN Contents 1 Understanding these instructions for use correctly 20 1 1 Markings on the device 20 Waste disposal and protecti...

Страница 3: ...n d rfen nicht mit dem Hausm ll entsorgt werden Der Verbraucher ist gesetzlich Verp ichtet elektrische und elektronische Ger te so wie Batterien am Ende Ihrer Lebensdauer an den daf r einge richteten...

Страница 4: ...in sollte oder wenn Sie Schmorgeruch feststellen Betreiben Sie Ger t nicht mit besch digtem Geh use oder besch digtem Kabel nen Sie das Ger t nicht Reparieren Sie das Ger t niemals selbst Lassen Sie d...

Страница 5: ...aste Fokus und Ausl sung zweifarbiges Anzeige l mpchen Sperrenanzeige Ein Ausschalter Diplay Batteriestandsanzeige Statusanzeige Timer Start Stop Taste Timer Active Aktiv Anzeige Set Taste Ton An Aus...

Страница 6: ...der Timer um sechs Sekunden verl ngert Um alle Bedienelemente au er dem Ausl ser 9 und der Beleuchtung Sperre Taste zu sperren Dr cken Sie die Beleuchtung Sperre Taste bis das Sperre Symbol L im Disp...

Страница 7: ...instellun gen f r die Auswahl anzuzeigen Um die anderen Einstellungen anzusehen dr cken Sie die Pfeiltaste links oder rechts Die momentane Auswahl wird durch den Auswahlcursor angezeigt Dr cken Sie di...

Страница 8: ...hrleisten w hlen Sie ein Intervall das mindestens eine Sekunde l nger ist als die Belichtungszeit Wenn Sie den Autofokus verwenden stellen Sie die Verz gerung auf zwei oder mehr Sekunden ein um siche...

Страница 9: ...elle angegebe nen Reinigungsmittel Nutzung des Timers Bevor Sie den Timer f r l ngere Zeit nutzen berpr fen Sie dass die Batterien ausreichend aufgeladen sind Ersetzen Sie die Batterien wenn die Batte...

Страница 10: ...D5000 S1 Sony Alpha DSLR A100 SLR A200 SLR A300 SLR A350 SLR A700 SLR A900 Alpha 5D Alpha 7D Minolta Maxxum Dynax AF 7D 5D 9 7 5 4 3 807si 800si 700si 600si 505si 500si Sweets 9000 7000 5000 Dimage 7...

Страница 11: ...tronic appliances as well as batteries must not be disposed of together with domestic waste The user is legally obliged to return electric and electronic appliances as well as batteries to specially s...

Страница 12: ...or if you notice a burning smell Do not operate the device with a damaged housing or a damaged cab le Do not open the receiver Never repair the device on your own Have the device repaired exclusively...

Страница 13: ...s and the release of two color indicator light Lock indicator ON OFF Display panel Low battery indicator Status display Timer Start Stop button Timer Active indicator Set button Speaker on o indicator...

Страница 14: ...hile the backlight is on the timer is extended for another six seconds To lock all controls except the shutter release 9 and lighting lock buttons press the illuminator lock button until the lock icon...

Страница 15: ...complete the operation and display the new settings for the selected item To view other settings press the arrow button left or right The current selection is indicated by the selection cursor Press...

Страница 16: ...n press the TIMER START STOP button 5 To ensure correct operation choose an interval at least one second lon ger than the exposure time When using autofocus set the delay to two seconds or more and ch...

Страница 17: ...the device into contact with moisture or water Using the timer BBefore using the timer for extended periods check that the batteries have enough charge Replace the batteries when the low battery indi...

Страница 18: ...S5 pro N2 Nikon D70S D80 N3 Nikon D90 D5000 S1 Sony Alpha DSLR A100 SLR A200 SLR A300 SLR A350 SLR A700 SLR A900 Alpha 5D Alpha 7D Minolta Maxxum Dynax AF 7D 5D 9 7 5 4 3 807si 800si 700si 600si 505si...

Отзывы: