background image

 Safety

WX520 / WX520L / WX520T

Log Splitter

Safety

10

• 

Before applying pressure to the system, 
make sure all components are tight, and 
that lines, hoses and couplings are not 
damaged.

• 

Do not attempt any makeshift repairs to the hydraulic lines, 
fittings or hoses by using tapes, clamps or cements. The 
hydraulic system operates under extremely high pressure. 
Such repairs can fail suddenly and create a hazardous and 
unsafe condition.

• 

Wear proper hand and eye protection 
when searching for a high-pressure 
hydraulic leak. Use a piece of wood 
or cardboard as a backstop instead of 
hands to isolate and identify a leak.

• 

If injured by a concentrated high-pressure stream of 
hydraulic fluid, seek medical attention immediately. Serious 
infection or toxic reaction can develop from hydraulic fluid 
piercing the skin surface.

• 

Relieve pressure in the hydraulic system before working on 
it.

2.10 Engine Safety

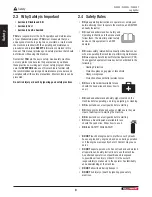
 CAUTION!

Before starting the engine, review the safety, 

operating, and maintenance instructions in the 

engine manual.

W019

IMPORTANT!  In some regions, when an engine is used 
on any forest covered, brush covered, or grass covered 
unimproved land it is required by law to have a spark 
arrestor installed on the muffler. A spark arrestor traps 
exhaust particles that are expelled from the engine. It is the 
responsibility of the operator to comply with the local laws 
and regulations. To purchase a spark arrestor, contact your 
local Wallenstein dealer or distributor.

•  DO NOT

 operate engine in an enclosed area. Exhaust gases 

contain odorless and deadly carbon monoxide that can 
cause death by asphyxiation.

•  DO NOT

 place hands or feet near moving or rotating parts.

•  DO NOT

 store, spill, or use gasoline near an open flame, 

or devices such as a stove, furnace, or water heater which 
use a pilot light or devices which can create a spark.

•  DO NOT

 refuel indoors where area is not well ventilated. 

•  DO NOT

 refuel while engine is running. Allow engine to cool 

for five minutes before refueling. Store fuel in approved 
safety containers.

•  DO NOT

 remove fuel tank cap while engine is running.

•  DO NOT

 operate engine if gasoline is spilled. Move machine 

away from the spill and avoid engine ignition until gasoline 
has evaporated.

•  DO NOT

 smoke while filling fuel tank.

•  DO NOT

 choke carburetor to stop engine. Whenever 

possible, gradually reduce engine speed before stopping.

•  DO NOT

 run engine above rated speeds. This may result in 

injury.

•  DO NOT

 tamper with governor springs, governor links or 

other parts which may increase the governed speed.

•  DO NOT

 tamper with the engine as set by the original 

equipment manufacturer.

•  DO NOT

 check for spark with spark plug or spark plug wire 

removed.

•  DO NOT

 crank engine with spark plug removed. If engine is 

flooded, crank until engine starts.

•  DO NOT

 strike flywheel with a hard object or metal tool as 

this may cause flywheel to shatter in operation. Use proper 
tools to service engine.

•  DO NOT

 operate engine without a muffler. Inspect 

periodically and replace, if necessary. 

•  DO NOT

 operate engine with an accumulation of grass, 

leaves, dirt or other combustible materials in the muffler 
area.

•  DO NOT

 touch hot muffler, engine body or cooling fins. 

Contact may cause burns.

•  DO NOT

 run engine with air cleaner or air cleaner cover 

removed.

Be sure to:

• 

Remove the wire from the spark plug when servicing 
the engine or equipment to prevent accidental starting. 
Disconnect the (-) ground  wire from the battery terminal. 

• 

Keep engine cooling fins and governor parts free of grass 
and other debris that can affect engine speed.

• 

Examine muffler periodically to be sure it is functioning 
effectively. A worn or leaking muffler should be repaired or 
replaced as necessary.

• 

Use fresh gasoline. Old fuel can clog carburetor and cause 
leakage. 

• 

Check fuel lines and fittings frequently for cracks or leaks. 
Replace if necessary.

Содержание WX520

Страница 1: ...OPERATOR S MANUAL Log Splitter Serial numbers 100252 1100000 and up WX520 WX520L WX520T Part Number Z97135_En Rev Feb 2023...

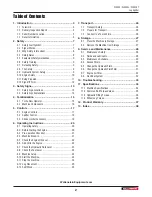
Страница 2: ...ng the Engine 20 6 3 Pre operation Checklist 21 6 4 Machine Break In 21 6 5 Check the Engine Oil Level 22 6 6 Add Oil to the Engine 22 6 7 Check the Hydraulic Fluid Level 23 6 8 Check the Fuel Level 2...

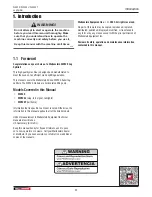
Страница 3: ...his Manual WX520 WX520L stop turn signal tail lights WX520T tall frame Information that is specific to a model is noted Otherwise the information in this manual applies to all of the listed models Uni...

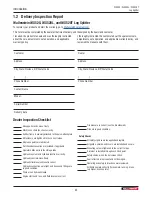
Страница 4: ...ontrols function correctly Splitter frame is securely attached to the quick attach plate All fasteners are tightened to the correct torque All grease points are lubricated Purchased accessories are in...

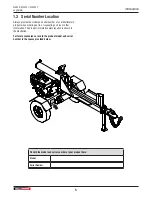
Страница 5: ...r Wallenstein product when ordering parts or requesting service or other information The product information plate location is shown in the illustration For future convenience record the product model...

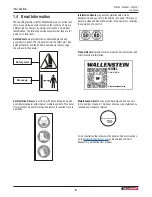
Страница 6: ...h a blue background and generally rectangular with single or multiple symbols This decal informs what Personal Protective Equipment is required for safe operation Informative Decals are generally pict...

Страница 7: ...s situation that if not avoided will result in death or serious injury This signal word is to be limited to the most extreme situations typically for machine components which for functional purposes c...

Страница 8: ...erator DO review safety related items annually with all personnel who are operating the machine or performing maintenance DO wear appropriate Personal Protective Equipment PPE The suggested equipment...

Страница 9: ...ty instructions is not qualified to use the machine Untrained operators expose themselves and bystanders to possible serious injury or death If elderly people are assisting with the work their physica...

Страница 10: ...create a spark DO NOT refuel indoors where area is not well ventilated DO NOT refuel while engine is running Allow engine to cool for five minutes before refueling Store fuel in approved safety conta...

Страница 11: ...Ground should be firm and level Operate only in daylight or good artificial light Make sure machine is properly adjusted and in good operating condition Store fuel well away from the wood pile Perfor...

Страница 12: ...the sign off sheet provided below can be used Make periodic reviews of Safety and Operation a standard practice for all operators Review again at the startup of every season The design and manufacture...

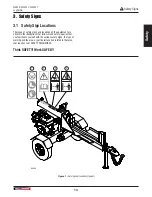
Страница 13: ...s on the equipment are shown in the illustrations that follow Good safety requires that you familiarize yourself with the various safety signs the type of warning and the area or particular function r...

Страница 14: ...d that have safety signs on them new signs must be applied Safety signs must always be replaced if they become damaged are removed or become illegible Safety signs are included in the product decal ki...

Страница 15: ...litter can provide many years of trouble free service IMPORTANT Make sure all operators understand how to put the log splitter in a Safe Condition before working with this machine See Safe Condition p...

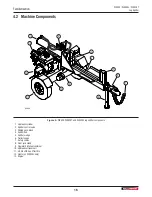
Страница 16: ...components 1 Hydraulic cylinder 2 Splitter control valve 3 Sliding push block 4 Splitter bed 5 Splitter wedge 6 Trailer tongue 7 Safety chains 8 Front jack stand 9 Operator s Manual container 10 Hydr...

Страница 17: ...age 10 IMPORTANT For complete information about the engine controls see the engine manufacturer s manual 5 1 1 Throttle Control and Fuel Shutoff The throttle control and fuel shutoff lever has the fol...

Страница 18: ...tral and retract 02061 3 2 1 Figure 6 Splitter control valve 1 Extend 2 Neutral 3 Retract The splitter control has the following functions 1 Extend Push and hold the lever to move the push block towar...

Страница 19: ...gine Make sure the control valve lever is in the neutral position 4 Loosen the hex set screw on the rod adjusting collar and move the rod up to the push block This is the set position at which the pus...

Страница 20: ...g and operating 5 Keep hands out of splitting area Do not rest hands on the log being split 6 Do not step over or straddle splitter during operation 7 Do not try to split more than one log at a time T...

Страница 21: ...ards and shields are in place secured and can function as designed Check and inspect tires wheels and hubs Check and tighten all fasteners Make sure the equipment is in good condition Check that appro...

Страница 22: ...he oil level is correct continue with step 7 If the oil level is low add oil until the oil level is at the full upper mark For instructions see Add Oil to the Engine 7 Insert and secure the oil level...

Страница 23: ...d remove it 2 Use a clean funnel and add fluid until the level is at the full mark on the dipstick 3 Install filler cap securely Wipe up any spilled fluid 6 8 Check the Fuel Level Check the fuel level...

Страница 24: ...onged exposure to loud noise may cause permanent hearing loss Use suitable protection while operating the machine W016 Make sure the log splitter is set up to work and otherwise ready to run 1 If the...

Страница 25: ...t Wood WARNING Risk of pinching or crushing hazard The worker loading the splitter MUST be the only one in control of the hydraulic cylinder and splitting wedge Only one worker should operate and load...

Страница 26: ...ncoming traffic in all situations including narrow bridges intersections and so on 15 Watch for other traffic when near or crossing roadways 16 Do not drink and drive 17 Before transporting perform a...

Страница 27: ...the cylinder ram push block and wear plates for damage or entangled material Repair or replace damaged parts Remove all entangled material 6 Touch up all paint nicks and scratches to prevent rusting 7...

Страница 28: ...fuel connections are properly secured 9 When completing a maintenance or service function make sure all safety shields and devices are installed before placing splitter in service 10 When cleaning an...

Страница 29: ...tomatic transmission fluid ATF for all operating conditions The following ATFs are acceptable substitutes Dexron VI Mercon 9 3 Maintenance Schedule Perform maintenance procedures at time shown or hour...

Страница 30: ...ine It indicates a grease point and the interval in hours Wipe grease fitting with a clean cloth before greasing to avoid injecting dirt and grit If fittings do not take grease remove and clean them t...

Страница 31: ...pose of used fluid in an environmentally safe manner 9 6 Change the Hydraulic Fluid Filter Change hydraulic fluid filter at 100 hours of operation or annually The filter is located on side of the hydr...

Страница 32: ...m 2 Remove the cover 3 Remove the air filter 4 Gently tap the air filter on a hard surface to loosen and remove dust and debris 5 If the air filter is excessively dirty or damaged replace it with a ne...

Страница 33: ...and safely remove wood Low engine speed Check throttle is set to maximum Check that choke is off Control handle does not go to neutral after rod is fully retracted Valve detent set too tight Adjustmen...

Страница 34: ...10 2 x 61 cm Splitting force 20 ton Valve type Open center Auto return detent Hydraulic pump type 2 stage Gear Hydraulic pump flow 11 gpm 47 Lpm Bed height 19 48 cm 28 71 cm Wedge height 9 23 cm Tire...

Страница 35: ...er increase torque values by 5 NOTE Bolt grades are identified by their head markings Imperial Bolt Torque Speci cations Bolt Diameter Torque Value SAE Gr 2 SAE Gr 5 SAE Gr 8 lbf ft N m lbf ft N m lbf...

Страница 36: ...nt safety procedure to apply and maintain proper wheel mounting torque on your trailer axle Torque wrenches are the best method to assure the proper amount of torque is being applied to a fastener Whe...

Страница 37: ...ginal purchase receipt with any claim This warranty does not cover the following 1 Normal maintenance or adjustments 2 Normal replacement of wearable and service parts 3 Consequen al damage indirect d...

Страница 38: ...G Gas Motor Safety 10 Grease Specifications 30 Grease Points 31 H Hydraulic Fluid Specifications 30 Hydraulic Fitting Torque 37 Hydraulic Flluid Adding 24 Hydraulic Fluid Changing 32 Hydraulic Fluid L...

Страница 39: ...draulic Oil Filter Changing 32 Maintenance Schedule 30 Shutoff engine fuel 17 Sign off form 12 Specifications 35 Common Bolt Torque Values 36 Fluid hydraulic 30 Fuel engine 30 Grease 30 Hydraulic Fitt...

Страница 40: ...WallensteinEquipment com...

Отзывы: