background image

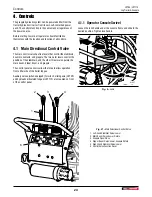
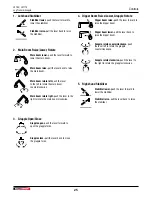
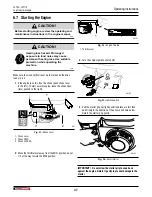
1.  Left-hand Stabilizer

Stabilizer lower

–push the lever forward to 

lower the stabilizer.

Stabilizer raise

–pull the lever back to raise 

the stabilizer.

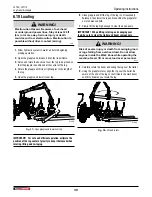
2.  Main Boom Raise/Lower, Rotate

Main boom lower

–push the lever forward to 

lower the main boom.

Main boom raise

–pull the lever back to raise 

the main boom.

Main boom rotate left

–push the lever 

to the left to rotate the main boom 
counterclockwise .

Main boom rotate right

–push the lever to the 

right to rotate the main boom clockwise.

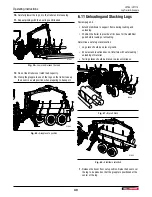
3.  Grapple Open/Close

Grapple open

–push the lever forward to 

open the grapple forks.

Grapple close

–pull the lever back to close 

the grapple forks.

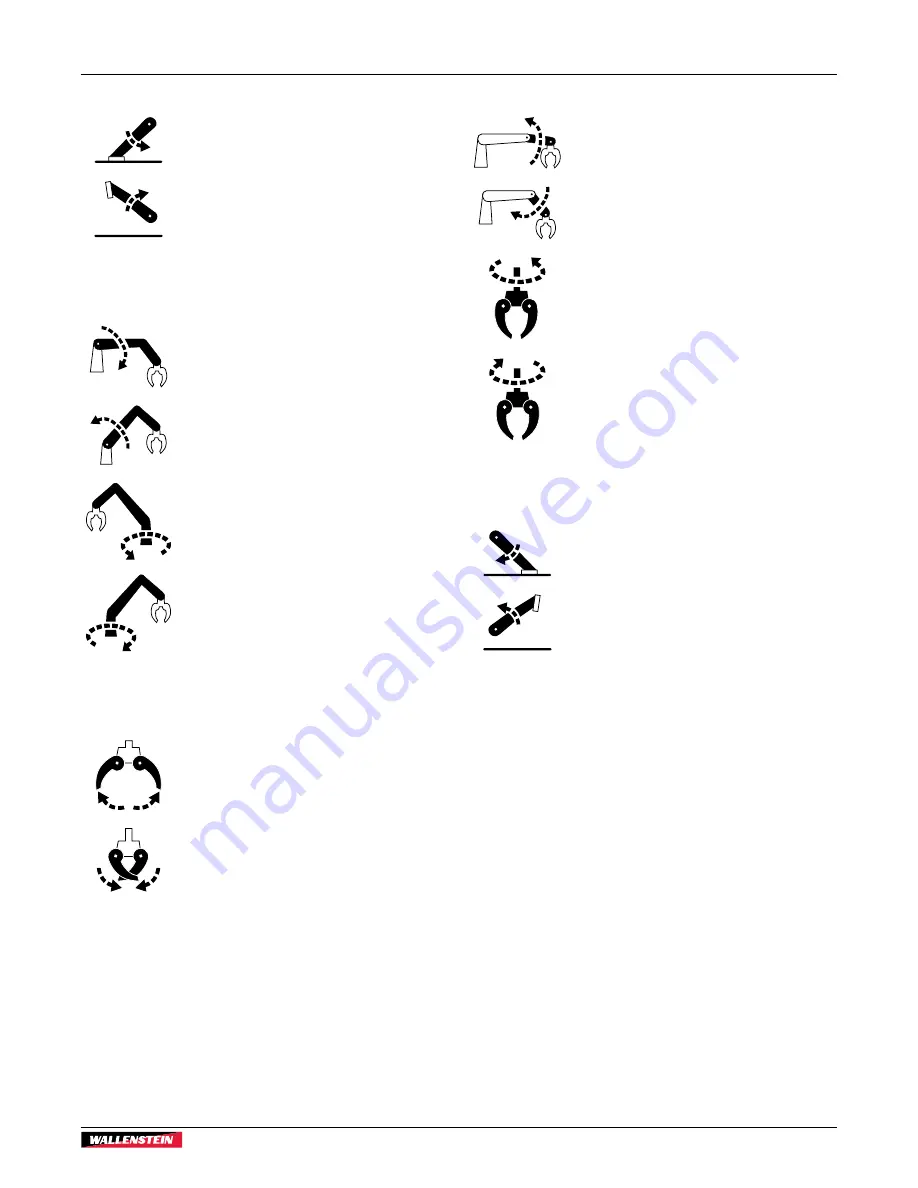
4.  Dipper Boom Raise/Lower, Grapple Rotate

Dipper boom raise

–push the lever forward to 

raise the dipper boom.

Dipper boom lower

–pull the lever back to 

raise the dipper boom.

Grapple rotate counterclockwise

–push 

the lever left to rotate the grapple 
counterclockwise.

Grapple rotate clockwise

–push the lever to 

the right to rotate the grapple clockwise.

5.  Right-hand Stabilizer

Stabilizer lower

–push the lever forward to 

lower the stabilizer.

Stabilizer raise

–pull the lever back to raise 

the stabilizer.

LXT95 / LXT115
Log Trailer & Grapple

Controls 

25

Содержание LXT115

Страница 1: ...OPERATOR S MANUAL LXT95 S N2E9US1116FS030006 Up LXT115 S N2E9US1114JS060128 Up Document Number Z97069 Rev Jul 2021 Log Trailer Grapple LXT95 LXT115 ...

Страница 2: ...is manual covers all factory variations Safe efficient and trouble free operation of this Wallenstein product requires that anyone using or maintaining the machine reads and understands the Safety Operation Maintenance information contained within this Operator s Manual Keep this manual handy for frequent reference and to pass on to new operators or owners Call your Wallenstein dealer or the Distr...

Страница 3: ...Valve 24 4 2 Hydraulic Power Pack 26 4 3 Bunk Posts 28 4 4 Hydraulic Sliding Tandem Axle 28 4 5 Articulated Trailer Tongue 29 4 6 Hydraulic Winch 30 4 7 Braking Systems 31 5 Machine Setup 33 6 Operating Instructions 34 6 1 Jobsite Safety 34 6 2 Before Start up 34 6 3 Machine Break In 35 6 4 Pre start Checks 35 6 5 Engine Oil Level Check 36 6 6 Fuel Level Check 36 6 7 Starting the Engine 37 6 8 Sto...

Страница 4: ...warranty policy and reviewed the manuals Dealer Address City State Province ZIP Postal Code Phone Number 1 2 1 Dealer Inspection Report Check hydraulic hoses Check boom and grapple function All grease points have been lubricated Boom lock pin is installed Check wheel lug nuts are properly torqued Check all fasteners are tight Check tire pressure Hitch has retainer is installed Check bunk posts bac...

Страница 5: ...A TOUTES LES NORMES QUI LUI SONT APPLICABLES EN VERTU DU REGLEMENT SUR LA SECURITE DES VEHICLES AUTOMOBILES DU CANADA EN VIGUEUR A LA DATE DE SA FABRICATION 1 3 Serial Number Location Always provide the model and serial number of your Wallenstein product when ordering parts or requesting service or other information The product information plate location is shown in the illustration Record your pr...

Страница 6: ...ecals indicate machine model and serial number and other important information VIN NLV MODEL Manufactured by Wallenstein Equipment Inc 7201 Line 86 Wallenstein ON N0B2S0 Canada TYPE OF VEHICLE TYPE DE VEHICLE TRA REM GAWR PNBE KG GVWR PNBV KG DIMENSION RIM JANTE E R I T PNEU COLD INFL PRESS PRESS DE CONFLA A FROID PSI LPC THIS VEHICLE CONFORMS TO ALL APPLICABLE STANDARDS PRESCRIBED UNDER THE CANAD...

Страница 7: ...es IMPORTANT To avoid confusing equipment protection with personal safety messages a signal word IMPORTANT indicates a situation that if not avoided could result in damage to the machine 2 3 Why is SAFETY important Three Big Reasons Accidents Disable and Kill Accidents Cost Accidents Can Be Avoided YOU are responsible for the SAFE operation and maintenance of your Wallenstein product YOU must make...

Страница 8: ...tion and feature sections of this manual Each of the safety messages found on the safety signs on the machine Engine operator s manual as equipped Extend stabilizers to support and steady the trailer and boom during loading or stacking Keep the trailer attached to the tow vehicle Always wear appropriate PPE This equipment includes but is not limited to the following A hard hat Heavy gloves Hearing...

Страница 9: ...ration and safety instructions is not qualified to use the machine Make sure every operator Reads and understands the operator s manual Is instructed in safe and proper use of the equipment Understands and knows how to perform the Safe Condition procedure Train all new personnel and review instructions frequently with existing workers Be certain only a properly trained physically able person uses ...

Страница 10: ...r an open flame or devices such as a stove furnace or water heater which use a pilot light or devices which can create a spark DO NOT refuel indoors where area is not well ventilated Outdoor refueling is preferred DO NOT refuel while engine is running Stop engine and allow to cool for five minutes before refueling Store fuel in approved safety containers DO NOT remove fuel tank cap while engine is...

Страница 11: ...de to activate the winch If a rope breaks under tension it can snap back in an unpredictable direction with great force The recoil may cause injury or death to a person in its path Always keep hands clear of winch rope hook loop hook and fairlead opening during installation operation and when spooling in or out Never touch winch rope or hook while under tension or under load Always be certain the ...

Страница 12: ... rotating boom creates a collision hazard if workers or bystanders are inside the working zone Follow these important points to keep workers and bystanders safe from potential hazards A Work Zone includes any area where work with this grapple is done and can include the traveled portion of a road if being used as a landing Create a 20 ft 6 m radius work zone perimeter clearly marked with safety co...

Страница 13: ...vy material falling dropping in this area Material on a rotating boom creates a collision hazard if workers or bystanders are inside the Work Zone Place safety cones around the area to warn others 10 ft 3 m 10 ft 3 m 2 2 1 1 1 01611 Fig 2 Operator Work Station Kept Opposite Work Area Safety LXT95 LXT115 Log Trailer Grapple Safety 13 ...

Страница 14: ...below can be used Make periodic reviews of Safety and Operation a standard practice for all operators Review again at the startup of every season The design and manufacture of this product conforms to relative provisions in the following standards ASABE S318 Safety for Agricultural Field Equipment ISO 3600 Operator s Manual Machinery for Agriculture Forestry Lawn Equipment Sign off Form Date Owner...

Страница 15: ...w to avoid the hazard Hazard How to avoid the hazard Practicing good safety means becoming familiar with safety signs and warnings and being aware of the situations that require alertness Think SAFETY Work SAFELY Fig 3 Safety Decal Locations LXT95 model shown however LXT115 is same 50 ft 15 m 01614 2 3 4 1 Safety LXT95 LXT115 Log Trailer Grapple Safety 15 ...

Страница 16: ...01614 5 6 3 7 Fig 4 Safety Decal Locations LXT95 model shown however LXT115 is same Safety LXT95 LXT115 Log Trailer Grapple Safety 16 ...

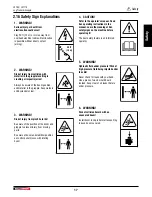
Страница 17: ...e to prevent injury from moving parts Be aware of boom and stabilizer position as control panel moves with rotating boom 4 CAUTION Refer to the operator s manual Read ALL operating instructions in the manual Learn the meaning of ALL safety signs on the machine before operating it The best safety feature is an informed operator 5 WARNING Hydraulic fluid under pressure Risk of high pressure fluid be...

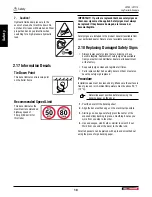
Страница 18: ...hat are missing or have become illegible Replacement safety signs are available from your authorized distributor dealer parts department or the factory Keep safety signs clean and legible at all times Parts replaced that had a safety decal on them must also have the safety sign replaced Procedure Installation area must be clean and dry Make sure the surface is free of grease or oil Ambient tempera...

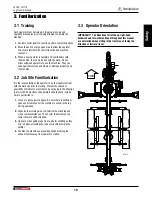
Страница 19: ...y of problems or accidents by not being in the situation to start with Some items the operators should check include but are not limited to 1 Close or cramped work space Be sure there is sufficient space and clearance for the machine to winch in the log during operation 2 Organize the working area to minimize the winching and wood removal distances The shorter the distances the faster the work wil...

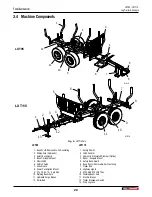
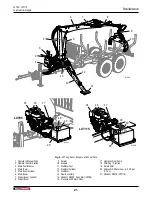
Страница 20: ...el Jack 8 Power Pack Option Mount 9 27 x 10 5 x 15 8 ply tires 10 Walking Beam Axle 11 Hydraulic Surge Brakes 12 Trailer Bed LXT115 1 Safety Chains 2 Hitch Coupler 3 Hydraulic Articulated Drawbar Option 4 Boom Grapple Mount 5 Safety Back Guard 6 Bunk Posts Removable Self centering 7 Trailer Bed 8 Highway Lights 9 ST235 80R16 LRE Tires 10 Walking Beam Axle 11 Electric Brakes 12 Trailer Breakaway Sw...

Страница 21: ...le 11 Stabilizer Foot 12 Stabilizer Cylinder 13 Stabilizer 14 Slew Assembly 15 Honda GX200 Rope Start LXT95 16 Pressure and Return Lines 17 Hydraulic Gear Pump 18 Filler Cap Dipstick 19 Return Filter 20 Hydraulic Oil Reservoir 4 6 US gal 17 5 L 21 Honda GX270 LXT115 1 2 3 4 5 6 7 8 9 10 12 11 13 14 01620 15 16 17 18 19 20 01621 LXT95 21 16 17 18 19 20 01629 LXT115 LXT95 LXT115 Log Trailer Grapple ...

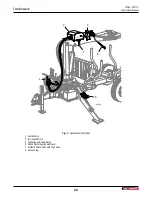
Страница 22: ... Hydraulic Winch Option 1 Control Valve 2 Two speed Winch 3 Top Pulley and Cable Guide 4 Winch Clutch Speed Select Lever 5 Synthetic Winch Rope with Grab Hook 6 Access Step Familiarization LXT95 LXT115 Log Trailer Grapple 22 ...

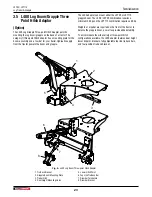
Страница 23: ...hp and the LXT115 combination requires a 60 hp Weights or a loader are required on the front of the tractor to balance the grapple boom as well as provide added stability To accommodate the wide variety of three point hitch configurations available the L400 adapter features dual height lower link arm brackets fully adjustable top link tie back bars and four position tie back bracket 1 2 3 4 5 Fig ...

Страница 24: ...evers operate the main boom dipper boom and grapple The control panel can swivel to either side to allow operation from either side of the trailer tongue Auxiliary valves when equipped for winch sliding axle LXT95 and hydraulic articulated tongue LXT115 are mounted on front of the control panel 4 1 1 Operator Console Swivel Loosen the lock handle under the console frame and slide to the desired po...

Страница 25: ...rapple Open Close Grapple open push the lever forward to open the grapple forks Grapple close pull the lever back to close the grapple forks 4 Dipper Boom Raise Lower Grapple Rotate Dipper boom raise push the lever forward to raise the dipper boom Dipper boom lower pull the lever back to raise the dipper boom Grapple rotate counterclockwise push the lever left to rotate the grapple counterclockwis...

Страница 26: ...itch to ON Turn it counterclockwise to OFF to stop the engine 00187 Fig 11 Ignition Switch Choke Lever The choke lever opens and closes the choke valve in the carburetor Place the choke lever in the CLOSED position 3 when starting a cold engine Move the choke lever to the OPEN position 2 after the engine starts When restarting a warm engine leave the lever in the OPEN position 00188 1 2 3 Fig 12 C...

Страница 27: ... Pull the starter grip out lightly until resistance is felt then pull briskly in the direction of the arrow as shown below Return the starter grip gently 00203 Fig 15 Recoil Starter 4 2 2 Hydraulic Reservoir The hydraulic reservoirs for each model of power pack feature a dip stick with high and low indicators and a spin on filter 01631 1 2 3 Fig 16 Power Pack hydraulic Reservoir 1 Return Filter 2 ...

Страница 28: ...nd can be used to help balance a load or adjust the tongue weight for added traction if required Check that the trailer is parked on level ground and the frame is not under tension or twisted IMPORTANT Tandem axle should be adjusted with trailer unloaded Tandem bolt is not accessible when loaded Reinserting the tandem bolt is made easier with the help of an assistant 1 Connect trailer to the tow v...

Страница 29: ...o move the axle forward on the frame 01636 Fig 21 Sliding Axle Forward 7 Adjust axle position then insert the tandem bolt and locknut 4 5 Articulated Trailer Tongue LXT115 option With the Articulating Tongue option maneuvering the log trailer through tight spaces is made easier The tow vehicle is moved away from the trailer tongue by adding another hinge point 01638 1 3 4 2 Fig 22 Articulating Tra...

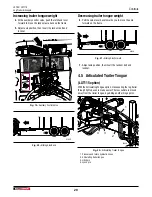
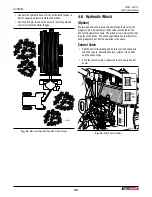
Страница 30: ... for the grapple to pick An auxiliary control valve is mounted on the front of the operator console The winch drive is mounted on the top side of the boom The winch specifications are different for each grapple model but the operation is the same Control Valve Pull the control lever back and hold to start the winch and wind the rope in Releasing the lever returns it to neutral and the winch stops ...

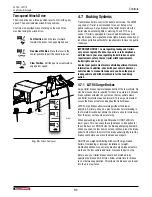
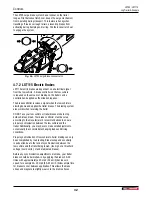
Страница 31: ...e owner s manual to make sure you have the proper towing vehicle and hitch attachments for the load being pulled 4 7 1 LXT95 Surge Brakes Surge trailer brakes operate independently of the tow vehicle No electrical connection is required for them to operate A hydraulic brake cylinder actuates the system as the tow vehicle slows and trailer momentum pushes forward This surge momentum moves the brake...

Страница 32: ...r trailer brakes alone to stop both vehicle and load Your brake controller must be set up according to the manufacturer s recommendations to ensure proper synchronization between the tow vehicle and the trailer Additionally you may have to make small adjustments occasionally to accommodate changing loads and driving conditions Proper synchronization of tow vehicle to trailer braking can only be ac...

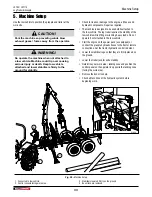
Страница 33: ...ehicle while lifting or winching heavy loads Do not operate if not attached to the tow vehicle Start the engine on the power pack as equipped or connect the grapple hydraulic hoses to the tractor remote connections Set the tractor hydraulic control in detent Lower the stabilizer legs so that they are firmly placed on the ground Lower the trailer jack for extra stability Determine your work area la...

Страница 34: ...rapple Never allow children or unauthorized people to operate or be around this machine When operating this equipment it is recommended to have at least two operators present and trained in safe operation of the machine All operators must be completely familiar with all components of the machine and their function Keep hydraulic lines and fittings tight in good condition and free of leaks Keep the...

Страница 35: ...ection See page 45 6 4 Pre start Checks Items to Check Boom and Grapple Machine is lubricated as indicated in the Maintenance Schedule on page 50 All boom pivot points grapple and stabilizers move freely Check for leaks in the hydraulic system Tighten leaking fittings Repair or replace any damaged components Make sure all guards and shields are in place Check all fasteners and hardware Re torque i...

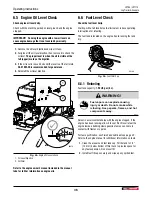
Страница 36: ...fuel level daily Starting with a full tank helps to eliminate or reduce operating interruptions for refueling The fuel tank is located on the engine Avoid running the tank dry 00198 Fig 30 Fuel Filler Cap 6 6 1 Refueling Fuel tank capacity 1 59 US gal 6 L WARNING Fuel vapors can explode causing injury or death Do not smoke while refueling Keep sparks flames and hot components away W027 Refuel in a ...

Страница 37: ...ver pushed to the right 00188 1 2 3 Fig 31 Choke Lever 1 Choke Lever 2 Choke OPEN 3 Choke CLOSED 2 Move the throttle lever away from the MIN position about 1 3 of the way toward the MAX position 00191 1 Fig 32 Engine Throttle 1 Throttle Lever 3 Turn the engine ignition switch ON 00187 Fig 33 Ignition Switch 4 Pull the starter grip out lightly until resistance is felt then pull briskly in the direc...

Страница 38: ...F If possible carefully lower the grapple load onto the trailer or ground Correct fault situation before restarting 6 9 Load Distribution Always balance the load in the center of the trailer to maintain a balanced weight distribution on the tires and trailer frame larger logs on the bottom and smaller on top The best results are obtained when loads are planned in a safe and common sense manner Do ...

Страница 39: ...ion of the log center of gravity to keep it balanced when rotating lifting and swinging 6 Close grapple and lift the log If the log is not reasonably balanced then lower the log and reposition the grapple for a more balanced hold 7 Slowly lift the log high enough to clear the bunk posts IMPORTANT When lifting rotating and swinging your load be sure to clear the trailer and boom components WARNING ...

Страница 40: ...bilizers to support frame during loading and unloading Position the trailer to provide a firm base for the stabilizer pads before loading or unloading Determine a safe log stack location Log stack should be on level ground Ensure stack location does not interfere with safe loading unloading of material Tall log stacks should be braced to prevent collapse 01664 Fig 41 Braced Stack 01665 Fig 42 Stab...

Страница 41: ...owly lift the log high enough to clear the bunk posts Be aware of the end of the log so that it clears the main boom and lift cylinder as you lift and swing the log 6 Carefully rotate the boom and swing the log over the ground 7 Using the grapple rotator align the log over landing zone 01682 Fig 44 Swing and rotate 8 Carefully lower the log to the ground and release 01683 Fig 45 Lower and release ...

Страница 42: ...ng use planks or stabilizer pads Use the stabilizers to keep the boom and trailer as level as possible Apply parking brakes of the tow vehicle for extra stability Place chocks in front of and behind the tow vehicle and the trailer tires to limit the chance of movement Be extra cautious and use common sense Working on Slopes Park at the top of the slope and winch logs to your position Make sure tha...

Страница 43: ... sized towing ball Clean off all debris from the machine Check that all the lights reflectors and other lighting requirements are installed and in good working condition Never allow riders on the machine Be a safe and courteous driver Always yield to oncoming traffic in all situations including narrow bridges intersections and so on Watch for traffic when near or crossing roadways Do not drink and...

Страница 44: ...aking fittings 10 Stow hydraulic hose ends in storage brackets to keep them off the ground 11 Touch up all paint nicks and scratches to prevent rusting 12 Cover with a waterproof tarp if the machine cannot be placed inside 13 Check tire pressure and top up if required 14 Store in an area away from human activity 15 Do not allow children to play around the stored unit 6 14 1Grapple three point hitc...

Страница 45: ... or maintenance work always wear proper PPE for the job Where replacement parts are necessary genuine factory replacement parts must be used to restore equipment to original specifications The manufacturer is not responsible for injuries or damages caused by use of unapproved parts or accessories Inspect and tighten all bolts nuts and screws Check that all electrical and hydraulic connections are ...

Страница 46: ...and repair broken fittings immediately 3 If fitting does not take grease remove and clean thoroughly Also clean lubricant passageway Replace fitting if necessary Location Every 50 hours of operation 1 Stabilizer and stabilizer cylinder 2 Main Boom Hoist Cylinder 3 Main Boom Pivot 4 Dipper Cylinder 5 Dipper Cylinder Links 6 Boom Nose 7 Slew Assembly Ring Gear 8 Adjustable Tandem Slide 9 Tandem Axle...

Страница 47: ...LXT95 1 1 2 3 4 6 7 8 9 10 Fig 50 LXT95 Log Boom and Trailer Grease Points LXT95 LXT115 Log Trailer Grapple Service and Maintenance 47 ...

Страница 48: ...LXT1 15 1 1 2 3 4 6 5 7 9 10 Fig 51 LXT115 Log Boom and Trailer Grease Points Service and Maintenance LXT95 LXT115 Log Trailer Grapple 48 ...

Страница 49: ...11 12 12 Fig 52 Log Grapple Grease Points Fig 53 Winch Option Grease Point 01730 13 LXT95 LXT115 Log Trailer Grapple Service and Maintenance 49 ...

Страница 50: ...ope Condition Check hydraulic hoses fittings Check that all fasteners are secure Check wheel lug nut torque See page 60 Engine oil level See page 36 Fuel Level See page 36 Grease Machine Hydraulic Oil Level See page 52 Check engine air filter Seepage 51 Change engine oil See engine manual Repack axle bearings Check tire pressure Change hydraulic oil and filter See page 53 Change engine air filter ...

Страница 51: ...en than specified IMPORTANT Operating the engine without an air filter or with a damaged air filter can allow dirt to enter the engine causing rapid engine wear This type of damage is not covered by Warranty 00658 Fig 54 Engine Air Cleaner Inspection Remove the air cleaner cover and inspect the filter elements Clean or replace dirty filter elements Always replace damaged filter elements 1 2 3 4 00...

Страница 52: ...US gal 17 5 L Use Dexron III ATF for all operating conditions Dexron VI or Mercon are acceptable substitutes Install fill cap securely and wipe up any spilled fuel Check levels after changing filters or servicing hydraulic components F L 01689 Fig 56 Hydraulic Oil Level Check 7 5 1 Hydraulic Oil Changing The drain plug is located at the bottom of the hydraulic tank Allow the machine to cool before...

Страница 53: ... on See page 7 2 Clean area around filter then remove the filter 3 Apply a light coat of oil to the O ring and install the replacement filter Snug up by hand and then tighten a further 1 4 turn 4 Start up the machine and operate the hydraulic functions for 1 2 minutes 5 Check filter head for oil leaks If leaks are found around the filter tighten slightly 6 Check hydraulic reservoir oil level Top u...

Страница 54: ... steel winch rope especially when free spooling and hauling around It also prevents the synthetic line from kinking like the steel rope is prone to if not handled properly Strength Steel winch rope can stand more abrasion It can be pulled over obstacles and rough terrain without fear of damage to the rope itself If winching primarily in muddy rocky or sandy conditions a steel rope may be a better ...

Страница 55: ...nings and should not be cause for concern When replacement is necessary it is important to replace both shoes on each brake and both brakes of the same axle This helps retain the braking balance Before reassembling apply a light film of grease or anti seize compound on the brake anchor pin the actuating arm bushing and pin and the areas on the backing plate that are in contact with the brake shoes...

Страница 56: ...ipped with electromagnets designed to provide the proper input force and friction characteristics Magnets should be inspected and replaced if worn unevenly or abnormally Use a straight edge to check magnet flatness Even if wear is normal the magnets should be replaced if any part of the magnet coil has become visible through the friction material facing of the magnet It is also recommended that th...

Страница 57: ... service or be replaced Call service technician Leaking hydraulic hose Hose worn or damaged Replace Leaking cylinder Seals worn Seal replacement may be required Call service technician Hydraulic controls from tractor behave erratically Hydraulic circuit type on tractor does not match boom grapple control valve type open center closed center Call service technician Boom drifts down Leaking cylinder...

Страница 58: ...iameter 2 5 cm Ground Clearance 14 36 cm 17 43 cm Tires 27 x 10 5 x 15 8 ply ST235 80R16LRE Ball Hitch Size 2 2 5 16 Brakes Surge Electric Tongue Weight Trailer empty with log loader 200 lb 465 lb 91 kg 211 kg 480 lb 218 kg Tongue Weight Trailer empty with log loader and power pack 250 lb 515 lb 114 kg 234 kg 555 lb 252 kg Trailer Weight Unloaded 1 650 lb 748 kg 2 470 lb 1 120 kg Dimensions L x W ...

Страница 59: ...identified by their head markings Imperial Bolt Torque Specifications Bolt Diameter Torque Value SAE Gr 2 SAE Gr 5 SAE Gr 8 lbf ft N m lbf ft N m lbf ft N m 1 4 6 8 9 12 12 17 5 16 10 13 19 25 27 36 3 8 20 27 33 45 45 63 7 16 30 41 53 72 75 100 1 2 45 61 80 110 115 155 9 16 60 95 115 155 165 220 5 8 95 128 160 215 220 305 3 4 165 225 290 390 400 540 7 8 170 230 420 570 650 880 1 225 345 630 850 97...

Страница 60: ...eel mounting torque on your trailer axle Torque wrenches are the best method to assure the proper amount of torque is being applied to a fastener Wheel lugs should be torqued before first road use and after each wheel removal Check and re torque after the first 10 miles 16 km 25 miles 40 km and again at 50 miles 80 km Check periodically thereafter WARNING Wheel lug nuts must be installed and kept ...

Страница 61: ...oes not cover the following 1 Normal maintenance or adjustments 2 Normal replacement of wearable and service parts 3 Consequen al damage indirect damage or loss of profits 4 Damages resul ng from Misuse negligence accident the or fire Use of improper or insufficient fuel fluids or lubricants Use of parts or a ermarket accessories other than genuine Wallenstein parts Modifica ons altera on tampering or i...

Страница 62: ...sing trailer tongue weight 29 Hydraulic Winch Option 30 Control Valve 30 I Ignition Switch 26 Information Decals 18 L L400 Log Boom Grapple Three Point Hitch Adaptor 23 Lubricants 45 M Machine Break In 35 Machine Components 20 Machine Setup 33 Maintenance Decals 6 Maintenance Schedule 50 O Operating Instructions Before Start up 34 Engine Oil Level Check 36 Fuel Level Check 36 Load Distribution 38 ...

Страница 63: ...7 Stopping 38 Stopping in an Emergency 38 Storage 44 Storage Safety 44 Synthetic Rope Cleaning 54 Handling 54 Rope inspection 54 Strength 54 Weather 54 T Throttle Lever 27 Trailer Brake Adjustment 55 Transporting 43 Transporting Safety 43 Troubleshooting Guide 57 U Understanding Safety Decals 15 W Warranty 61 Welding Safety 10 Wheel Lug Torque 60 Winch Accessory 54 Synthetic Rope Use 54 Winch Safe...

Страница 64: ...www wallensteinequipment com ...

Отзывы: