background image

English

   - 11 -

Switching the TV On/Off

To Switch the TV On

Connect  the  power  cord  to  the  220-240V  AC,  50 
Hz.

Switch  the  “

• 

”  button  to  position  “

|

”  so  the  TV 

will switch to standby mode. Then the standby LED 
lights up.

To switch on the TV from standby mode either:

• 

Press the “

• 

” button, P+ / P- or a numeric button 

on the remote control.

Press the “

• 

” or +/- button on the TV.

The TV will then switch on.

• 

  Note :  If  you  switch  on  your  TV  via  PROGRAMME 
UP/DOWN buttons on the remote control or on the 
TV set, the programme that you were watching last 
will be reselected. 

 By either method the TV will switch on. 

 To Switch the TV Off

  Switch the “

• 

” button to position 2 as illustrated, 

 so the TV will switch 

OFF

.


• 

To power down  the TV  completely,  unplug  the 
power cord from the mains socket.


Note:  When  the  TV  is  switched  to  standby  mode, 
standby LED can blink to indicate that features such 
as  Standby Search, Over Air Download or Timer is 
active.

Digital Teletext (** for UK only)

   • Press the “

” button.

The digital teletext information appears.

• 

Operate it with the coloured buttons, cursor buttons and 

• 

OK

 button. 

 The  operation  method  may  differ  depending  on  the 
contents of the digital teletext.

Follow  the  instructions  displayed  on  digital  teletext 
screen. 

When  Press  “

• 

SELECT

”  button  or  similar  message 

appears on the screen, press the OK button.

When the “

• 

” button is pressed, the TV returns to 

television broadcasting.

With digital terrestrial broadcasting (DVB-T), in addition 

• 

to digital teletext broadcasting together with the normal 
broadcasting, there are also channels with just digital 
teletext broadcasting.

The  aspect  ratio  (picture  shape)  when  watching 

• 

a  channel  with  just  digital  teletext  broadcasting  is 
the  same  as  the  aspect  ratio  of  the  picture  viewed 
previously.

When  you  press  the  “

• 

”  button  again,  the  digital 

teletext screen will be displayed.

Analogue Teletext

Use  of  teletext  and  its  functions  are  identical  to 
the  analogue  text  system.  Please  do  refer  to  the 

TELETEXT

” explanations.

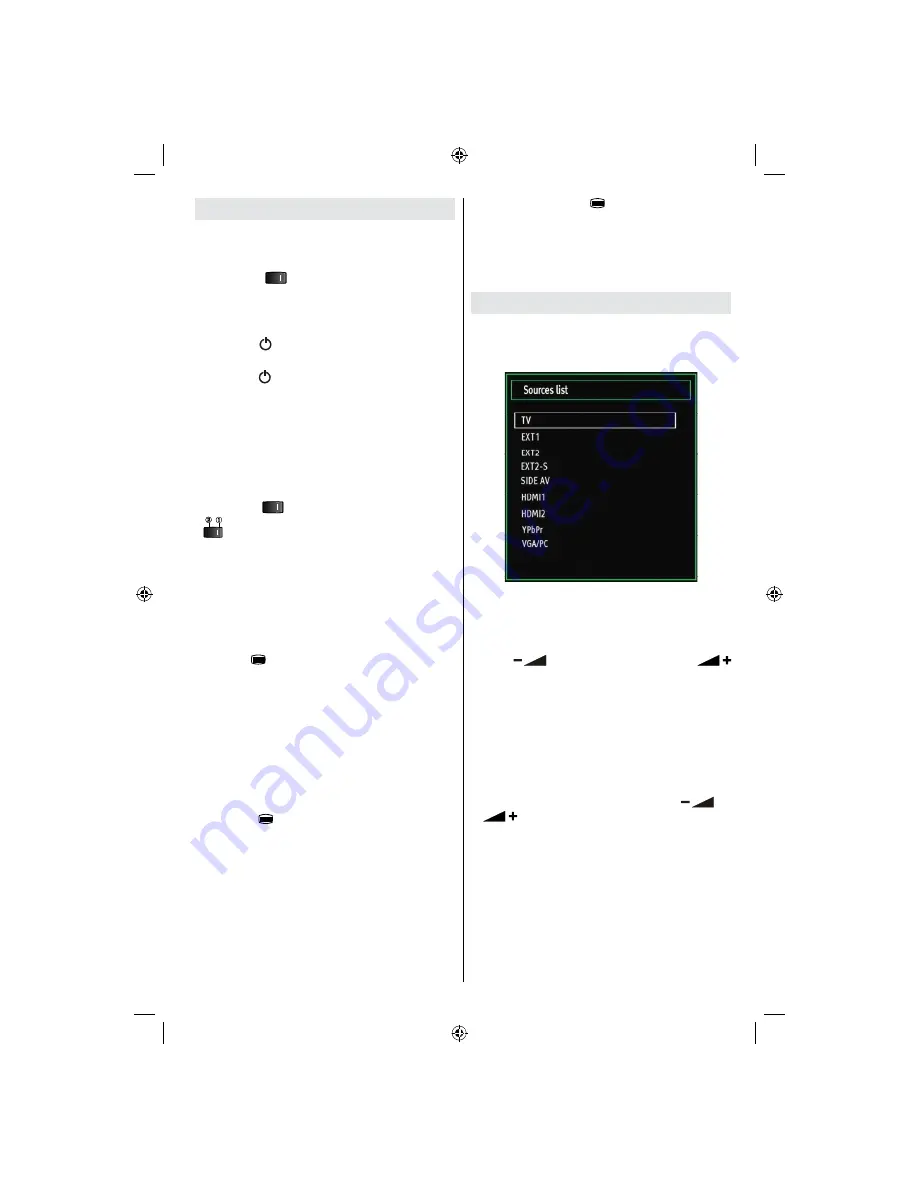
Input Selection

Once  you  have  connected  external  systems  to  your 
TV,  you  can  switch  to  different  input  sources.  Press 

SOURCE

” button on your remote control consecutively 

for directly changing sources.

You can operate your TV using both the remote control 
and onset buttons.

Operation with the Buttons on the TV

Volume Setting

Press “

• 

” button to decrease volume or 


button  to  increase  volume,  so  a  volume  level  scale 
(slider) will be displayed on the screen.

Programme Selection

Press “

• 

P/CH +

” button to select the next programme or 

P/CH -

” button to select the previous programme.

Viewing Main Menu

Press the “

• 

V+

”/”

V-

” button at the same time to view 

main menu. In the Main menu select sub-menu using 
“AV” button and set the sub-menu using “

” or 

” buttons. To learn the usage of the menus, 

refer to the menu system sections.

AV Mode

Press the “

• 

AV

” button in the control panel on the TV 

to switch between AV modes.

Operation with the Remote Control

The remote control of your TV is designed to control all 

• 

the functions of the model you selected. The functions 
will be described in accordance with the menu system 
of your TV.

[GB]_MB61_3900UK_IDTV_42843W_BRONZE16_10071025_50179563.indd   11

01.11.2010   15:33:00

Содержание SaorView WP4211LCD

Страница 1: ...COLOUR TELEVISION WITH REMOTE CONTROL OPERATING INSTRUCTIONS WP4211LCD BE WALKER WISE logon to www walker ie...

Страница 2: ...a Channel 15 Managing Stations Favourites 15 Button Functions 15 Managing Stations Sorting Channel List 16 On Screen Information 16 Media Playback Using Media Browser 16 Viewing Videos via USB 16 View...

Страница 3: ...as future reference When selling the device or giving it away absolutely give these direction for use Thank you for choosing this product This manual will guide you for the proper operation of your TV...

Страница 4: ...ced on top of the TV Batteries should not be exposed to excessive heat such as sunshine re or the like Lightning In case of storm and lightning or when going on holiday disconnect the power cord from...

Страница 5: ...ard Connection to a cable distribution system has therefore to be provided through a device providing electrical isolation below a certain frequency range galvanic isolator see EN 60728 11 The Standby...

Страница 6: ...itch off or disconnect the TV from the mains plug This will also reduce energy consumption Disconnect power when going away for longer time Note that annually using the TV set in Power Save Mode has m...

Страница 7: ...wn 15 Programme Down Page up in DVB channels 16 Electronic programme guide in DVB channels 17 Programme Up Page down in DVB channels 18 Sleep Timer 19 Picture mode selecion Changes picture mode 20 in...

Страница 8: ...VCR or a DVD player Note If an external device is connected via the SCART socket the TV will automatically switch to AV mode Note To connect external device please use to supplied scart connection ca...

Страница 9: ...er 720p or 1080p signals No sound connection is needed for an HDMI to HDMI connection HDMI 2 HDMI Input 9 Viewing the Connections Side Connectors CI Slot is used for inserting a CI card A CI card allo...

Страница 10: ...USB player and especially the USB device itself SIDE VIEW USB MEMORY USB Memory Connection IMPORTANT The TV should be switched off while plugging or unplugging a USB device Plug your USB device to th...

Страница 11: ...emote control handset when it is not to be used for a long period Otherwise it can be damaged due to any leakage of batteries Remote range is approximately 7m 23ft Connecting to a DVD Player If you wa...

Страница 12: ...r with the normal broadcasting there are also channels with just digital teletext broadcasting The aspect ratio picture shape when watching a channel with just digital teletext broadcasting is the sam...

Страница 13: ...channels EPG will be displayed with blanks OK Options Displays programme options including Select Channel option INFO Event Details Displays the programmes in detail Green button Programme schedule w...

Страница 14: ...ressing or button select the country you want to set and press button to highlight Teletext Language option Use or button to select desired Teletext Language Press button after setting Teletext Langua...

Страница 15: ...ions will change accordingly Use button to highlight an item and then press or button to set an option You can press MENU button to cancel Digital Manual Search In manual channel scan the number of th...

Страница 16: ...ng or button moves to the previous next character Pressing or button toggles the current character i e b character becomes a by and c by Pressing the numeric buttons 0 9 replaces the highlighted chara...

Страница 17: ...k Using Media Browser If the USB stick is not recognized after power off on or First Time Installation rst plug the USB device out and power off on the TV set Plug the USB device in again To display M...

Страница 18: ...he slideshow Previous Next Left Right buttons Jumps to previous or next le on slideshow Rotate Up Down buttons Rotates the image using up down buttons Loop Shuf e BLUE button Press once to disable Loo...

Страница 19: ...al When the AUTO mode does not function correctly due to poor WSS signal quality or when you want to change the ZOOM mode change to another ZOOM mode manually 16 9 This uniformly stretches the left an...

Страница 20: ...or Off Game Mode When Game Mode is set to On speci c game mode settings which are optimized for better video quality will be loaded Note When Game Mode is on some items in the Picture Settings menu w...

Страница 21: ...ight speaker balance Headphone Sets headphone volume AVL Automatic Volume Limiting AVL function sets the soundto obtain xed outputlevel betweenprogrammes For instance volume level of advertisements te...

Страница 22: ...l Access and press OK to view menu items Con guring Language Preferences You can operate the TV s language settings using this menu Press MENU button and select the Settings icon by using or button Pr...

Страница 23: ...ers To view Timers menu press MENU button and select Settings icon by using or button Press OK button to view Settings menu Use or button to highlight Timers and press OK to continue Setting Sleep Tim...

Страница 24: ...tically stored Con guring Other Settings To view general con guration preferences select Other Settings in the Settings menu and press OK button Operation Press or buttons to select an item Use or but...

Страница 25: ...have been found message will be displayed on the screen Standby Search optional Use or button to select Standby Search and then press or button to set this setting as On or Off If you change Standby S...

Страница 26: ...displaying a persistent image LCD TVs image persistence may disappear after a short time Try turning off the TV for a while To avoid this do not leave the screen in still picture for extended periods...

Страница 27: ...Types Source Supported Signals Available EXT 1 SCART 1 PAL 50 60 O NTSC 60 O RGB 50 O RGB 60 O EXT 2 SCART 2 PAL 50 60 O NTSC 60 O RGB 50 X RGB 60 X SIDE AV PAL 50 60 O NTSC 60 O YPbPr 480I 60Hz O 48...

Страница 28: ...Supported File Formats for USB Mode Supported Players Player Stream Video Decoder MSVD Audio Decoder MSAD Audio MP3 None MP3 Audio WAV AIFF None LPCM Windows Media optional WMA ASF VC1 WMA MPEG1 Prog...

Страница 29: ...th next power up TV opens with new software version Note on reboot operation Reboot is the last step in software upgrade operation if download of new software is nished successfully During reboot TV m...

Страница 30: ...on Standards DVB T MPEG2 DVB T MPEG4 HD i DEMODULATION Symbol rate COFDM with 2K 8K FFT mode Modulation 16 QAM 64 QAM FEC for all DVB modes automatically found MHEG 5 ENGINE compliant with ISO IEC 135...

Страница 31: ...s coloured blue or black must be connected to the terminal which is marked with the letter N or coloured Black The wire which is coloured brown or red must be connected to the terminal which is marked...

Страница 32: ...50179563...

Отзывы: