1
2
0
p
3
4
k
PAGE 7
5
a
b
a
b
OR
6
OR
7
OR
8
p
0
EN
9
SPRAYING
i
Follow these steps to deliver spray material from the tank to
the spray gun.
YOU WILL NEED
•
Waste bucket
•
Scrap material / cardboard
•
Drop cloths to protect floors and furnishings from overspray
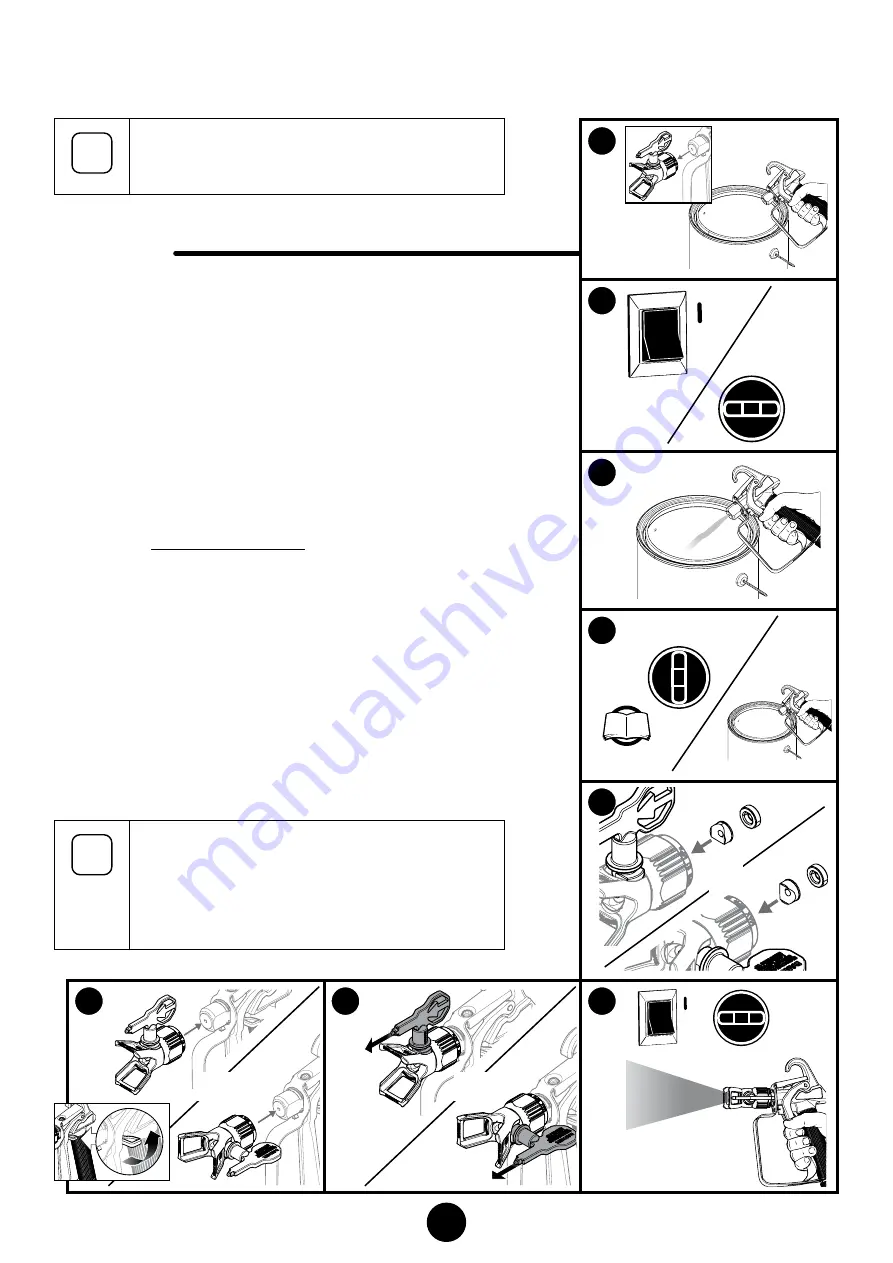
1.
Make sure the tip and spray guard are removed. Point the spray gun into
a separate waste container. Unlock the spray gun trigger.
Squeeze and hold trigger for steps 2-3.
2.
Turn the power ON (l).
Turn the PRIME/SPRAY knob to SPRAY.
3.
Continue to squeeze trigger until the material is flowing freely through the
spray gun.
4.
Perform the Pressure Relief Procedure, page 7.
5.
IMPORTANT: Make sure the washer (a) and saddle seat (b) are installed
in the rear of the spray guard. Note the orientation of the saddle seat (b)
based on the orientation of the spray tip.
6.
Make sure the spray gun trigger is locked. Thread the spray tip guard
assembly onto the gun. Tighten by hand.
7.
Make sure the spray tip is rotated forward to the spray position, with the
arrow on the tip facing forward.
Unlock the spray gun trigger.
8.
Turn the power ON (l). Turn the PRIME/SPRAY knob to SPRAY.
Point the spray gun at a piece of scrap material/cardboard.
Pull the trigger and practice spraying (see page 10).
i
Motor will cycle ON and OFF while spraying to regulate
pressure. This is normal.
The sprayer will not blow air. There must be spray material or
water in the tank.
Do not run the sprayer without spray material or water in the
tank.


