


Factory-Installed Options
LTN
56
wc_tx001650gb.fm
5
Factory-Installed Options
This machine may be equipped with one or more of the following factory-installed
options. To verify if any of these options are installed on your machine, contact
Wacker Neuson Corporation at 1-800-770-0957. A nameplate listing the Model
Number, Item Number, Revision, and Serial Number is attached to each unit.
Please have this information available when contacting Wacker Neuson
Corporation.
The illustrations shown in this chapter represent typical installations. The factory-
installed options on your machine may look different.
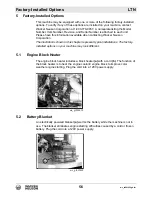
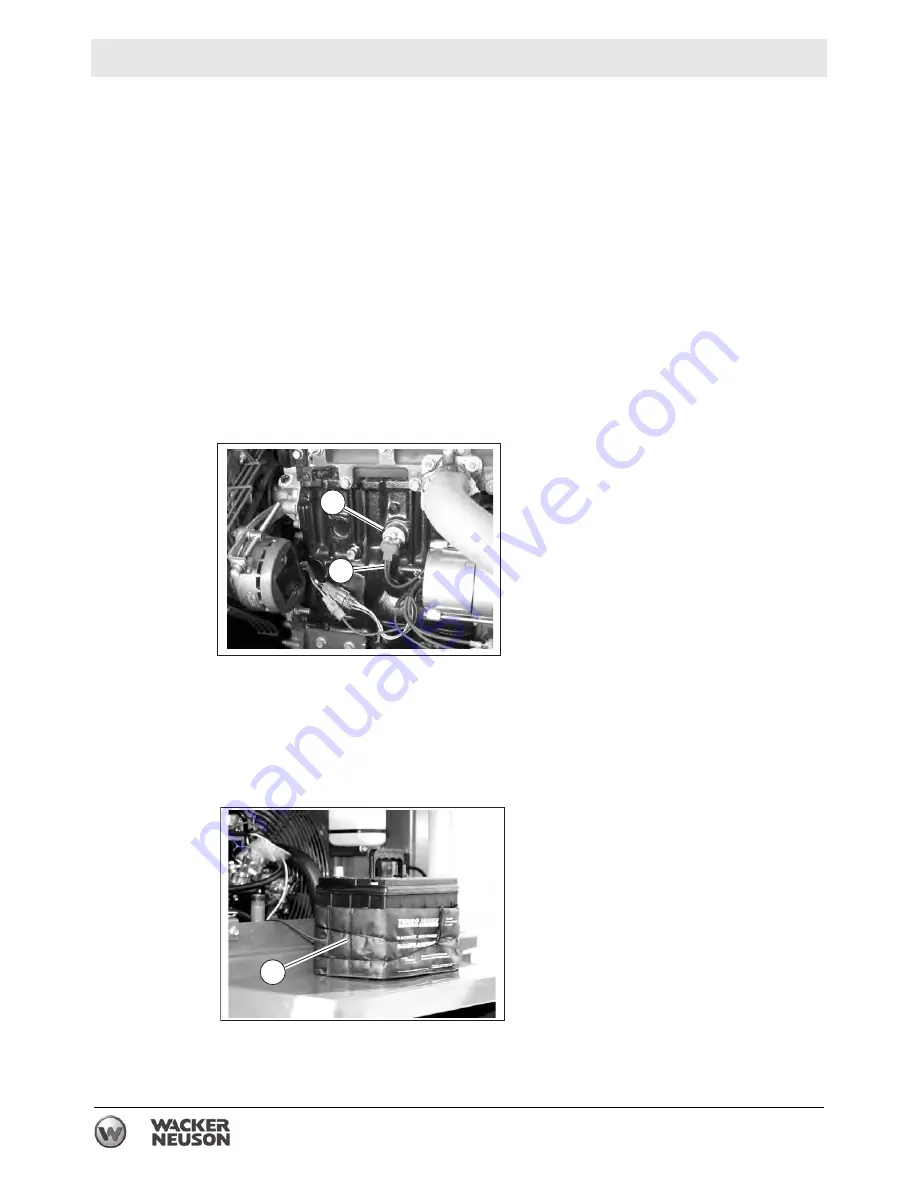
5.1
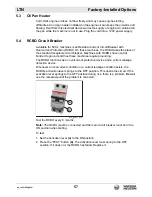
Engine Block Heater
The engine block heater includes a block heater
(a)
with a cord
(b)
. The function of
the block heater is to heat the engine coolant/ engine block to improve cold-
weather engine starting. Plug the cord into a 120V power supply.
5.2
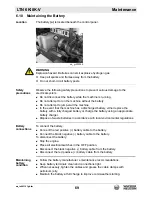
Battery Blanket
An electrically powered blanket
(a)
warms the battery while the machine is not in
use. The blanket eliminates engine starting difficulties caused by a cold or frozen
battery. Plug the cord into a 120V power supply.
wc_gr006975
a
b
wc_gr007422
a
Содержание LTN 6K-V
Страница 8: ...Table of Contents LTN wc_bo5200004275_03TOC fm 8 ...
Страница 21: ...LTN Labels wc_si000705gb fm 21 wc_gr009302 E B A Z EE AA K BB W GG HH W X H II CC JJ FF W DD G ...
Страница 79: ...wc_tx003101gb fm 79 LTN 6K 8K V Maintenance ...
Страница 83: ...wc_tx003733gb fm 83 Engine Maintenance Kubota T4f ...
Страница 97: ...wc_tx003107gb fm 97 LTN Schematics 11 3 LTN 6K V Lighting Schematic ...
Страница 105: ......