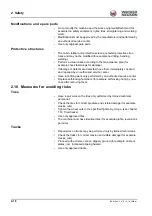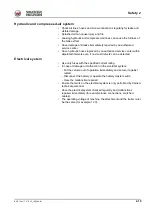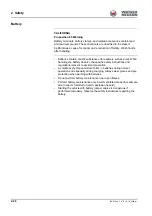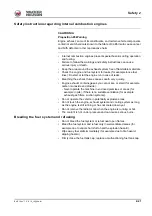
background image

BA E16 en* 1.0 * E16_10_300.fm 

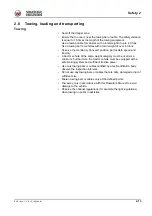
3-1

Introduction 3

3

Introduction

3.1

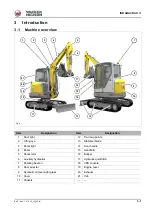
Machine overview

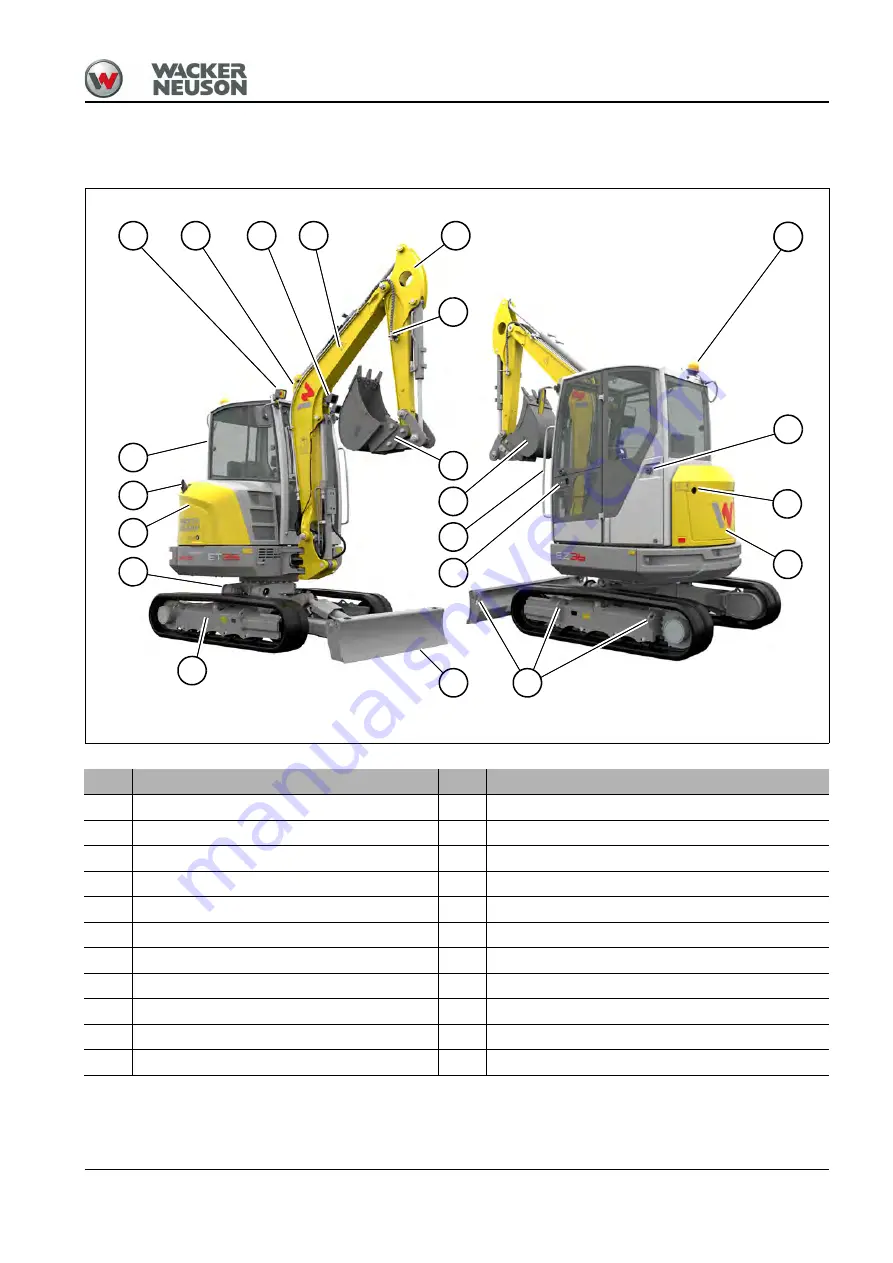
1

Fig. 2  

21

19

2

3

4

13

12

11

20

6

14

10

9

18

17

16

67

5

8

15

Item

Designation

Item

Designation

1

Roof light

12

Tie-down points

2

Lifting eye

13

Stabilizer blade

3

Boom light

14

Door handle

4

Boom

15

Handhold

5

Shovel arm

16

Bucket

6

Auxiliary hydraulics

17

Hydraulic quickhitch

7

Rotating beacon

18

VDS console

8

Door arrester

19

Engine cover

9

Hydraulic oil level sight glass

20

Exhaust

10

Cover

21

Cab

11

Chassis

--

--

Introduction

Содержание ET35

Страница 1: ...Operator s manual Track excavator Vehicle models E16 01 E16 02 Edition 1 0 Document order number 1000392821 Language en us Serial number ET35 WNCE1601HPAL00160 EZ36 WNCE1602KPAL00160...

Страница 2: ...mented on these vehicles Technical data dimensions and weights are only given as an indication Non metric data is rounded off Responsibility for errors or omissions not accepted The cover features the...

Страница 3: ...4 1 Cabin control stand 4 1 4 2 Overview of control elements 4 23 4 3 Indicator lights and warning lights overview 4 28 4 4 Preparatory work 4 36 4 5 Starting and stopping the engine 4 38 5 Operation...

Страница 4: ...Washer system 7 46 7 16 Travel drive 7 46 7 17 Braking system 7 46 7 18 Tracks 7 47 7 19 Maintenance of attachments 7 50 7 20 Maintenance of options 7 50 7 21 Exhaust gas treatment 7 50 7 22 Machine...

Страница 5: ...er Str 309 80687 Munich Germany EU identification number 0515 Notified body involved in procedure T V S D Industrie Service GmbH Westendstr 199 D 80686 Munich Directives and standards We hereby declar...

Страница 6: ...andsberger Str 309 80687 Munich Germany EU identification number 0515 Notified body involved in procedure T V S D Industrie Service GmbH Westendstr 199 D 80686 Munich Directives and standards We hereb...

Страница 7: ...of ground and work environment Operator s qualification and ability to make decisions With a qualified training the operator is capable of the following Concrete assessment of the work situations Feel...

Страница 8: ...service log Exemption from liability The warranty and product liability are void in the event of personal injury and property damage in the following cases Failure to observe the safety and warning i...

Страница 9: ...es an alphabetical list B Continuation of an alphabetical list Cross references see page 1 1 page Cross references 7 pos no or table no Cross references Fig 2 Fig no 1 Cross references see chapter 5 O...

Страница 10: ...ard Protective Structure FOPS Falling Objects Protective Structure if nec if necessary Hydrau lic quick hitch Hydraulic quickhitch for example Easy Lock max maximum min minimum MSWS Mechanical quickhi...

Страница 11: ...g company person A company or person operating the vehicle This can be a job site operating company for example Operators Person performing vehicle travel or operation vehicle Unless otherwise specifi...

Страница 12: ...ds depending on optional equipment Engine variants are described separately if there are engine specific differences for example regarding operation Load diagram Specifies the maximum load at a given...

Страница 13: ...Volume unit 1 cm 0 061 in 1 m 35 31 ft 1 ml 0 034 US fl oz 1 l 0 26 gal 1 l min 0 26 gal min Unit of length 1 mm 0 039 in 1 m 3 28 ft Weight 1 kg 2 2 lbs 1 g 0 035 oz Pressure 1 bar 14 5 psi 1 kg cm 1...

Страница 14: ...1 8 BA E16 en 1 0 E16_10_100 fm 1 Foreword Notes...

Страница 15: ...onsequences in case of non observance Avoidance of injury or death WARNING WARNING identifies a situation that can cause death or serious injury if it is not avoided Consequences in case of non observ...

Страница 16: ...the authority to refuse instructions by other persons that are contrary to safety Have the vehicle serviced and repaired only by an authorized service center Required knowledge of operator The operat...

Страница 17: ...use and the instructions set forth in this Operator s Manual The operator and owner are obligated not to put into operation or operate a damaged or malfunctioning vehicle If a damage or malfunction oc...

Страница 18: ...the vehicle only with the seat belt fastened and only from the place provided for this Check the condition and the fastening of the seat belt Have malfunc tioning seat belts and mounting hardware repl...

Страница 19: ...carbon monoxide poisoning Use existing visual aids to stay aware of the danger zone In conditions of darkness and poor visibility switch on existing work lights and ensure that motorists are not blin...

Страница 20: ...ple protective structures such as a cabin or rollbar removable safety devices is installed and functional Check the vehicle for visible damage and defects In case of damage and or unusual behavior put...

Страница 21: ...tion Never get on a moving vehicle and never jump off the vehicle Machine travel on public roads sites The specific national driving license is required Observe the national regulations for example th...

Страница 22: ...suitable wheel chocks Remove the starting key and secure the vehicle against unauthorized operation 2 5 Lifting gear applications Requirements Have loads fastened and the operator guided by a qualifi...

Страница 23: ...must be fastened so as to prevent them from slipping or falling Move loads only on horizontal level and firm ground Move loads close to the ground In order to avoid oscillating movements of loads Perf...

Страница 24: ...he load Stop the vehicle immediately and stop the engine if persons enter the danger zone Use the machine for lifting gear applications ONLY if the mandatory lifting gear for example a joint rod and l...

Страница 25: ...g circle Before hitching unhitching the trailer secure it to prevent it from rolling away for example with the parking brake suitable wheel chocks There must be nobody between the vehicle and the trai...

Страница 26: ...erator s seat Removing and fitting attachments Before uncoupling or coupling hydraulic connections Stop the engine Release the pressure in the operating hydraulics Picking up and lowering attachments...

Страница 27: ...peed and itinerary A tractor vehicle of the same weight category must be used as a minimum Furthermore the tractor vehicle must be equipped with a safe braking system and sufficient tractive power Use...

Страница 28: ...in sight or sound of him Observe all movements of the vehicle and lifting gear Secure the vehicle against unintentional movement Raise the vehicle only after it is safely attached and the person attac...

Страница 29: ...s of the German employers liability insurance association for construction engineering Bear in mind the weather conditions for example ice snow Ensure the minimum load on the steering axle s of the tr...

Страница 30: ...persons must be authorized and trained for the operation of the vehicle One person must be seated on the operator s seat and stay in contact with the second person Keep a safe distance from rotating...

Страница 31: ...under a raised machine attachment support the machine attachment for example with a lift platform trestles ensuring safety and stability Hydraulic cylinders or jacks alone do not sufficiently secure a...

Страница 32: ...red by an authorized service center Have retrofitting work only performed by an authorized service center Replace self locking fasteners for example self locking nuts by new ones after removing them 2...

Страница 33: ...s even if no visual defects can be detected Electrical system Use only fuses with the specified current rating In case of damage or malfunction in the electrical system Put the vehicle out of operatio...

Страница 34: ...g the battery observe the specific safety instructions and regulations relevant to accident prevention A volatile oxyhydrogen mixture forms in batteries during normal operation and especially during c...

Страница 35: ...ly Engine exhaust contains gases you cannot see or smell for example carbon monoxide and dioxide Never operate the machine in enclosed premises or areas for example in pits if there is no suitable ven...

Страница 36: ...r example with a breathing mask Do not operate the vehicle in radioactively biologically or chemically contaminated areas Fire hazard Fuel lubricants and coolants are flammable Do not put the vehicle...

Страница 37: ...accordingly If live supply lines are touched nevertheless Do not leave touch the cabin Faraday cage If possible drive the vehicle out of the danger zone Warn others against approaching and touching th...

Страница 38: ...s Do not wear ear protectors during machine travel on public roads sites Cleaning Risk of injury from compressed air and high pressure cleaners Wear appropriate protective clothes Do not use any dange...

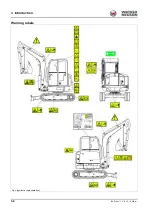
Страница 39: ...ation Item Designation 1 Roof light 12 Tie down points 2 Lifting eye 13 Stabilizer blade 3 Boom light 14 Door handle 4 Boom 15 Handhold 5 Shovel arm 16 Bucket 6 Auxiliary hydraulics 17 Hydraulic quick...

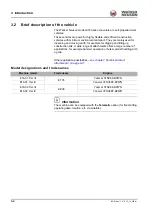
Страница 40: ...uction pits A wide range of attachments offers a large number of applications for example hammer operation or bulk material handling with a grab Other application possibilities see chapter Technical d...

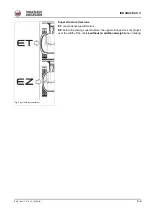
Страница 41: ...ction 3 Superstructure Versions ET conventional superstructure EZ Zero tail revolving superstructure the upper carriage does not project over the width of the vehicle without an additional weight when...

Страница 42: ...issing or damaged labels An insufficient warning of dangers can cause serious injury or death Do not remove warning and information labels Immediately replace damaged warning and information labels In...

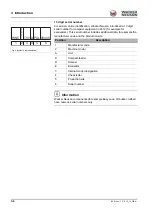
Страница 43: ...chine serial number Fahrzeug Modell model mod le Machine designation Leistung performance Engine power Typ version Machine type Betriebsgewicht operating weight poids en charge Operating weight Transp...

Страница 44: ...additional data for example the manufacturer code and the production site Information Wacker Neuson components for example Easy Lock tilt bucket rollbar have numeric serial numbers only 1 2 3 4 5 6 W...

Страница 45: ...BA E16 en 1 0 E16_10_300 fm 3 7 Introduction 3 Canopy cabin The type label is located at the rear of the chassis Front Guard The type label is located at the upper left of the chassis Fig 7 Fig 8...

Страница 46: ...3 8 BA E16 en 1 0 E16_10_300 fm 3 Introduction Warning labels Fig 9 symbolic representation...

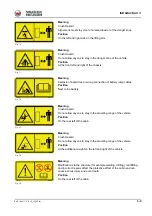
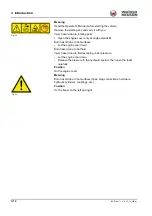
Страница 47: ...cables Position Next to the battery Meaning Crush Hazard Do not allow anyone to stay in the swiveling range of the vehicle Position On the rear left of the cabin Meaning Crush Hazard Do not allow anyo...

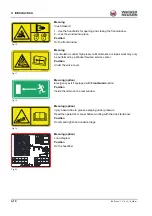
Страница 48: ...rformed by a Wacker Neuson service center Position Under the valve cover Meaning option Emergency exit if equipped with Front Guard option Position Inside the cabin on the rear window Meaning option I...

Страница 49: ...ehicle operation on slopes pay attention to the maximum gradient angle and maximum lateral angle of inclination Do not drive in speed range 2 Risk of fatal injuries due to electric shock During vehicl...

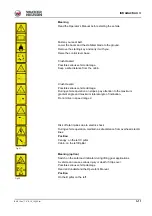
Страница 50: ...still Burn hazard due to hot surfaces Let the engine cool down Burn hazard due to hot fluid Injury hazard due to fluid escaping under pressure Let the engine cool down Release the pressure in the hydr...

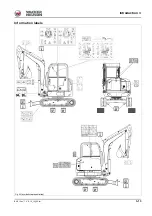
Страница 51: ...BA E16 en 1 0 E16_10_300 fm 3 13 Introduction 3 Information labels Fig 25 symbolic representation...

Страница 52: ...side depending on the biodegradable hydraulic oil used 1 BP Biohyd SE S 46 2 Panolin HLP Synth 46 3 Other biodegradable hydraulic oil Position Next to the filler neck of the hydraulic oil tank Meaning...

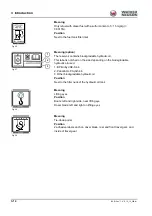
Страница 53: ...sound power level ET35 EZ36 Tier III 95 dB ET35 EZ36 Tier IV 94 dB only tier IV EU Position At the front left of the chassis Meaning Lubrication interval Position At the front left of the chassis Mean...

Страница 54: ...fuse box in the engine compartment Meaning Maintenance of VDS Position On the roof window Meaning option Operating procedures differing from the ISO controls if the SAE controls are set Position On t...

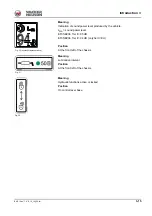
Страница 55: ...SAE change over switch Position At the left under the operator seat Meaning Air filter dirt indicator only tier IV Position For the air filter Meaning Functional overview ISO controls Check the selec...

Страница 56: ...3 18 BA E16 en 1 0 E16_10_300 fm 3 Introduction Meaning Maintenance intervals Position On the cabin left side Meaning option Reflectors Position At the rear left and right of the vehicle Fig 41 Fig 42...

Страница 57: ...BA E16 en 1 0 E16_10_300 fm 3 19 Introduction 3 ANSI label option Fig 43 symbolic representation...

Страница 58: ...fm 3 Introduction Position Canopy on the C pillar Cabin window at the right upper rear Position On the headliner Position On the headliner Position On the headliner Position On the left C pillar Fig 4...

Страница 59: ...BA E16 en 1 0 E16_10_300 fm 3 21 Introduction 3 Position On the left C pillar Position On the left C pillar Fig 49 Fig 50...

Страница 60: ...n 1 0 E16_10_300 fm 3 Introduction Position On the left C pillar Position For the air filter Position For the air filter Position On the engine cover Position On the engine cover Fig 51 Fig 52 Fig 53...

Страница 61: ...23 Introduction 3 Position On the gas struts Front window 2 Engine cover 1 Position At the canopy on the cabin rear Position On the left C pillar Position On the left and right side on the lifting ar...

Страница 62: ...3 24 BA E16 en 1 0 E16_10_300 fm 3 Introduction Position On the front left of the chassis Position On the front left of the chassis Position On the headliner Fig 60 Fig 61 Fig 62...

Страница 63: ...on At the front left and right of the chassis Position On left and right hand undercarriage Position On the front window Position On the headliner Meaning Do not use starting aid sprays Position With...

Страница 64: ...3 26 BA E16 en 1 0 E16_10_300 fm 3 Introduction Notes...

Страница 65: ...as you enter and leave it Immediately have damaged stages and handholds replaced Do not operate the vehicle CAUTION Crushing hazard due to incorrectly locked door Unlocked cabin doors can cause crushi...

Страница 66: ...ds and one foot must be always in contact with the vehicle when getting on and off Cabin entry and exit Park the vehicle see chapter Parking the machine on page 5 12 Information When entering or leavi...

Страница 67: ...the key in door lock A clockwise Opening and closing the door Opening Pull door handle B Closing Close the door applying firm pressure Opening the door from the inside Press lever C on the door lock d...

Страница 68: ...t and pull the front window forward with handles B on the left and right 2 Release levers A and press the window upward until it engages Closing the upper front window 1 Press levers A on the left and...

Страница 69: ...ll the front window upward with handles B on the left and right until the front window engages with guide C Closing the lower front window Keep levers A pressed on the left and right and pull the lowe...

Страница 70: ...s described 4 5 on page Opening the front window to a gap ventilation position Open 1 Press levers A on the left and right and slightly pull handles B on the left and right The front window is unlocke...

Страница 71: ...ncy exit on vehicles equipped with protective Front Guard structures option WARNING Injury hazard when leaving the cabin in an emergency An emergency exit can cause serious injury or death There are n...

Страница 72: ...ation can cause serious injury or death Adjust the operator seat before putting the vehicle into operation Ensure that the levers are locked into place Weight adjustment CAUTION Spinal cord injury due...

Страница 73: ...wn on the operator seat 2 Pull lever C upward and move the seat forward or backward at the same time Fig 86 A 70 kg Function Operation Higher weight Turn crank A anticlockwise Lower weight Turn crank...

Страница 74: ...place it over hard edged or fragile items in your clothes Ensure that the buckle is inserted pull test Do not use seat belt extensions CAUTION Injury hazard due to damaged or dirty seat belt A damaged...

Страница 75: ...seat belt buckle B until it engages Unfastening the retracting seat belt Press the red touch button D on the buckle B until the buckle latch comes out Seat belt C is automatically retracted Armrest 1...

Страница 76: ...ite Accidents resulting in serious injury or death can be caused by a restricted field of vision Do not allow anyone to stay in the danger zone Use suitable visual aids if necessary for example a came...

Страница 77: ...not meet the requirements for conformity and registration Use safety oriented ladders and work platforms for adjustment work on the vehicle Do not use vehicle parts or attachments as a climbing aid Se...

Страница 78: ...tective Front Guard protective structure according to EN 474 5 is not possible on the canopy Only perform work that does not require a protective Front Guard structure Definition of FOPS Front Guard c...

Страница 79: ...performed by a Wacker Neuson service center Replace self locking fasteners Information Machine operation is only allowed with a correctly installed and intact cabin For additional protection only use...

Страница 80: ...400 fm 4 Putting into operation Assembly The term screw is used for fastening equipment used in the following sequence 1 Screw 2 Washer Information Only install protective structures with the help of...

Страница 81: ...danger from the front for example pipes tree trunks Information The protective Front Guard structure corresponds to category I according to ISO 10262 1998 The vehicle owner must ensure that the hazard...

Страница 82: ...er Preparing lubrication on page 7 9 K mounting points top left and right 2 Install screws L and lock nuts M and tighten to 110 Nm 81 ft lbs P mounting points bottom left and right 3 Install screws Q...

Страница 83: ...rve the prescribed work area see Job site CAUTION Accident hazard in conditions of restricted visibility due to rain snowfall dust etc Can cause injury Stop machine operation immediately NOTICE Possib...

Страница 84: ...operation Job site Work range height A 120 cm 47 in E 50 cm 20 in The figures Fig 98 and Fig 99 refer to work with a Wacker Neuson hydraulic hammer Information Working with another attachment can modi...

Страница 85: ...e 5 12 1 Install the mounting angle A with screws B on the shatter protection C 2 Install the shatter protection with screws D to the frame Information Torque for screws and nuts 25 Nm 18 ft lbs Remov...

Страница 86: ...nections 12 V connections A 12 V connection is located at the rear right of the cabin and on the front left on the chassis USB connection A USB connection is located at the front right of the cabin In...

Страница 87: ...tion 4 4 2 Overview of control elements This chapter describes the controls and contains information on the function and handling of the indicator lights and controls in the cabin The pages stated in...

Страница 88: ..._400 fm 4 Putting into operation Cabin 1 2 4 14 22 17 6 13 15 5 25 21 9 23 10 12 19 11 Fig 105 Overview of the operating elements tier IV Fig 105 Overview of the operating elements tier III 7 8 20 3 1...

Страница 89: ...dio option see operator s manual for radio 15 Cigarette lighter cabin 12V connection canopy 4 22 16 Document box option 4 22 17 Operator seat 4 8 18 Gas lever tier IV manual throttle function via jog...

Страница 90: ...the left 4 3 2 1 7 9 10 8 6 5 Designation See page 1 Tilt the upper carriage VDS option 5 72 2 Working lights 5 13 3 Safe load indicator option 5 35 4 Hydraulic quickhitch option 5 41 5 Window wiper w...

Страница 91: ...trol element Function See page F1 Displaying operating states 4 33 F2 Changing the engine operating mode directly 5 3 F3 Automatic engine speed setting 5 5 Menu button Press briefly Selecting control...

Страница 92: ...edures and possible vehicle malfunctions Information It may take a few seconds before a selected function is displayed Information The indicator lights are tested when the starter is engaged and are i...

Страница 93: ...ure 8 2 5 39 Yellow Preheating 4 39 6 Red Safe load indicator light 5 35 7 Red Coolant temperature 8 2 8 For Wacker Neuson service center 9 Hour meter maintenance meter changeover 4 34 10 Green Not as...

Страница 94: ...signed 38 Red General vehicle malfunction 8 1 41 Yellow Engine warning 8 1 42 Red Engine stop 8 1 43 Not assigned 44 Not assigned 46 Not assigned 47 Not assigned 48 Red Hydraulic functions locked 4 39...

Страница 95: ...lay element multi functional display on page 8 2 Symbol Designation Symbol Designation 01 Engine stop short indication 05 Charge indicator light short indication 02 General malfunction short indicatio...

Страница 96: ...5 3 Tier III Coolant temperature Tier III If the segments reach the red range the telltale light A illuminates and the buzzer sounds Tier IV If the coolant temperature is too high the symbol shown on...

Страница 97: ...ymbol shown on the left appears Tier IV Tier III Hour meter Counts the engine operating hours with the engine running Tier IV Operating states Press F1 to toggle between the operating state displays O...

Страница 98: ...IV No function This symbol appears when a control element without function is operated Tier III Overload Tier III The telltale light illuminates red and the buzzer sounds Tier IV The next display app...

Страница 99: ...lti functional display Performing the adjustments Push button C call the settings Control knob A select settings turn and confirm press Push button B return back to previous menu level Symbols D Brigh...

Страница 100: ...eration for the first time Wacker Neuson recommends trying out the vehicle on open ground without any obstacles When using the vehicle check the surroundings constantly in order to identify potential...

Страница 101: ...icle during operation Putting into operation for the first time and running in period Before putting the vehicle into operation for the first time check whether the equipment supplied with the vehicle...

Страница 102: ...g start repeat interlock Do not run the starter for more than 20 seconds Wait two minutes so the battery can recover and the starter does not overheat before trying again Information Provide for suffi...

Страница 103: ...3 Perform vehicle travel on open terrain 4 Secure the danger zone 5 Stop the vehicle 6 Raise the control lever base G 7 Move all control levers and pedals in all directions The selected elements do n...

Страница 104: ...he starting key in position 2 until the indicator light for preheating E goes out The telltale lights engine oil pressure F and alternator charging C are illuminated 5 Turn the starting key to positio...

Страница 105: ...ating temperature of about 80 C 176 F coolant However do not let the machine warm up at standstill During the warm up phase check for unusual noise exhaust color leaks malfunctions or damage In case o...

Страница 106: ...ating parts Rotating parts can cause serious injury or death Open the engine cover only at engine standstill CAUTION Burn hazard due to hot surfaces Can cause serious burns or death Stop the engine an...

Страница 107: ...oltage 12 V NOTICE Possible damage to vehicle with empty battery due to voltage peaks NOTICE Possible damage to battery jumper cables when placing them near rotating parts Do not place the battery jum...

Страница 108: ...ngine of vehicle Y 7 Wait five minutes for the empty battery to be charged a little 8 Start the engine of machine X 9 Switch on the boom light of vehicle X in order to avoid voltage peaks and to prote...

Страница 109: ...d operation are Increased engine oil consumption Dirt in engine due to engine oil in exhaust system Blue smoke in exhaust gas Stopping the engine NOTICE Possible damage to the engine when it is stoppe...

Страница 110: ...ry master switch no sooner than two minutes after shutting down the engine Actuate the battery isolator switch If the vehicle is parked for longer periods of time e g over the weekend If the vehicle i...

Страница 111: ...en 1 0 E16_10_500 fm 5 1 Operation 5 5 Operation 5 1 Steering system Movement Drive levers accelerator pedals Steering to the left Steering to the right Rotation to the left Rotation to the right Ope...

Страница 112: ...eed can be set continuously with throttle A Manual throttle tier IV Speed can be set continuously with the control button A see chapter Control button on page 4 27 Fig 122 2 1 A Engine speed Position...

Страница 113: ...ode 1 Press menu button B 2 Press control button A to select menu item Engine Operating Mode C 3 Press control button A 4 Turn control button A to select the required operating mode ECO PWR 5 Press co...

Страница 114: ...cted with push button A on the dozer blade lever If speed 2 is selected the vehicle shifts to Auto 2 Speed mode The vehicle moves at higher speed Higher vehicle travel resistance for example in curves...

Страница 115: ...right Tier IV The automatic engine speed setting can be switched on and off with touch button F3 on the jog dial Changing rpm manually Tier IV Push button B on the left control lever makes it possibl...

Страница 116: ...d During downhill vehicle travel the automatic hydraulic brake valves prevent the vehicle from moving faster than the permissible travel speed Information Reduce the speed with the drive levers or acc...

Страница 117: ...d death Slowly and carefully actuate the control levers WARNING Accident hazard due to incorrectly rotated upper carriage If rotated incorrectly the upper carriage blocks the visibility of the travel...

Страница 118: ...plication limits of the vehicle Engine Temperature C F 3TNV88 BPWN 15 5 45 113 3TNV88F EPWN Tier IV EU 15 5 40 104 3TNV88F EPWN Tier IV non EU 15 5 45 113 Application Description Uphill and downhill A...

Страница 119: ...and the boom during downhill or uphill vehicle operation with a full attachment Diagonal machine travel is prohibited Stones and the humidity in the upper layer of the ground can affect vehicle tracti...

Страница 120: ...Always perform uphill or downhill vehicle travel in a straight line When changing position do not exceed a maximum gradient angle of 15 and a maximum lateral angle of inclination of 10 Change position...

Страница 121: ...ill vehicle operation Raise the boom 20 30 cm 8 12 in off the ground and position it straight ahead at the center of the vehicle In order to minimize the risk of tipping over adapt the travel speed to...

Страница 122: ...y to release the pressure in the hydraulic system 6 Remove the starting key and carry it with you 7 Raise the control lever base 8 Close the windows and doors 9 Close and lock all covers and doors 10...

Страница 123: ...injury or death Stop vehicle operation if motorists are blinded Take up operation again only when sufficient illumination of the working area is ensured without blinding motorists Working lights The s...

Страница 124: ...0_500 fm 5 Operation Interior light Horn Press button A on the right hand joystick to actuate the horn Fig 139 Interior light Operation On Press light to the left or right Off Press the light to the c...

Страница 125: ...netic base and is attached to the cabin roof The electric power supply has a 12 volt connection A The switch is located on the switch panel on the right Information Observe the national and regional r...

Страница 126: ...not actuate the wipers if the front window is raised NOTICE Damage to electric pump if the reservoir is empty Do not actuate the washer system if the reservoir is empty Fig 143 A 0 1 2 Wiper wash sys...

Страница 127: ...health hazards Do not direct the air vents directly at the face when the air conditioning system is switched on Temperature setting The temperature controller is located on the right under the driver...

Страница 128: ...ption The switch is located on the switch panel on the right Information Let the air conditioning system run a few minutes several times a month to avoid damage to the air conditioning compressor Fig...

Страница 129: ...kward vehicle operation Danger of crushing that may lead to serious injuries or death Do not allow anyone to stay in the danger zone Despite the traveling signal the danger zone must also be monitored...

Страница 130: ...ISO controls SAE controls Required function Joysticks1 1 The control levers shown are symbolic representations Joystick1 Left Right Left Right Rotating the upper carriage to the left Rotating the uppe...

Страница 131: ...o modified control mode Modified controls can cause incorrect operation and serious injury or death Before starting work check the selected control type Secure the wing nut on the changeover lever of...

Страница 132: ...ls parts of buildings or other obstacles Ensure that there are no obstacles is in the danger zone Information As long as the hydraulic oil has not reached its operating temperature the upper carriage...

Страница 133: ...s the control lever in the opposite direction until the upper carriage is at a standstill Functional check of swivel unit brake Perform the functional check on a warm vehicle after work once a day If...

Страница 134: ...ver base 8 Wait one minute 9 Put a measuring rod A against the attachment 10 Wait one minute If the attachment does not move from the measuring rod Machine is ready for operation If the attachment mov...

Страница 135: ...o deeply into the ground can create increased resistance Slightly raise the stabilizer blade The clearance between the stabilizer blade and the ground should be about 1 cm 0 4 in Check the stabilizer...

Страница 136: ...tion Swiveling the boom Fold the pedal cover forward Fig 158 A Stabilizer blade Position Raise Pull lever A backward Lower Push lever A forward Swivel left Push lever A tot he left Swivel right Push l...

Страница 137: ...the vehicle Observe the mandatory limits of the work area Do not hammer horizontally or upward Only hammer with attached shatter protection or closed front window WARNING Accident hazard due to tippi...

Страница 138: ...he Powertilt unit beyond 30 during breaker operation otherwise the load on the boom increases tremendously Stop vehicle operation immediately if a hydraulic hose moves back and forth in an unusual man...

Страница 139: ...s AUX I Information Tier III the full hydraulic power is always available in hammer operation Information Tier IV Set the maximum oil flow see chapter Adjusting the starting point and maximum required...

Страница 140: ...h the left joystick Tier IV If the AUX II function is selected the next symbol appears in the center of the display for a few seconds Fig 164 Fig 164 B Oil flow Position To the line on the left Press...

Страница 141: ...control lever base to the required position AUX II and AUX III option 1 Turn the rotary switch on the control lever base on the left to the required position The auxiliary hydraulics system is operat...

Страница 142: ...for AUX II AUX III and the dozer blade are identical Performing the adjustments Press push button C to call the settings The settings are selected turn and confirmed press with adjustment button A Pus...

Страница 143: ...d the work to be performed 1 Press the switch to the position at which the attachment is supposed to start moving 2 Hold the switch and turn adjustment button A at the same time to select the starting...

Страница 144: ...ry lifting gear and safety equipment is installed functional and enabled The subgrade must be horizontal even and have a high load bearing capacity Do not tilting the upper carriage WARNING Risk of ve...

Страница 145: ...e load indicator before performing lifting gear applications 1 Start the vehicle 2 Perform vehicle travel on open terrain 3 Secure the danger zone 4 Stop the vehicle 5 Switch on the safe load indicato...

Страница 146: ...e 4 39 Only the following lifting gear may be used for lifting gear applications Powertilt quickhitch with load hook Joint rod with lifting eye When symbol A is displayed and the buzzer sounds Reduce...

Страница 147: ...in the danger zone During locking and unlocking procedures make sure that hands and feet are not crushed Only use undamaged attachments and quick coupler systems Before starting any work and after ev...

Страница 148: ...dge C of the attachment touches the quick coupler system 4 Screw in the quick coupler system A until the attachment lies completely on the quick coupler system A due to its weight 5 Shut off the engin...

Страница 149: ...tarting any work and after every locking process press the attachment to the ground and quickly move it back and forth over just over the ground a few times The attachment may not detach from the quic...

Страница 150: ...e ignition switch key safely 3 Turn the socket wrench D counter clockwise until the bolts E are completely retracted The quick coupler system is unlocked 4 Remove the socket wrench 5 Start the engine...

Страница 151: ...or the operation of the vehicle Observe the operator s manual of the quickhitch system or the attachment Nevertheless should a non released HSWS be used the following points must also be observed If...

Страница 152: ...ARNING Crushing hazard when picking up attachments If an attachment is not locked correctly it can come off and cause serious injury or death Do not allow anyone to stay in the danger zone Only use un...

Страница 153: ...tabilizer blade Picking up an attachment 1 Hook up the quick coupler system A in the bolts B of the attachment receptacle 2 Extend the bucket cylinder so that pin C of the attachment touches the quick...

Страница 154: ...the same time pull back the J dozer blade lever The quickhitch opens Tier IV The symbol quickhitch open appears Check pin F must be fully extended The attachment engages 7 Release the dozer blade lev...

Страница 155: ...5 Check pin F must be fully retracted 8 Press switch D to position 2 The quickhitch is disabled and the buzzer does not sound any longer Tier IV The symbol Hydraulic quickhitch disabled appears for a...

Страница 156: ...rk and after every locking process press the attachment to the ground and quickly move it back and forth over just over the ground a few times to check the secure locking The attachment may not detach...

Страница 157: ...quick coupler system Stop the engine and remove the starting key Raise the control lever base Rotate bolt A so that the pin B fits in the recess C 2 Press in bolt A and turn until it is held in its po...

Страница 158: ...ng is located to the left on the quick coupler system Stop the engine and remove the starting key Raise the control lever base Rotate bolt A so that the pin B fits in the recess C 2 Pull out the bolt...

Страница 159: ...switch D and press it to position 1 The quickhitch is enabled and the buzzer sounds Tier IV The symbol Hydraulic quickhitch enabled appears and the buzzer sounds 3 Press and hold the foot operated to...

Страница 160: ...must be fully extended 4 Retract the bucket cylinder The attachment is lowered to the ground 5 Release the dozer blade lever J and foot operated touch button E The quickhitch closes Check pin F must b...

Страница 161: ...0_510 fm 5 51 Operation 5 6 Press switch D to position 2 The quickhitch is disabled and the buzzer does not sound any longer Tier IV The symbol Hydraulic quickhitch disabled appears for a few seconds...

Страница 162: ...s place on the left and right of the stick Stopping grab operation 1 Move both levers D on the ball type cock to position B Notch C indicates the flow direction Stopping bucket operation 1 Move both l...

Страница 163: ...ove the control lever or the pedal of the hydraulic circuit in all directions repeatedly 6 Remove the starting key and carry it with you The grab hose couplings can now be coupled and uncoupled from t...

Страница 164: ...Lower the boom and the stabilizer blade to the ground Setting the hydraulic thumb Bring the ball type cock A with lever B into the desired position to the left and right on the stick Information The l...

Страница 165: ...se burns to the skin If a hose bursts move the control elements to neutral position so that as little hydraulic oil as possible escapes Wear protective equipment Information Hose burst valves are set...

Страница 166: ...y lowering if possible see chapter 5 12 Emergency lowering on page 5 70 5 Raise the control lever base 6 Remove the starting key and lock the cabin 7 Secure the vehicle and the attachment 8 Contact a...

Страница 167: ...raulic oil causes blood poisoning WARNING Accident hazard when picking up attachments Picking up attachments incorrectly can cause serious injury or death Wear protective equipment during installation...

Страница 168: ...tachment to the ground without too much pressure otherwise the resistance when removing the pins is too high The procedure of changing attachments is described below for a backhoe bucket Follow the sp...

Страница 169: ...again Pressure releases with proportional controls option 1 Park the machine on horizontal and level ground 2 Lower the attachment completely to the ground 3 Stop the engine 4 Turn the starting key to...

Страница 170: ...nt of the respective hydraulic circuit several times in all directions and hold each time as far as it will go for three seconds AUX II ensure that AUX II is selected Move the control element of the r...

Страница 171: ...e the bucket only with minimum pressure on the ground as you remove the pins The higher the pressure on the ground the higher the resistance and the more difficult it is to remove the pins Mount 1 Ins...

Страница 172: ...er Machine travel on slopes on page 5 8 Stop vehicle operation immediately if persons do not stay clear of the danger zone Seal off the danger zone should it not be possible to keep a sufficient safet...

Страница 173: ...C Slingers must remain out of the danger zone see chapter Lifting gear operation on page 5 34 A A A Fig 228 symbolic representation Danger zone with a bucket Danger zone with a bucket and a safety di...

Страница 174: ...vel force of the upper carriage to tear down walls or to create level surfaces Do not ram the attachment into the ground when swiveling the upper carriage Working with the drive force Do not ram the a...

Страница 175: ...t of the vehicle for work Use the force of the hydraulic cylinders exclusively Fully lowering the stabilizer blade Apply the full weight of the vehicle over the entire width of the stabilizer blade wh...

Страница 176: ...ng abruptly as well as changing direction suddenly on rough terrain Operation in water Water must not reach any further than the upper edge of the tensioning wheel Lubricate lubrication points again t...

Страница 177: ...ucket The maximum excavation force is achieved at an angle of 80 to 120 between the boom and the stick 1 Penetrate into the ground with the bucket 2 Lower the stick and at the same time position the b...

Страница 178: ...with the wind behind you to keep the dust away from your eyes air filters and fans If possible the site dumper and the working direction of the bucket should form an angle of 45 Grading The stabilize...

Страница 179: ...erforming digging work Wacker Neuson recommends that you observe the following points Exits from pits must be outside the digging line and as level as possible Dig by removing adjacent strips if possi...

Страница 180: ...not allow anyone to stay in the danger zone Stop vehicle operation immediately as soon as someone enters the danger zone Observe the following during emergency lowering 1 Turn the starting key to pos...

Страница 181: ...ast 50 cm 20 in away from the starter 4 Within 15 seconds turn starting keys requiring coding to position 1 for at least one second 5 Repeat step 4 if more starting keys require coding With this the c...

Страница 182: ...of inclination over 10 Do not perform vehicle travel on inclines or slopes steeper than 15 Ensure that no parts of the body protrude outside the vehicle Do not board or leave the vehicle if the upper...

Страница 183: ...Press and hold the switch 1 2 Press control lever 2 to the left The upper carriage lowers 3 If the required tilt angle is reached return joystick 2 to the neutral position and release switch 1 Shovel...

Страница 184: ...ne with a high pressure cleaner in a suitable place see chapter 7 5 Cleaning and maintenance on page 7 23 3 Check the vehicle for leaks and loose nuts screws and connections 4 Carefully clean and dry...

Страница 185: ...icle according to the lubrication plan 11 Check all engine vehicle fluids in the units or reservoirs and add fluids if necessary 12 If the vehicle was out of service for over 6 months have the oil in...

Страница 186: ...er Neuson service center Observe the national and regional regulations for disposal Environment Do not allow environmentally damaging wastes to get into the ground or stretches of water and dispose of...

Страница 187: ...pe Load the vehicle Wear protective equipment Start vehicle travel and tow away slowly NOTICE The vehicle can be damaged during towing Tow the vehicle away only from the immediate danger zone until it...

Страница 188: ...The manufacturer s warranty shall not apply to accidents or damage caused by towing Using the towing eye A to pull another vehicle or to tow equipment is prohibited 6 2 Loading the vehicle WARNING Ac...

Страница 189: ...6 en 1 0 E16_10_600 fm 6 3 Transportation 6 Tie down points Fig 252 A Position Quantity A Stabilizer blade 2 B Front of travel gear 2 C Rear of travel gear 2 D Inside of travel gear 2 Fig 253 B C Fig...

Страница 190: ...tures 6 Start the engine 7 Raise the boom and the stabilizer blade to avoid touching the access ramps 8 Carefully drive the vehicle onto the middle of the transport vehicle 9 Move the vehicle to trans...

Страница 191: ...s type label Observe the loading weight Add the weight of subsequently installed accessories to the weight of the vehicle The vehicle may only be raised with suitable lifting gear NOTICE Possible dam...

Страница 192: ...raised using the lifting eyes indicated below Ensure that the lifting gear has the required lengths L1 and L2 Fig 257 A Position Quantity A Dozer blade left and right 2 B Boom 2 Fig 258 B Fig 259 symb...

Страница 193: ...ulic system 14 Raise the control lever base 15 Remove the starting key and carry it with you 16 Safely store all loose objects 17 Leave the cabin close and lock all doors windows and covers 18 Attach...

Страница 194: ...6 8 BA E16 en 1 0 E16_10_600 fm 6 Transportation Notes...

Страница 195: ...icle into operation Safety relevant components may only be repaired replaced by an authorized service center Observe all risk indications and safety instructions given in this Operator s Manual Follow...

Страница 196: ...indicated on the maintenance label I Top off and drain fluids lubricants Check vehicle functions II Check wear parts seals hoses and screw connections III Check for damage corrosion and dirt IV Lubri...

Страница 197: ...the lubrication schedule 7 9 Tier IV Check the dirt indicator on the air filter1 7 39 Check the water separator pre filter and fuel filter on sight glass drain water if necessary 7 30 Check the track...

Страница 198: ...s flexible lines and screw connections of the following assemblies and components Repair if nec essary Page Engine and hydraulic system Travel drive Cooling systems heating and hoses visual check Hydr...

Страница 199: ...for maintenance intervals once a day 1 Air filter replacement according to the dirt indicator every 1000 o h or once a year at the latest Replace after 50 o h when in extensive use in environments wi...

Страница 200: ...orized service center must be performed only by the trained and qualified personnel of an authorized service center Only once after the first 50 operating hours Wacker Neuson service center Replace th...

Страница 201: ...operation daily Clean bolt guide G 50 hours of operation weekly Clean the bolt contact surface H 50 hours of operation weekly Clean bottom side of the quick coupler system Y 50 hours of operation week...

Страница 202: ...external edge of the quickhitch Information In the case of deviating bolt settings do not operate the mechanical quickhitch contact an authorized service center Check the bolt settings on a monthly b...

Страница 203: ...ntrol lever repeatedly to release the pressure in the hydraulic system 6 Raise the control lever base 7 Remove the starting key and carry it with you 8 Safely store all loose objects 9 Close the windo...

Страница 204: ...7 10 BA E16 en 1 0 E16_10_700 fm 7 Maintenance Boom dozer blade 2 Fig 265 1 3 2 4 7 9 8 12 13 1 5 6 9 4 2 9 10 11...

Страница 205: ...ylinder Daily 2 6 Joint rod Daily 2 7 Easy Lock Daily 2 8 Swiveling console Daily 2 9 Swiveling cylinder 50 o h 2 10 Teeth of live ring see chapter Teeth of live ring on page 7 15 50 o h 1 11 Live rin...

Страница 206: ...hydraulic Easy Lock quickhitch VDS Hydraulic thumb 4 4 1 2 1 Position Lubrication point Interval Quantity 1 Easy Lock Every week 21 Easy Lock quickhitch Every week 2 Powertilt Daily 41 3 VDS Every wee...

Страница 207: ...4 Fig 267 symbolic representation Position Lubrication point Interval Quantity 1 Front window pin lock notches and locks Every week 6 2 Windshield guide rails Every week 2 3 Control lever base see cha...

Страница 208: ...ark the vehicle on firm level and horizontal ground 2 Lower the boom and the stabilizer blade to the ground 3 Stop the engine remove the starting key and carry it with you 4 Apply grease to lubricatio...

Страница 209: ...cation points are located on the left side of the chassis 1 Lower the stabilizer blade to the ground 2 Stop the engine remove the starting key and carry it with you 3 Apply grease to lubrication point...

Страница 210: ...tay clear extremities clothing of the moving parts 1 Raise the control lever base 2 Spray fluid grease onto the guide lever in the area of C 3 Spray fluid grease on both sides D of the double spring P...

Страница 211: ...10 10 System fills incl hoses and diesel engine Engine oil11 11 Viscosity SAE 10W40 according to DIN 51511 For other temperatures see chapter Engine oil types on page 7 19 API CF CF 4 CI 4 ACEA E3 E4...

Страница 212: ...hydraulic oil filter depending on the percentage of hammer operation Viscosity class Ambient temperature min C min F max C max F ISO VG32 20 4 30 86 ISO VG46 5 23 40 104 ISO VG68 5 41 50 122 Percenta...

Страница 213: ...add mineral oil the content of mineral oil should not exceed 2 of the system fill in order to avoid foaming problems and to ensure biological degradability When running the vehicle with biodegradable...

Страница 214: ...njury or death Open the engine cover only at engine standstill CAUTION Burn hazard due to hot surfaces Can cause serious burns or death Stop the engine and let hot surfaces cool down Wear protective e...

Страница 215: ...n the starting key in lock A anticlockwise 3 Press lock A The engine cover is supported by a gas strut with lock B item 1 Close the engine cover 1 Release lock B by applying slight pressure position 2...

Страница 216: ...In the toolbox to the left of the operator seat is the vehicle tool kit Cabin air filter 1 Loosen screws A and remove cover 2 Clean coarse filter B with compressed air daily 3 Reinstall the cover and...

Страница 217: ...y or death Open the engine cover only at engine standstill WARNING Burn hazard due to hot surfaces Hot surfaces can cause serious burns or death Stop the engine and let it cool down Wear protective eq...

Страница 218: ...er jet directly at electric components and protect the electric components against humidity If water contacts electrical components dry them with compressed air and apply contact spray to them Environ...

Страница 219: ...ly at electric parts and damping material Cover the vent filter on the hydraulic oil reservoir and the filler caps for fuel hydraulic oil etc Protect the following components from moisture Electrical...

Страница 220: ...destroy the fabric Cleaning in a saline environment 1 Park the vehicle in a wash bay or place 2 see chapter Preparing lubrication on page 7 9 3 Check the vehicle for salt deposits or corrosion Have c...

Страница 221: ...water fill up the fuel tank nearly completely at the end of each working day Information Do not run the fuel tank completely dry Otherwise air is drawn into the fuel system This requires bleeding the...

Страница 222: ...he maintenance area clean Do not refuel in closed rooms Do not add gasoline to diesel fuel Let the engine cool down CAUTION Health hazard due to diesel fuel Diesel fuel and fuel vapors are harmful to...

Страница 223: ...the pressure in the fuel tank 4 Refuel the vehicle 5 Close the filler cap 6 Close and lock the engine cover Even the smallest particles of dirt can cause increased engine wear malfunctions in the fue...

Страница 224: ...ter M are located in the engine compartment Both are equipped with a water separator Information Use a suitable container to collect fluids and lubricants as they flow out and dispose of them in an en...

Страница 225: ...ew on the threaded ring B The indicator ring is at the base of the water separator 8 Turn ball type cock A to the ON mark Fuel supply is open 9 Close the engine cover Empty the water separator main fi...

Страница 226: ...se the fuel tank 4 Turn the starting key to the first position 5 Wait about 5 minutes while the fuel system bleeds itself automatically 6 Start the engine If the engine runs smoothly for a while and t...

Страница 227: ...age due to wrong engine oil Use engine oil according to Fluids and lubricants list Have the oil changed only by a Wacker Neuson service center NOTICE Possible engine damage due to adding engine oil to...

Страница 228: ...er 3 Wipe the area around oil dipstick A with a lint free cloth 4 Pull out oil level dipstick A and wipe it with a lint free cloth 5 Slide in oil dipstick A completely 6 Withdraw it and read off the o...

Страница 229: ...oil dipstick A slightly to allow any trapped air to escape 6 Add engine oil 7 Wait at least five minutes until all the oil has run into the oil sump 8 Check the oil level 9 Add oil if necessary and c...

Страница 230: ...zard due to coolant or antifreeze The coolant and antifreeze are easily flammable fluids that can cause serious burns or death if they are brought into contact with fire or open flames Wear protective...

Страница 231: ...coolant reaches the filler inlet of the radiator B 5 Tighten filler cap A 6 Check the coolant level in the expansion tank C 7 Top off the coolant until the coolant reaches the mark FULL in the expansi...

Страница 232: ...conditions clean more frequently than indicated in the maintenance plans NOTICE Possible damage to radiator fins during cleaning Keep a safe distance from the radiator during cleaning Use oil free com...

Страница 233: ...the mark B reaches the value described in the table contact an authorized service center Checking the air intake 1 Stop and park the vehicle Stop the engine see chapter Preparing lubrication on page...

Страница 234: ...re Hydraulic oil escaping under pressure can penetrate the skin and cause serious injury or death Do not operate the vehicle with leaking or damaged hydraulic system components Open the breather filte...

Страница 235: ...vel With a warm engine the hydraulic oil must be about at the middle of the sight glass Check the hydraulic oil level once a day NOTICE Possible damage to hydraulic system due to dirty hydraulic oil A...

Страница 236: ...tabilizer blade to the ground 4 Stop the engine 5 Operate the control lever repeatedly to release the pressure in the hydraulic system 6 Remove the starting key and carry it with you 7 Sight glass A i...

Страница 237: ...rvoir ventilation B to release the pressure 2 Open cover C slowly to release the pressure inside the hydraulic oil tank 3 Remove cover C 4 Add hydraulic oil up to the corresponding mark 5 Check the hy...

Страница 238: ...nd hose connections only when the system is not under pressure Release the pressure before working on pressure lines Do not weld or solder damaged or leaking pressure lines and screw connections but h...

Страница 239: ...to malfunctioning batteries Batteries give off explosive gases that can cause deflagrations if ignited Wear protective equipment Fire open flames and smoking is prohibited Do not jump start the engine...

Страница 240: ...eze if necessary for refilling Checking the fluid level and adding fluid CAUTION Burn hazard due to hot surfaces Can cause serious burns or death Stop the engine and let it cool down Wear protective e...

Страница 241: ...e the vehicle evenly and horizontally by means of the boom and stabilizer blade 3 Place the tracks so that mark A is in the middle between drive pinion B and track tension roller C 4 Stop the engine 5...

Страница 242: ...due to grease escaping under pressure Grease escaping under pressure can penetrate the skin and cause serious injury or death Open the lubricating valve only very carefully and do not unscrew it more...

Страница 243: ...acker Neuson service center if track tension still is too low after pumping in more grease Reducing tension 1 Place a suitable container underneath to collect the grease 2 Slowly turn lubricating valv...

Страница 244: ...of the attachments 7 20 Maintenance of options Have a Wacker Neuson service center check all eyes regularly Machine lifting eyes Attachment lifting eyes Attachment load hooks Tie down points Towing e...

Страница 245: ...ghts illuminate for a few sec onds if the starting key is turned to position 1 If the engine stop or oil pressure light does not illumi nate stop vehicle operation immediately and contact a Wacker Neu...

Страница 246: ...Low Engine Oil Pressure Possible electric error Stop the engine immediately Contact a Wacker Neuson service center Engine malfunction Stop the engine immediately Contact a Wacker Neuson service center...

Страница 247: ...eed without any load Wait until the temperature drops and the indicator light goes out Stop the engine Check the coolant level Faulty telltale light Stop the engine immediately Contact a Wacker Neuson...

Страница 248: ...Neuson service center Temperature controller set to heating Set the temperature control ler to cooling 5 17 Dirty cabin air filter Clean or replace the cabin air filter 7 22 Reduced heating output or...

Страница 249: ...y Engine power is reduced Stop and park the vehicle Contact a Wacker Neuson service center and have the malfunction rectified Machine travel and operation is possible in case of minor errors Engine po...

Страница 250: ...8 6 BA E16 en 1 0 E16_10_800 fm 8 Malfunctions A B C D E A engine fault B vehicle fault C Not assigned D engine data E Machine data...

Страница 251: ...s The settings are selected turn and confirmed press with adjustment button A Push button B return takes you back to the previous menu level Symbols D engine fault E vehicle fault F Not assigned G eng...

Страница 252: ...8 8 BA E16 en 1 0 E16_10_800 fm 8 Malfunctions Notes...

Страница 253: ...mm 3 46 x 3 54 in Rated output at rated speed 22 2 kW at 2400 rpm 29 8 hp at 2400 rpm 18 2 kW at 2400 rpm 24 4 hp at 2400 rpm Engine power at preset maximum engine speed ECO 17 8 kW at 2400 rpm 23 9 h...

Страница 254: ...ance VDS mm in Rubber 300 12 0 40 5 7 251 10 224 9 Steel 0 41 5 8 Type Width mm in Ground pressure kg cm2 lbs in2 Ground clearance mm in Ground clearance VDS mm in Rubber 300 12 0 41 5 8 251 10 224 9...

Страница 255: ...ectly do not put the vehicle into operation and contact a Wacker Neuson service center NOTICE Explosion hazard in case of incorrect handling of fuses Use only specified fuses Do not repair or bypass f...

Страница 256: ...e left in the engine compartment 1 Opening 1 Stop and park the vehicle Stop the engine see chapter Parking the machine on page 5 12 2 Open the engine cover 3 Loosen screw B and remove the cover Closin...

Страница 257: ...he cabin fuse box is located on the left of the operator seat Opening 1 Stop and park the vehicle Stop the engine see chapter Preparing lubrication on page 7 9 2 Remove the cover C Closing 1 Install t...

Страница 258: ...F008 10 Interior light wiper F009 5 Machine control unit F010 15 12 V connection rotating beacon radio F011 10 Machine control unit VDS HSWS Fuse Ampere Relays Tier IV F001 40 K005 K007 Pre heating s...

Страница 259: ...gen lamp 12V 55W H3 LED lamp 12V 30W Front roof lights Halogen lamp 12V 55W H3 Front rear roof lights LED lamp 12V 30W Interior light Festoon lamp 12V 5W Rotating beacon LED lamp 12V 9W Type ET35 EZ36...

Страница 260: ...40 767 1480 1092 1770 1305 870 642 1250 922 M30 1420 1047 2010 1482 2400 1770 1200 885 1700 1254 Tightening torques fine pitch thread Property class 8 8 10 9 12 9 8 8 10 9 Screw dimen sions Screws acc...

Страница 261: ...de temperatures too to ensure protection against corrosion cavitation and deposits Distilled water Coolant2 2 Do not mix the coolant with other coolants Up to C F by volume by volume 30 22 50 50 ET35...

Страница 262: ...operation Uncertainty of measurement K has been taken into account for the specified values The degree of vibration is influenced by various parameters Some of them are listed below Operator training...

Страница 263: ...el Note For further vibration indications refer to the indications in ISO TR 25398 Mechanical Vibrations Directive on Estimation of whole body vibration during operation of earth moving vehicles This...

Страница 264: ...ge Keep the job site in good condition Remove large rocks or obstacles Fill up ditches and holes Provide a vehicle and enough time to keep the job site in good condition Use an operator seat according...

Страница 265: ...e vibration values and calculations are based on the indications made in ISO TR 25398 Mechanical Vibrations Guidelines for assessment of exposure to whole body vibration during operation of earth movi...

Страница 266: ...weight2 kg lbs Short stick steel track 3364 7415 3553 7834 EZ36 canopy Transport weight1 kg lbs Operating weight2 kg lbs Short stick steel track 3529 7779 3718 8197 1 Transport weight basic vehicle on...

Страница 267: ...514 260 573 Extra weight 153 337 153 337 Steel tracks 300 mm 122 269 122 269 Swiveling dozer blade 100 220 100 220 Cab 68 151 68 151 Hydraulic thumb 59 130 59 130 Air conditioning 52 116 52 116 Front...

Страница 268: ...n be damaged due to unreleased attachments Only use the attachments specified in the table Compare the weight of the attachment and its maximum payload with the indications in the relevant lift capaci...

Страница 269: ...335 HS03 Offset bucket 1400 55 135 4 8 165 364 HS03 ET35 EZ36 system Lehnhoff MSWS Bucket type Width mm in Capacity l ft3 Weight kg lbs Teeth Quick hitch Bucket 300 58 2 0 64 141 Yes MS03 Bucket 400 1...

Страница 270: ...19 2 kN 4316 lbf 21 1 kN 4743 lbf Max tearout force long stick 17 2 kN 3867 lbf 18 7 kN 4204 lbf Max breakout force at bucket tooth 2 24 2 kN 5440 lbf 31 7 kN 7126 lbf Max breakout force at bucket to...

Страница 271: ...hen it tips over The weight of the attachment and load must be subtracted from the weight specified in the corresponding column in the table Pay attention to the density of the load Do not exceed the...

Страница 272: ...ntal boom I Vehicle in travel direction front dozer blade dozer blade down loss of dozer blade contact with ground II Vehicle 90 to travel direction dozer blade up III Vehicle in travel direction fron...

Страница 273: ...hydraulic output and the hydraulic system s stabilizing features Neither 75 of the static tilt load nor 87 of the hydraulic lift capacity is exceeded Calculation basis according to ISO 10567 Setting p...

Страница 274: ...9 22 BA E16 en 1 0 E16_10_900 fm 9 Technical data Lift capacity tables ET35 01 Rubber track short stick 02 Rubber track long stick 03 Rubber track additional weight short stick...

Страница 275: ...BA E16 en 1 0 E16_10_900 fm 9 23 Technical data 9 04 Rubber track additional weight long stick 05 Steel track short stick 06 Steel track long stick...

Страница 276: ...9 24 BA E16 en 1 0 E16_10_900 fm 9 Technical data 07 Steel track additional weight short stick 08 Steel track additional weight long stick 09 Rubber track short stick VDS...

Страница 277: ...BA E16 en 1 0 E16_10_900 fm 9 25 Technical data 9 10 Rubber track long stick VDS 11 Rubber track additional weight short stick VDS 12 Rubber track additional weight long stick VDS...

Страница 278: ...9 26 BA E16 en 1 0 E16_10_900 fm 9 Technical data 13 Steel track short stick VDS 14 Steel track long stick VDS 15 Steel track additional weight short stick VDS...

Страница 279: ...BA E16 en 1 0 E16_10_900 fm 9 27 Technical data 9 16 Steel track additional weight long stick VDS...

Страница 280: ...9 28 BA E16 en 1 0 E16_10_900 fm 9 Technical data Lift capacity tables EZ36 17 Rubber track short stick 18 Rubber track long stick 19 Rubber track additional weight short stick...

Страница 281: ...BA E16 en 1 0 E16_10_900 fm 9 29 Technical data 9 20 Rubber track additional weight long stick 21 Steel track short stick 22 Steel track long stick...

Страница 282: ...9 30 BA E16 en 1 0 E16_10_900 fm 9 Technical data 23 Steel track additional weight short stick 24 Steel track additional weight long stick 25 Rubber track short stick VDS...

Страница 283: ...BA E16 en 1 0 E16_10_900 fm 9 31 Technical data 9 26 Rubber track long stick VDS 27 Rubber track additional weight short stick VDS 28 Rubber track additional weight long stick VDS...

Страница 284: ...9 32 BA E16 en 1 0 E16_10_900 fm 9 Technical data 29 Steel track short stick VDS 30 Steel track long stick VDS 31 Steel track additional weight short stick VDS...

Страница 285: ...BA E16 en 1 0 E16_10_900 fm 9 33 Technical data 9 32 Steel track additional weight long stick VDS...

Страница 286: ...ht specified in the relevant load diagram Use the vehicle for lifting gear applications only if the mandatory lifting gear and safety equipment is installed functional and enabled NOTICE If the weight...

Страница 287: ...system s stabilizing features Neither 75 of the static tilt load nor 87 of the hydraulic lift capacity is exceeded Calculation basis according to ISO 10567 ET35 24 000 kPA 3481 psi EZ36 24 000 kPA 348...

Страница 288: ...9 36 BA E16 en 1 0 E16_10_900 fm 9 Technical data ET35 Cabin or canopy ET35 Cabin or canopy additional weight...

Страница 289: ...BA E16 en 1 0 E16_10_900 fm 9 37 Technical data 9 ET35 Cabin or canopy VDS ET35 Cabin or canopy additional weight VDS...

Страница 290: ...9 38 BA E16 en 1 0 E16_10_900 fm 9 Technical data EZ36 Cabin or canopy EZ36 Cabin or canopy additional weight...

Страница 291: ...BA E16 en 1 0 E16_10_900 fm 9 39 Technical data 9 EZ36 Cabin or canopy VDS EZ36 Cabin or canopy additional weight VDS...

Страница 292: ...9 40 BA E16 en 1 0 E16_10_900 fm 9 Technical data 9 15 Dimensions ET35 symbolic representation...

Страница 293: ...Max reach at ground level short stick 5158 16 11 5143 16 10 H2 Max reach at ground level long stick 5408 17 9 5393 17 8 K1 Max digging radius short stick 5270 17 3 5270 17 3 K2 Max digging radius lon...

Страница 294: ...9 42 BA E16 en 1 0 E16_10_900 fm 9 Technical data EZ36 symbolic representation...

Страница 295: ...reach at ground level short stick 5391 17 8 5378 17 8 H2 Max reach at ground level long stick 5641 18 6 5629 18 6 K1 Max digging radius short stick 5506 18 1 5506 18 1 K2 Max digging radius long stick...

Страница 296: ...9 44 BA E16 en 1 0 E16_10_900 fm 9 Technical data Notes...

Страница 297: ...fting 6 5 D Danger zone 5 62 Danger zone during lifting gear applications 5 63 Diesel engine oil types 7 19 Diesel fuel specification 7 27 Differential lock 5 13 Dimensions 9 40 Display element 4 28 D...

Страница 298: ...e accesses 7 20 Maintenance label 7 2 Maintenance meter 4 34 Maintenance plan 7 3 Mechanical quickhitch 7 7 Travel drive 7 46 Maintenance of attachments 7 50 Malfunctions 8 1 Maximum speed 9 2 Mechani...

Страница 299: ...carriage with VDS option 5 72 Towing 6 1 Transportation 6 1 Transporting the vehicle 6 7 Travel drive 9 2 Type labels 3 5 U Unlocking and locking the door 4 3 Uphill vehicle operation 5 11 V V belt 7...

Страница 300: ...S 4 BA E16 en 1 0 E16_10_3SIX fm...

Страница 301: ...at have already been delivered and that will not be implemented on these vehicles Technical data dimensions and weights are only given as an indication Responsibility for errors or omissions not accep...

Страница 302: ...Wacker Neuson Linz GmbH Flughafenstr 7 A 4063 H rsching Phone 43 0 7221 63000 Fax 43 0 7221 63000 2200 E mail office linz wackerneuson com www wackerneuson com Order no 1000392821 Language en...

Отзывы: