21
6 Installation
6.1
Hardware Installation
You have read and understood the warnings listed under "Precautions" on Chapter 2;
To achieve reliable distance measurements, please follow below tips:
Better not using the camera in strong sunlight. If have to, keep the ambient light
below 50k Lux.
Do NOT place any objects in the scene that are not part of your intended
target, especially mirrors or other shiny surfaces/objects.
Maintain a stable housing temperature during operation.
Take measures to provide cooling to camera
Mount the camera robustly.
All accessories are ready
6.1.1 USB2.0 Mode Installation (DCAM550-U Only)
In this mode, the camera transmits the required data to host by USB2.0 interface.
For the application of near distance, the USB2.0 host can supply power to camera, for
the application of long distance which needs more power consumption, the multiple
functional cable (VZENSE-MFP-6P-B) shall be in use.
The steps are as below:
1. Mount the camera in an appropriate fixture, e.g. a camera bracket;
2. Plug the male end of the USB2.0 type A cable (VZENSE-USB-TYPEA-CABLE) into
the type A female jack at the back of the camera, and plug the other type A male end
into the USB port of your host processor;
3. Connect the adaptor to power source for long range usage;
4. Insert the cable (VZENSE-MFP-6P-B) if you need;
A Vzense DCAM550U device will be shown in the USB device list.
6.1.2 USB2.0 External Power Installation (DCAM550-U Only)
If you need stronger power in your application, besides the additional power supplied
to the MFP port via VZENSE-MFP-6P-B cable mentioned above, we also provide
another option, which using an external powered USB HUB. You shall connect the
system as below figure:
Содержание DCAM550
Страница 1: ...1 Vzense DCAM550 ToF Camera User Manual DCAM550U DCAM550P ...
Страница 33: ...33 ...
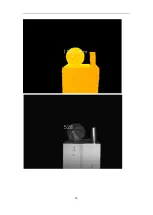
Страница 40: ...40 Depth image in range 0 Depth image in range 2 ...
Страница 41: ...41 Merged depth image in WDR mode ...

