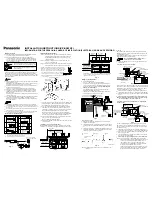
Instructions for Watering Tap Timer VYR-6050
PROGRAMMING:
2.
Turn the knobs to set up the FREQUENCY TIME in hours and the RUN TIME in minutes. NOTE: The first time
you program the timer, it will not begin watering until after the time delay. The time delay is the number of hours
to which you set the FREQUENCY knob.
Sample programs:
A. You want to water every morning at
6:00 AM
and every evening at
6:00 PM
for 10 minutes each watering:
You must program your timer at either 6:00 am or 6:00 pm (the hour that your want to begin watering). At
6:00
AM OR 6:00 PM
set the FREQUENCY knob to 12 (hours) and the RUN TIME knob to 10 (minutes).
AFTER
12 HOURS
, the timer will begin its first program and run for 10 minutes. 12 hours is the time delay before the
timer begins its first program. The timer will now water everyday at 6:00 AM and 6:00 PM for 10 minutes until
you change it.
B. You want to water every morning at
7:00 AM
for 30 minutes:
At
7:00 AM
, set the FREQUENCY knob to 24 (hours) and the RUN TIME knob to 30 (minutes). The timer will
not begin its program until
THE NEXT DAY AT 7:00 AM
when it will water for 30 minutes. The timer will
now water everyday at 7:00 AM for 30 minutes until you change it.
2.
Make a record of the date you programmed the timer, the FREQUENCY and the RUN TIME settings for your
reference. You can use the “ON/OFF” functions at any time without interrupting the FREQUENCY setting. Just
turn the RUN TIME knob to the “ON” position. When finished turn to “OFF” for five seconds then return the
RUN TIME knob to your desired setting.
3.
REPLACE THE WATERPROOF COVER AFTER PROGRAMMING, ENSURING THAT IT IS TIGHTLY
SCREWED ONTO THE TIMER.
NOTES:
1.
The timer starts keeping time when you set it.
You MUST set the timer at the hour you want it to run. For example, as in Sample Program
B above, if you want the timer to come on at 7:00 AM you must physically set it at 7:00
AM.
2.
You may change frequencies and run time at any time by just turning the Frequency knob
or the Run Time knob to a new setting.
3.
To STOP the timer and cancel the frequency setting, turn the Frequency knob to RESET.
All watering will stop. To reactivate, you must reprogram the timer.
TIMER INSTALLATION:
1.
Unscrew and remove waterproof cover. Slowly slide out the battery box from its compartment in the face of the
timer. Install two new 1.5V alkaline batteries (size AAA). Replace battery box.
2.
Test the unit by turning the RUN TIME knob from the “OFF” position. You should hear the sound of the motor
within 30 seconds. You will be setting the program momentarily.
3.
If you do not hear the motor, check to be sure the batteries are installed correctly.
4.
Hold the unit steady. Loosen the LARGE LOCKING COLLAR RING located in the top of the timer until the
inner BLACK FAUCET COLLAR is loose. Screw the BLACK FAUCET COLLAR onto the faucet/tap until it is
hand tight, and then hand tighten the LARGE LOCKING COLLAR RING. Turn on the faucet/tap to open the
flow of water. (DO NOT USE WRENCHES OR PLIERS TO TIGHTEN THE COLLARS.)
TROUBLE-SHOOTING GUIDE:
If the water does not come on, please check the following:
1.Be sure the faucet/tap is turned on.
2.Check to be sure the batteries are in good condition and are installed correctly.
3.Check to be certain that the frequency and run times are the same as your record.
4.Be sure that the frequency setting is longer than the run time. For example, you cannot set the frequency at the 1
hour setting and have the run time set for anything over 60 minutes.
CAUTION:
PROTECT THE TIMER AND ITS PARTS FROM FREEZING
Prior to the first frost or freeze, remove the timer from the faucet and store it
indoors until spring. Remember to remove the batteries from the battery compartment.


