Vynco Industries (NZ) Ltd
www.vynco.co.nz
Christchurch
Northern Region / Auckland
PO Box 9022, Tower Junction
Christchurch 8149
388 – 396 Tuam Street, Christchurch, 8011
P
+64 3 379 9283
F
+64 3 379 6838
E
PO Box 12 249
9 Levene Place, Mt Wellington,
Auckland, 1060
P
+64 9 525 6051
F
+64 9 525 5799
E
Installation Process:
1. Ensure desired location is suitable and clear of all obstruction.
2. Ensure the relevant circuits are isolated and safe.
3. Cut-out a 60mm diameter hole in the ceiling.
4. Unclip the Wiring & Terminal cover from the rear of the sensor.
5. Connect the supply and load cables to the terminal block as shown in the wiring
diagram below.
6. Replace the Wiring & Terminal cover.
7. Fold back Installation Springs and insert the Sensor into the cut out hole in the ceiling.
8. Twist the Fascia cover off the Sensor to access the controls.
9. Set and Test the controls as described in the next section.
10. Replace Fascia.
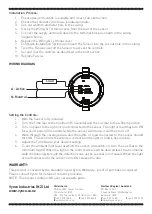
WIRING DIAGRAM:
6m Diameter
360°
2.4m Installation Height
Good Sensitivity
Poor Sensitivity
A - Active
Load
N - Neutral
Setting the Controls:
1. With the Sensor fully installed.
2. Turn the Time dial to the minimum (5 Seconds) and the Lux dial to the 4.00pm position.
3. Turn on power to the lights or load connected to the sensor. The light or load may turn ON
for a short period (30 seconds) while the sensor warms up, it will then turn off.
4. Walk through the coverage area and the lights or load connected to the sensor should
turn ON. This confirms the wiring is correct and the light or load is operational.
5. Adjust the Time Dial to your desired setting.
6. To set the ambient light level at which the sensor will switch on, turn the Lux Dial to the
minimum (night). When the light in the room or area is at the desired level, have someone
walk continuously through the detection zone as the Lux dial is increased. When the light
or load connected to the sensor turns ON release the dial.
WARRANTY:
This product is covered by the standard 3 year Vynco Warranty - proof of purchase is required.
Please contact Vynco for details of returns procedure.
NOTE: This product contains NO user serviceable parts.
N


